.svg)


全新設計,優秀如初!HelloSign 現已更名為 Dropbox Sign。
The insurance application process doesn’t require you to leave home nowadays, thanks to the internet. We have forms easily accessible and downloadable online. Except for one thing: how do you get a legal signature on an online application? Does one still need to print out the application, sign it, and mail it in? Not anymore. With Dropbox Sign eSignatures, legal signatures can be signed right on the same webpage as the application.
In this article, we’ll imagine you as an insurance agent who wants to get on the eSignature train. Tired of file cabinets full of paper documents, you’ll use the Dropbox Sign API to embed eSignature-capable insurance applications into your website, and streamline the process for your clients.
Create The Signature Request
First, let's focus on what needs to happen on the back end. You'll need to have a Dropbox Sign account and an API key for that account. The API key can be grabbed from the settings page.
Using your Dropbox Sign account, create a new API app. There are two required pieces of information:
- A unique name
- A domain for which embedded flows will be permitted
Protip: For local testing, you can use localhost as the domain.

That’s all you need to create your app, but you can configure the app further, such as providing an endpoint for event callbacks. Callbacks occur in response to events in the eSignature flow and can be used to trigger a specific action or service.
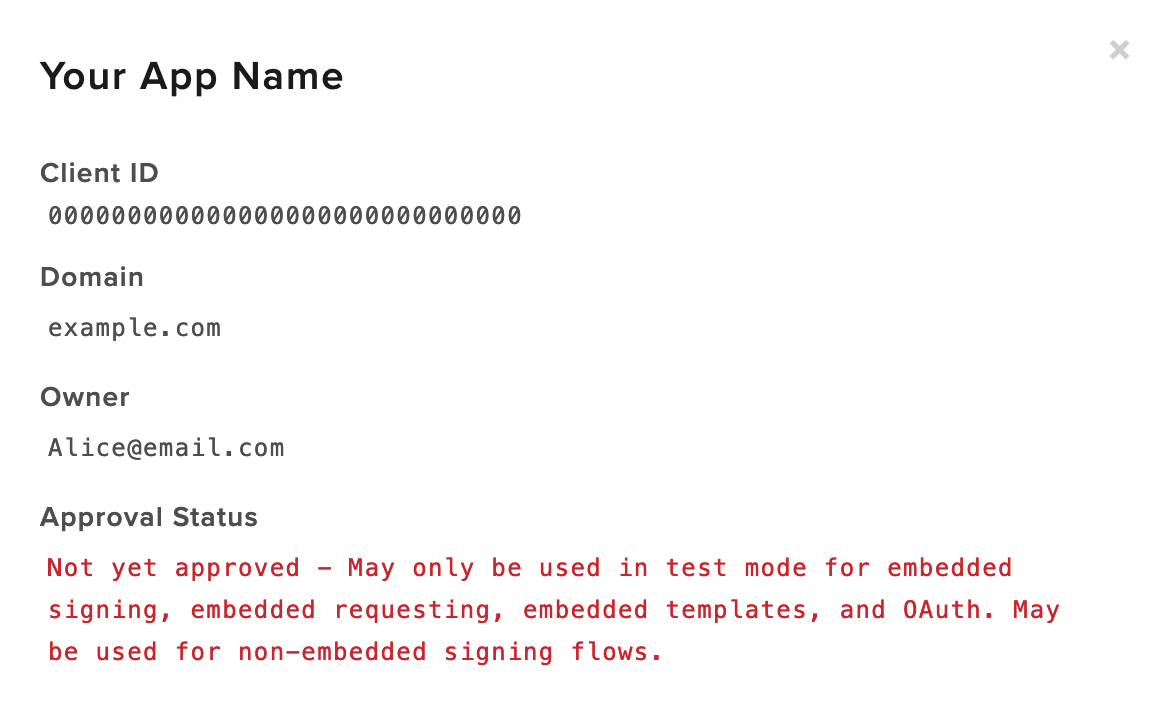
Once your app is created, you'll see app details like in the image below. You'll need the Client ID for later, so grab that.
For the rest of this article we'll be using a Python environment, but feel free to use any of the other languages Dropbox Sign supports. They’ll follow a similar structure and accept the same parameters. With Python, you can install the Dropbox Sign Python SDK with pip.
With that set up, you might as well make a quick call to make sure everything is correctly set up and you can interact with the API. You can do so with the Get Account endpoint, as shown in the example below.
Once you can access your account, you can move on to creating an embedded signature request. It’s worth noting that Dropbox Sign offers both embedded and non-embedded signing experiences. An Embedded signature request allows your users to sign documents on your web app. This is accomplished by following three main steps:
- Calling the Send Embedded Signature Request endpoint
- Passing the `signature_id` to Get Embedded Sign URL
- Passing the temporary `sign_url` to the client side Dropbox Sign library on the front end of your app
We’ll start by creating the embedded signature request. Let's touch on some of the crucial parameters first:
- `test_mode`: Test mode allows you to test out Dropbox Sign without getting app approval or setting up payment (we’ll touch on app approval later)
- `client_id`: client id of the app being used to create the embedded signature request
- `subject`: the subject line that’ll be sent to signers’ emails
- `message`: the custom email message
- `signers`: the email address and names of the applicants
- `files`: The local file(s) you’ll be using
If you've used Dropbox Sign in a non-embedded flow before, many of these parameters may be familiar to you. There is one crucial additional parameter that is used here, though: client_id. Remember that client ID you saw when you created your embedded app? Here's where you put that value.
If the call is successful, a Signature Request object will be returned. That Signature Request object will return an array of Signature objects, one for each signer. Within those Signature objects is where you can find each signer’s own `signature_id`.
You’ll pass that `signature_id` to the Get Embedded Sign URL endpoint to create an Embedded object, which contains a `sign_url`. You’ll need to generate a unique `sign_url` for each signer on the Signature Request so they can complete their embedded signing separately.
The `sign_url` is a temporary URL used to display the signature page in an iFrame that gets embedded on the front end of your application. You’ll be passing this value to the front end, so let’s look at the front end of your app now.
Display the Embedded Signature Request on your Website
Now that your back end is successfully creating an Embedded object, we can look at using the `sign_url` to display the document in an iFrame on your site. You’ll need to route the `sign_url` from the back end to the front end of your application. In this example, we’re using a snippet that can be executed in HTML by placing it in a `<script>` tag.
Of course, if you’re using Python for your back end you may also want to use it for your front end. Django or Flask are popular front end frameworks for Python. Django users will be happy to note our previous article on the topic: Building a Premium Branded eSignature Flow Using Django.
Anyway, for our example, you'll first need to install `hellosign-embedded` from npm.
With that installed and imported, you can call the `open()` function with the `sign_url` from your back end and your API client ID you grabbed when creating your Dropbox Sign app.
The snippet above is a basic example, but you can tweak the behavior to better fit your requirements. You can configure the behavior of your Embedded Signing by passing optional parameters into the open() method. You can read about the parameters in the Client Side section of the Embedded Signing Walkthrough.
Note that this customization is only for the behavior, not the aesthetics of the signing experience. For visual customization, you’ll want to look at taking advantage of Dropbox Sign’s premium branding experience. With premium branding, you can make the eSignature process seamlessly integrate with your brand and app.
Premium branding is actually done not at the request level, but at the app level. When your app is making use of Embedded Templates, you can set up the premium branding experience by using the Update API App endpoint.
With this implementation, you can embed a Signature Request on your website and let your users sign directly on that surface. What are the people who are signing the applications going to see when they visit your site? Let's walk through the process from the outside looking in.
Embedded Signing Provides a Streamlined E-Signature Process
The embedded Dropbox Sign content will appear wherever the iFrame is set to be displayed. Regardless of where it’s displayed on the page, insurance applicants will see the document like so:
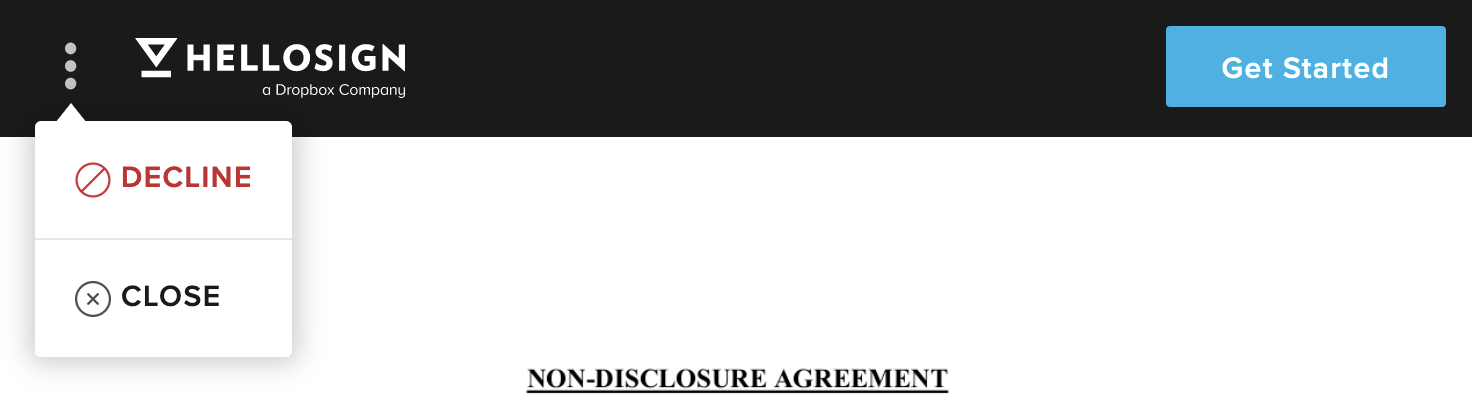
The behavior of the embedded document can be further customized using optional parameters with the open() method. For example, if you prefer signers don’t have the ability to close out of the document without exiting the page entirely, you can set the allowCancel parameter in your JavaScript.
Protip: If you want to see what this experience looks like without writing any JavaScript, check out our Embedded Testing Tool.
Applicants will be able to scroll through the document displayed on your webpage. At the bottom, they’ll see file metadata and where their signature is required, which will be next to their own information. If they don’t realize they need to keep scrolling after the document is over, the “Get Started” button on the top right will send them directly to the relevant section.
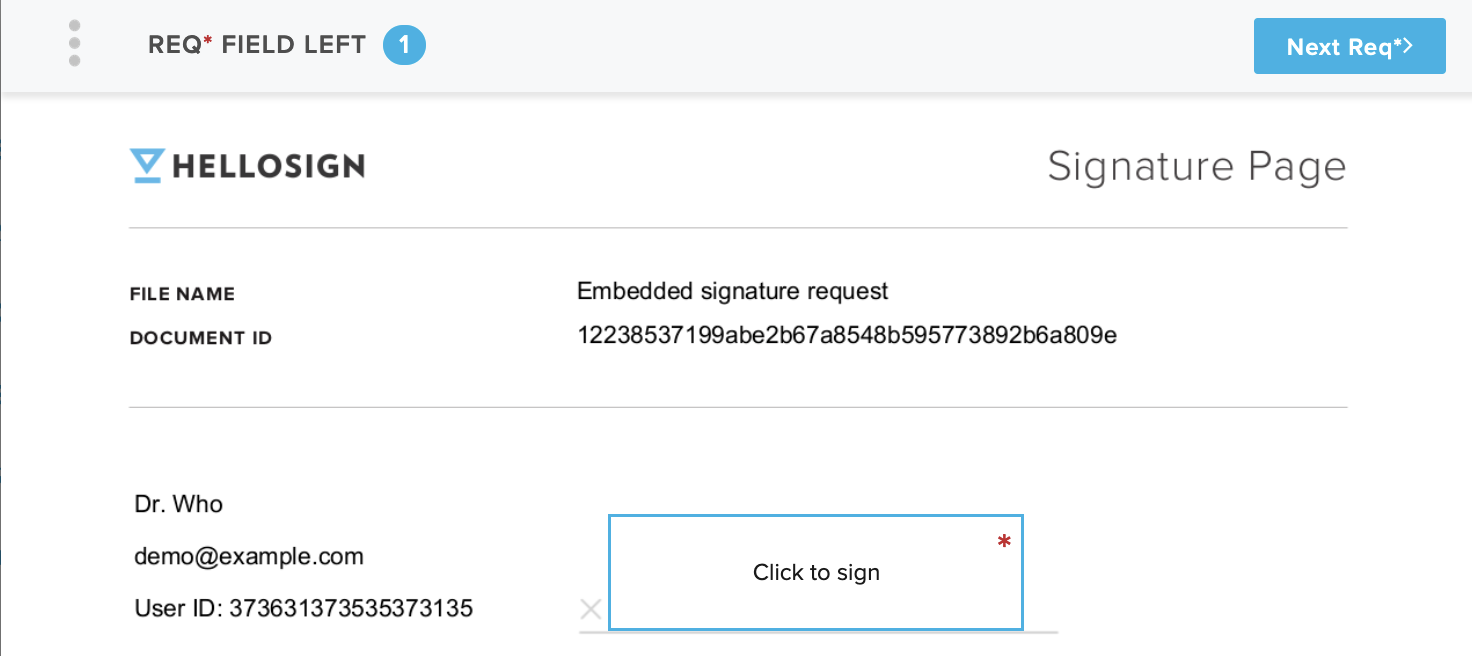
By clicking on the area marked “Click to Sign”, signers will be directed to a view where they can input their signature by mouse/touch input, by typing it in, or by uploading a picture. Whatever signature they use will then appear in place of that blank box.
This process continues for each additional document. Once done with signing documents, signers will be shown a view where they’ll explicitly agree to be legally bound by the document and Dropbox Sign terms of service. If they agree to that, they’ll be shown the following success dialog, and you can redirect them to another URL, if that’s what you specified in your code.

We’ve now seen what the flow will look like for your applicants. But, there is one more step you’ll need to take before being able to present it to visitors on your website: app approval. So far, your setup has been utilizing the test mode feature. In order to go live with Dropbox Sign Embedded Workflows, we need to make sure your app follows eSignature guidelines properly.
The main thing we’re concerned about here is how users identify themselves on your website. Essentially, we want to see that user profiles have confirmed ownership of their emails. If email-associated user profiles aren’t set up, unique links to emails that show ownership will also work. The full information on these requirements can be found in Dropbox Sign’s Embedded Signing walkthrough. When you’re ready, email us to schedule a meeting where we can talk through any questions you have and approve your app.
Regardless of whether you’re seeking app approval, please feel free to reach out to our support desk with any questions. Implementing an embedded workflow involves many moving parts, and we understand that each person’s use case is unique. Use this article as a jumping-off point for your own tailored Dropbox Sign experience! We’re here to help you along the way. Be sure to check out our full documentation as you begin fleshing out your own workflow. Thanks to the Dropbox Sign API, embedding eSignature directly into insurance applications through the web has never been easier.
時時參與其中
謝謝您!
感謝訂閱!


