.svg)


รูปลักษณ์โฉมใหม่แต่ยังเป็นผลิตภัณฑ์ที่ยอดเยี่ยมเช่นเดิม! HelloSign เปลี่ยนเป็น Dropbox Sign แล้วตอนนี้
If you’ve been hired as a contractor or freelancer, you’re likely going to need to complete a W-9 form. In the past, doing so meant using a printable W-9 form and printing, faxing, or signing the document in person. But now you can save time and effort by filling out your W-9 form online with Dropbox Sign.
Read on to learn how to fill out a W-9 form for free by using Dropbox Sign. You can sign-up for a free account here if you’re already ready to sign.
But before we get into the how-to details, let’s go over the basics of what a W-9 form is.
What is a W-9 tax form?
A W-9 form is a US tax form used by businesses to request the tax information of a freelancer, contractor, or vendor.
If you’ve been tasked with filling out a W-9 form, it’s so that the business that’s hired you can tell the IRS how much you’ve been paid, specifically if you’ve earned $600 or more in a calendar year. So, if you’re working on a project with a client that will only pay you $550, you don’t need a W-9. But it’s a good practice to use one with every client you work with and most businesses will ask you to fill one out for long-term working relationships.
You can find a W-9 form on the IRS’s site.
Here’s what it looks like:

When to use a W-9 form
Before you’re ready to learn how to fill out a W-9 form, you need to determine whether or not you need a W-9 form in the first place. You need to fill out a W-9 form if you meet any of the following criteria.:
- If your client hires you as an independent contractor or vendor for work or services, and plans to pay you more than $600 in a tax year.
- If your client needs to report payments made to you on Form 1099-MISC for tax purposes.
- If your client needs to obtain your taxpayer identification number (TIN), which can be a Social Security Number(SSN) or an Employer Identification Number (EIN) because you’re an independent contractor or vendor.
When should I not fill out a W-9 form?
On the other hand, here are a few situations for when filling out a W-9 form isn’t necessary.
- If you’re hired as a full-time or part-time employee, since W-9 forms are only used for independent contractors or vendors.
- If your client doesn’t plan to pay you more than $600 in a tax year as a contractor or vendor.
- If your client already has your TIN on file from a previous year's W-9 form submission.
How to fill out a W-9 Form
Step 1. Download a copy of a blank W-9 form
Your employer is usually responsible for sending you a blank copy of the W-9 form, but if you need to access one on your own, simply visit the IRS website and download a free PDF copy.
Step 2. Upload the document to Dropbox Sign
Upload the blank document to your Dropbox Sign account so you can fill it out online. If you don’t yet have a Dropbox Sign account, sign up.
Click on Upload and pick Computer if the form is saved on your computer. You can also choose other options, such as Dropbox or Google Drive, if you want to upload your form from another platform.

On the next page, click I’m the only signer, since this form won’t require a signature or information from anyone else.

Step 3. Format the W-9 form and fill in your information
You might get a message asking you if you’d like to keep the pre-existing fields on the form. Click Include.

After uploading the document, format your W-9 form by using the special formatting boxes located to the left of your document view. These boxes include formatting options like text fields, signature fields, and checkboxes.
Format the document by dragging and dropping the relevant field into the appropriate area on the document. As you format, fill in the correct information. For instance, you’ll fill your name into the text field on the “Name” line, the address into the box on the “Address” line, and drag and drop a checkbox over the relevant tax classification.
Here’s what the W-9 form looks like as it's being formatted:

Step 4. Sign the W-9 form with a legally binding eSignature
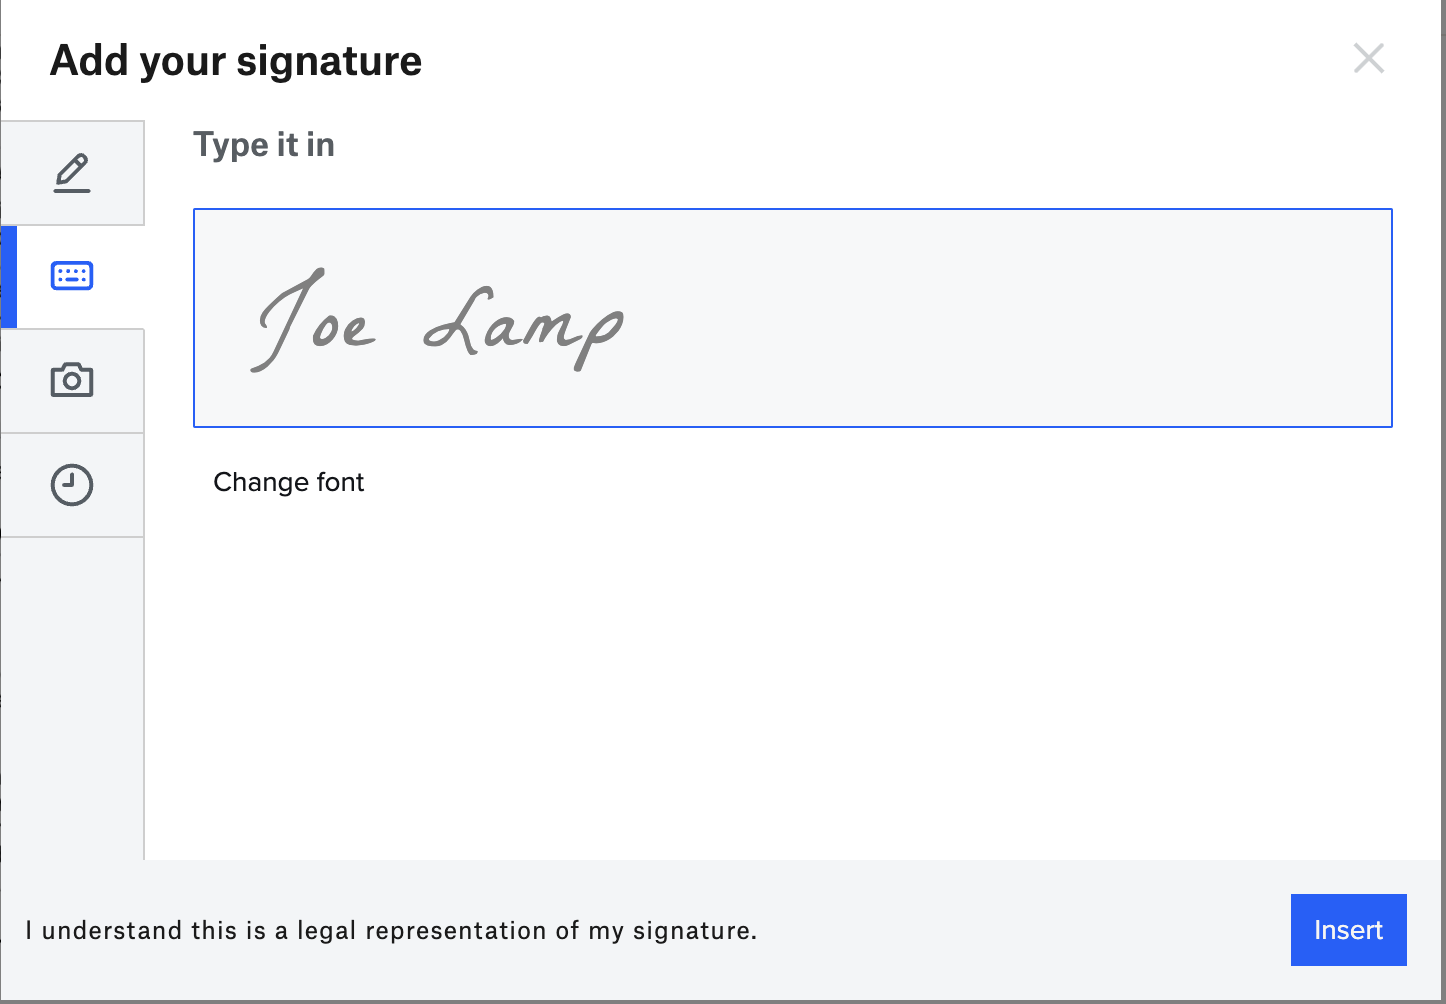
To finish the form, you'll need to insert your signature on the “Signature” line. You can create your electronic signature in a variety of ways.
These include:
- Drawing your signature on a touch screen using your finger or a stylus.
- Typing in your signature and customizing from a selection of fonts (below).
- Uploading a photo of your signature.
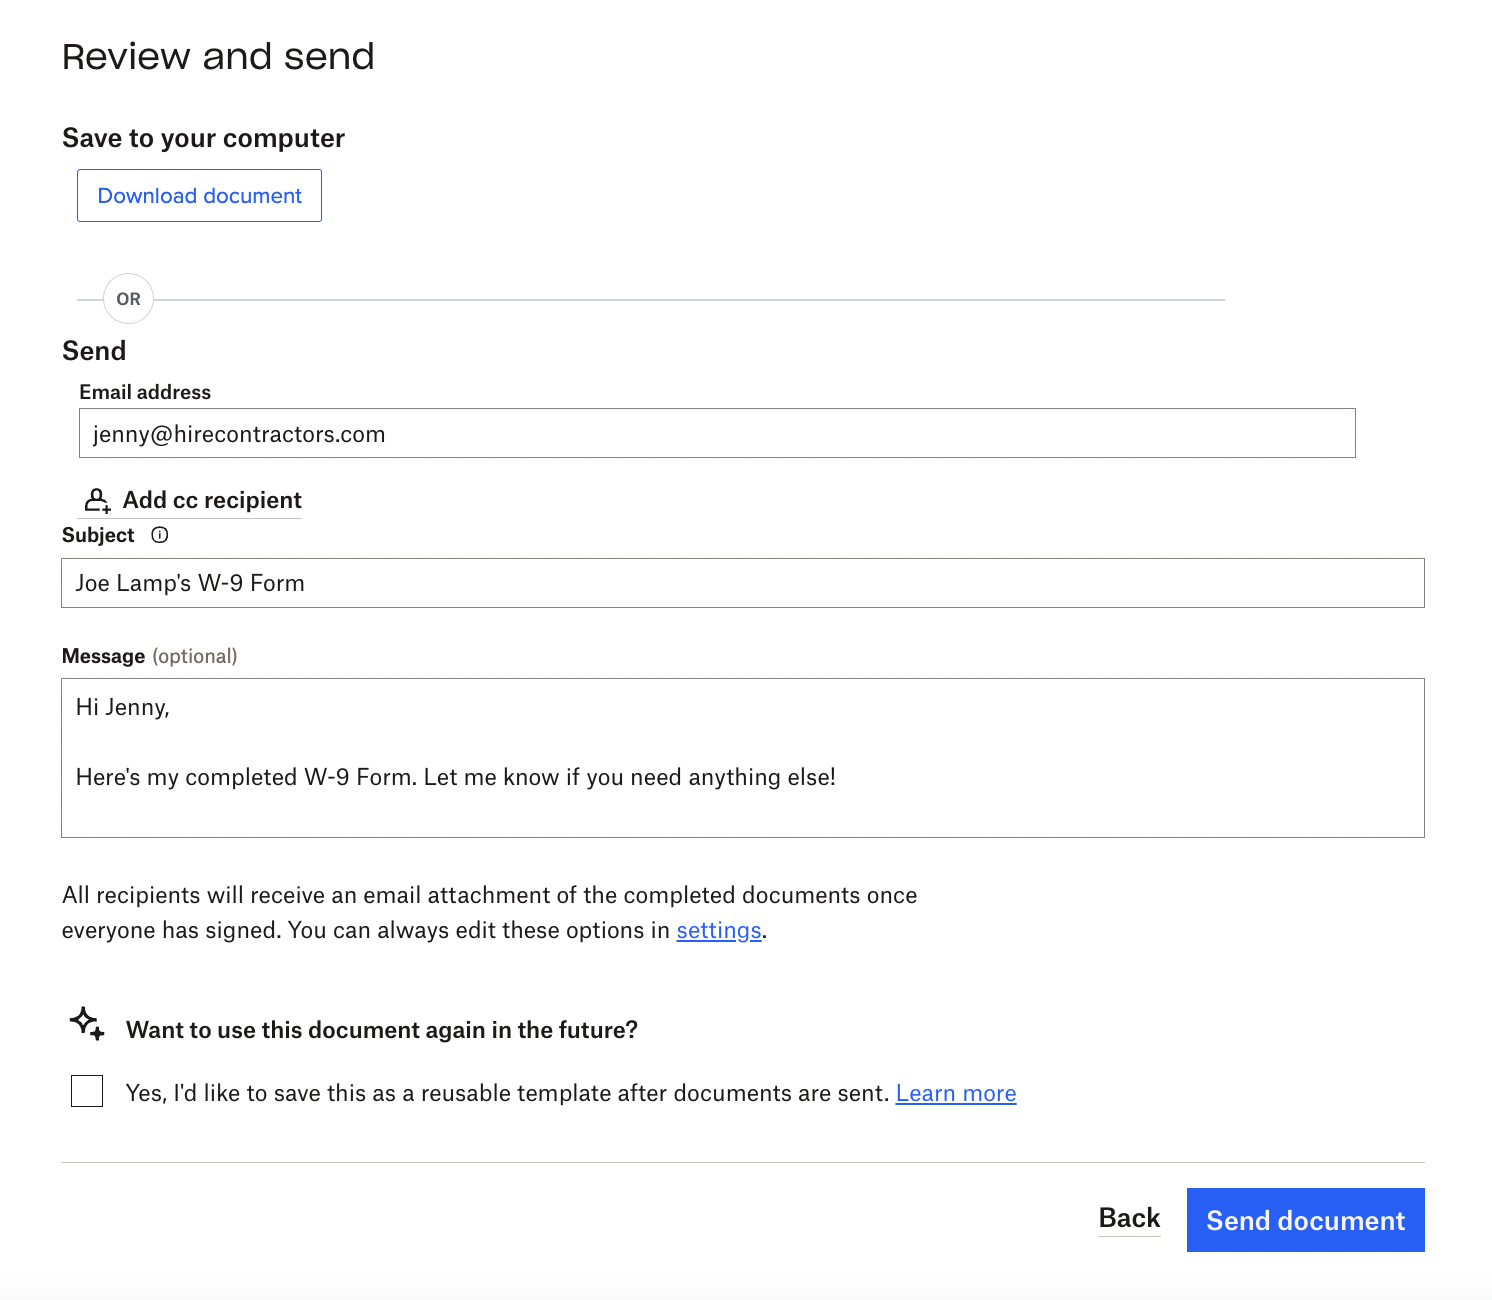
Step 5. Submit the completed W-9 form
After you’ve completed the form, you have the option to save a copy to your computer as a PDF if you need to attach it to an email.
You can also send the completed form directly to your employer or client from your Dropbox Sign account. Just enter their email address and include an optional message. Once it’s sent, you’ll receive notifications when they open or view the document.
Lastly, you’ll have the option to save the form as a template so that you can edit and reuse it whenever you need to.
Use Dropbox Sign to complete your W-9 form now
Now that you know how to fill out a W-9 form, sign up for a Dropbox Sign account to format and sign your first W-9 form online. The Dropbox Sign free plan offers unlimited self-signing and three send-for-signature requests per month, so you can sign all your documents without limits.
Sign up to fill out your W-9 Form for free!
ได้รับข้อมูลเสมอ
ขอบคุณ!
ขอบคุณสำหรับการสมัคร!


