As a business owner, managing expenses and keeping track of transactions is critical to running a successful operation. Whether it's ordering inventory, purchasing equipment, or paying for services, creating a purchase order can help streamline the buying process and ensure that you have a clear record of every purchase made.
But what exactly is a purchase order, and how can you create one? Below we'll dive into the details of how purchase orders work and provide you with step-by-step guidance on how to make a purchase order like a pro.
What is a purchase order?
A purchase order is a legal document that outlines the details of a deal between two parties: you (the buyer) and the supplier or vendor (the seller). It lists out the exact products or services being purchased, plus any other terms and conditions that need to be agreed upon.
Creating purchase orders ensures what you’re buying is exactly what you need and that it meets all your expectations—so you can get the most value out of purchases and save time in the process. Plus, it helps protect both you and the seller should any issues arise.

How do purchase orders work?
A purchase order is sent from the buyer (your organization) to the seller (the supplier). The supplier then produces an invoice based on that purchase order and sends it back to you for payment. It's important to note that any changes to a purchase order must be agreed upon by both parties—and all parties should keep copies of the purchase orders in case there are any discrepancies or disputes later on.
When should you use a purchase order?
You should draft a purchase order whenever you need to:
- Track and control inventory levels
- Ensure timely payment of goods or services
- Create a legal document that binds both the seller and buyer to certain conditions
Purchase orders will also provide accurate and up-to-date records of past purchases, including all associated costs like shipping, taxes, and discounts, which helps with budgeting, planning, and managing future orders.
How to create a purchase order
Here the four main purchase order process steps you need to know before you get started:
Step 1: Gather information
Budget
Before putting the order together, take a look at your budget or check in with your internal teams to make sure the purchase will be approved.
Vendor information
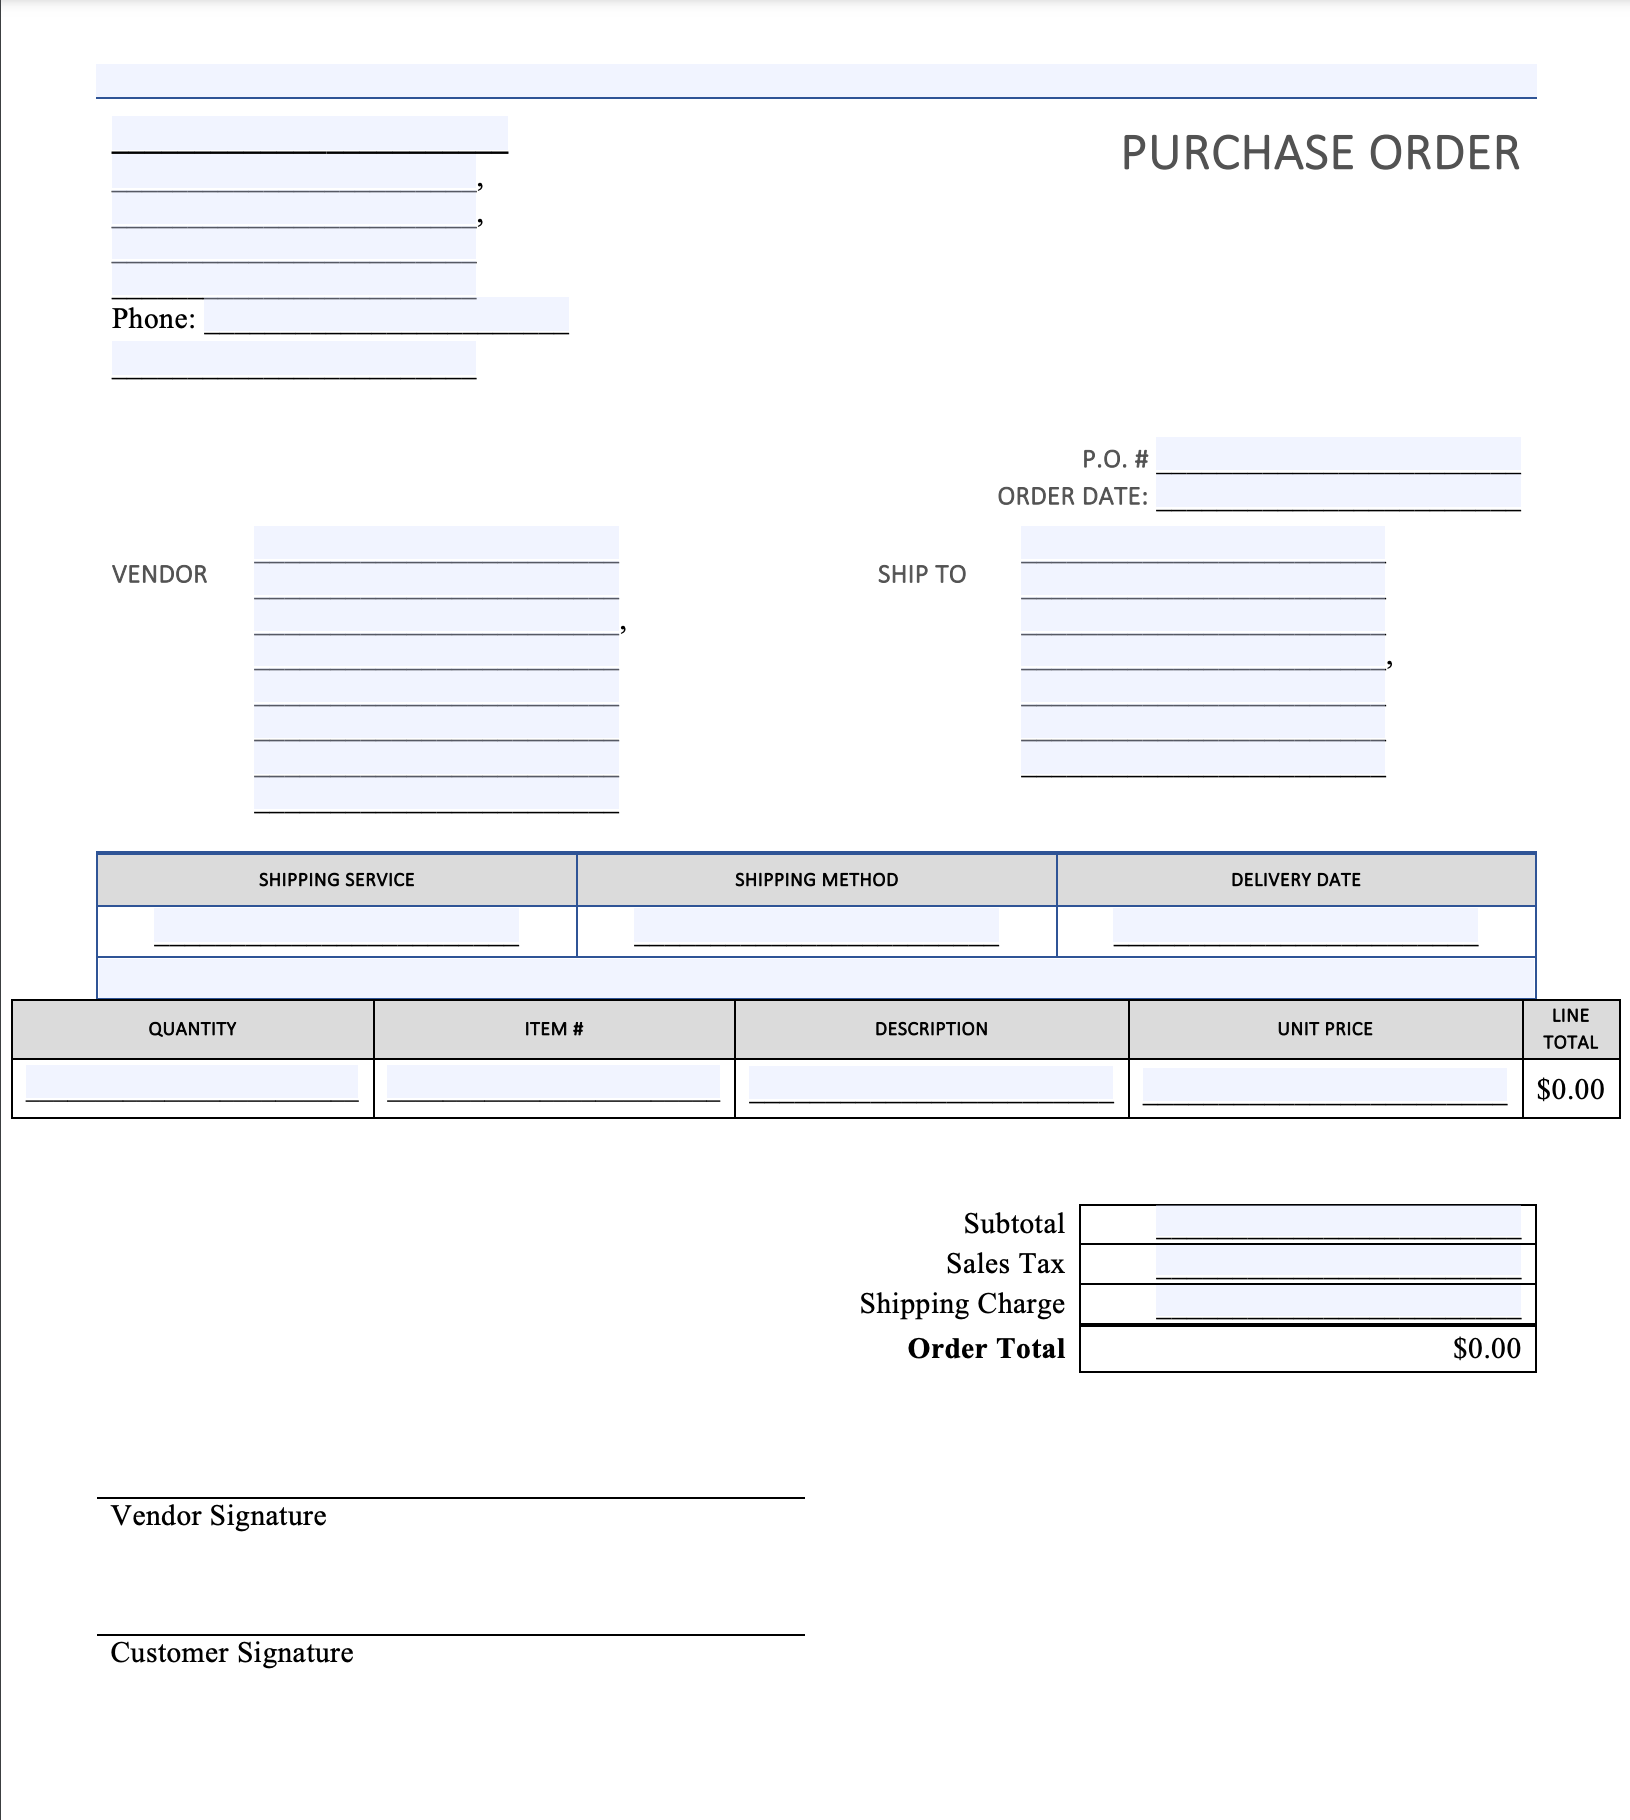
The purchase order needs to include contact details for the vendor, including their name, company address, and email address. This keeps track of who is supplying you with goods and services, so that if there are any issues or questions later on down the line you know where to go.
Buyer information
Just like supplier information, you need to add your own contact and location details as well so that vendors know exactly who to get in touch with and how. This information also helps them with delivering your goods or receiving payment when it's due.
Item number and description
In these sections, you'll want to be clear about what will be purchased from the supplier so that nothing is missing from your order. The description doesn’t need to be long since you’ll have limited space, but it should include details like the product name, material type, color variations, measurements, and other necessary characteristics.
Price per unit and total
Detail the cost for a single item as well as the cost if you’re buying multiple items. As mentioned before, you can always check with the vendor for pricing beforehand but there may also be discounts available for bulk purchases that you may want to take advantage of, so be sure to include those if they apply.
Step 2: Create a purchase order
Draft your purchase order by filling out all the necessary information that you gathered from the step above.
Make it easy and use this simple purchase order template by Formswift to speed up the process.
When you’re done, take another look at the purchase order to make sure all the sections look correct—you should especially review the item number, description, quantity, unit price, total amount, and address for accuracy.
Step 3: Send the purchase order
When sending the purchase order, it's good practice to provide a timeline for the vendor’s approval so they can ask any necessary questions. The purchase order also doesn’t become legally binding until the vendor accepts and confirms the order.
While the vendor can accept over email, a more efficient and organized method is to have your vendor sign the purchase order. Doing so allows you both to be in clear agreement that the order has been confirmed and will be delivered according to the outlined terms.
But instead of sending the purchase order as an attachment over email, you can use Dropbox Sign to send it electronically from one platform. After sending the purchase order, your vendor will be able to quickly and painlessly review the terms of the order and sign with a few clicks.
Step 4: Pay for the order
Once your vendor has confirmed the order, they should send you an invoice for the amount detailed on the purchase order. The invoice will also provide a short summary of what was purchased, the quantity, the amount due, and when payment is due.
From there, it’s up to you, the buyer, to pay the invoice according to the terms set by the vendor. For example, if the vendor has set net 30 payment terms, you’ll need to pay the invoice within 30 days of it being sent.
Sign all your documents with ease using Dropbox Sign
Dropbox Sign streamlines the way purchase orders and plenty of other documents are signed by digitizing the process and enhancing user experience. With its intuitive interface and seamless integration, Dropbox Sign can enable your teams to save time, reduce errors, and focus on growing your business.
Hold dig opdateret
Thank you!
Thank you for subscribing!


