Integrating electronic signature solutions into customer relationship management (CRM) systems is a game changer for many businesses. Electronic signatures enable businesses to automate the sending, signing, and managing contracts directly from your CRM.
Dropbox Sign, formerly known as HelloSign, is an electronic signature service that allows users to sign, send, and manage documents online. Integrating Dropbox Sign and Salesforce enhances the document signing process, which in turn streamlines the sales cycle workflow. This integration offers an embedded API that lets you seamlessly embed Dropbox Sign's e-signature into your existing platforms. This approach allows you to create, fill, send, and track documents, without changing your existing workflows, providing a seamless experience for both your teams and customers.
This tutorial will guide you through the process of integrating Dropbox Sign into Salesforce, streamlining your document signing workflow.
Why integrate Dropbox Sign with Salesforce
Integrating Dropbox Sign with Salesforce streamlines the signing process and enhances the customer experience. Documents can be signed directly within Salesforce, eliminating the need to switch platforms and reducing delays. Automated tracking and reminders speed up follow-ups, while the user-friendly mobile interface makes signing quick and easy. Plus, secure, legally binding e-signatures give peace of mind to both your business and your customers.
Both embedded and non-embedded Dropbox Sign APIs can streamline your sales process. The embedded API lets you sign and manage documents within Salesforce, speeding up quotes and contract negotiations without disrupting your workflow. In contrast, the non-embedded API offers flexibility for your external applications, allowing you to incorporate e-signature capabilities wherever needed. These APIs help your business close deals faster and operate more efficiently, ultimately boosting profits.
Dropbox Sign also ensures secure handling and adherence to compliance standards, protecting sensitive information and ensuring legal validity. The platform is compliant with electronic signature laws and regulations, including the Electronic Signatures in Global and National Commerce Act and the regulation on electronic identification and trust services (eIDAS). Dropbox Sign is also third-party certified with ISO 27001, SOC 2 type 2, and it undergoes regular security audits to provide the highest level of protection and compliance.
How to integrate Dropbox Sign and Salesforce
Before you begin this tutorial, make sure that you have the following accounts and that they all use the same email address:
- Sign up for a free Salesforce account and make sure you have admin permissions.
- Set up a Dropbox account and make sure that you use the free account version (that's different from subscribing to a free trial account).
- Set up a Salesforce Trailblazer account. This account helps install Salesforce applications from the AppExchange marketplace.
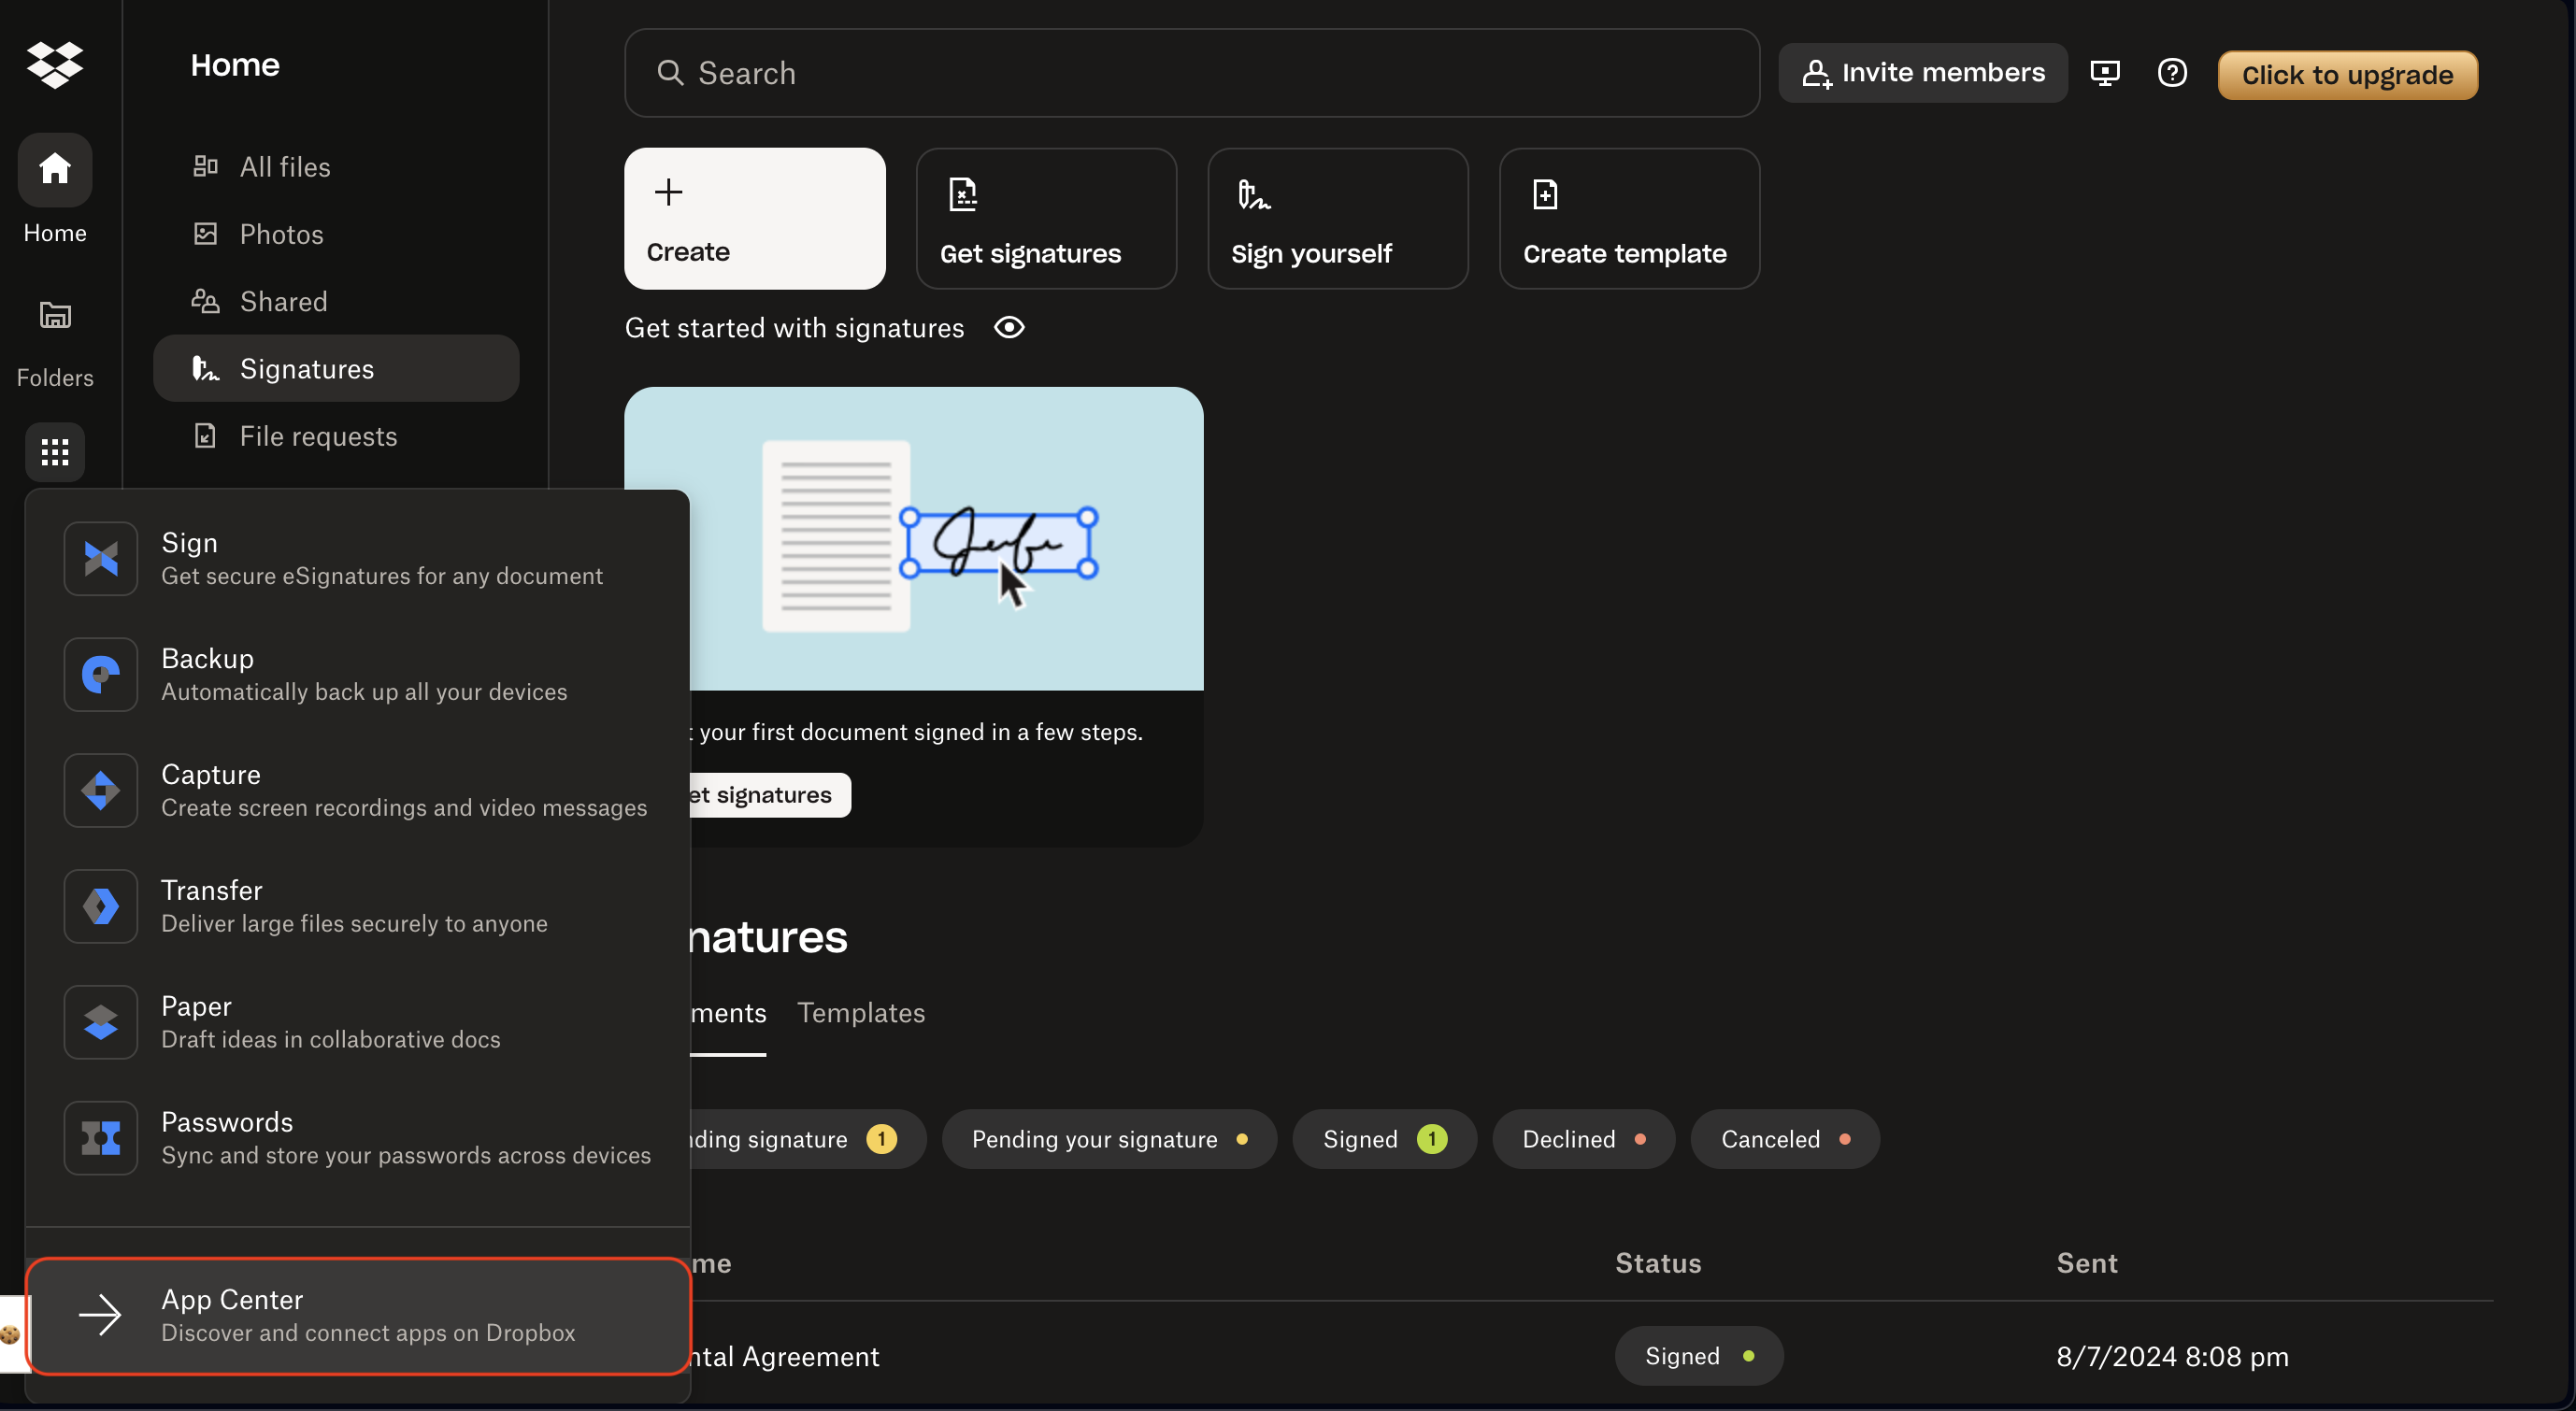
After you've signed up for all these accounts, you need to integrate Dropbox Sign with your Dropbox account. To do so, log in to your Dropbox account, click the More icon from the left navigation bar, scroll down, and select App Center:
When the Dropbox App Center opens, search for Dropbox Sign and select it:

Click Connect and, if prompted, click Allow to give access to your Dropbox account:

Connect your Salesforce account with Trailblazer
After you've connected your Dropbox account with Dropbox Sign, you need to connect your Salesforce account with Trailblazer. To do so, log in to your Trailblazer account and go to your account settings by clicking your profile image. Then navigate to Connected Accounts and click Connect an Account:

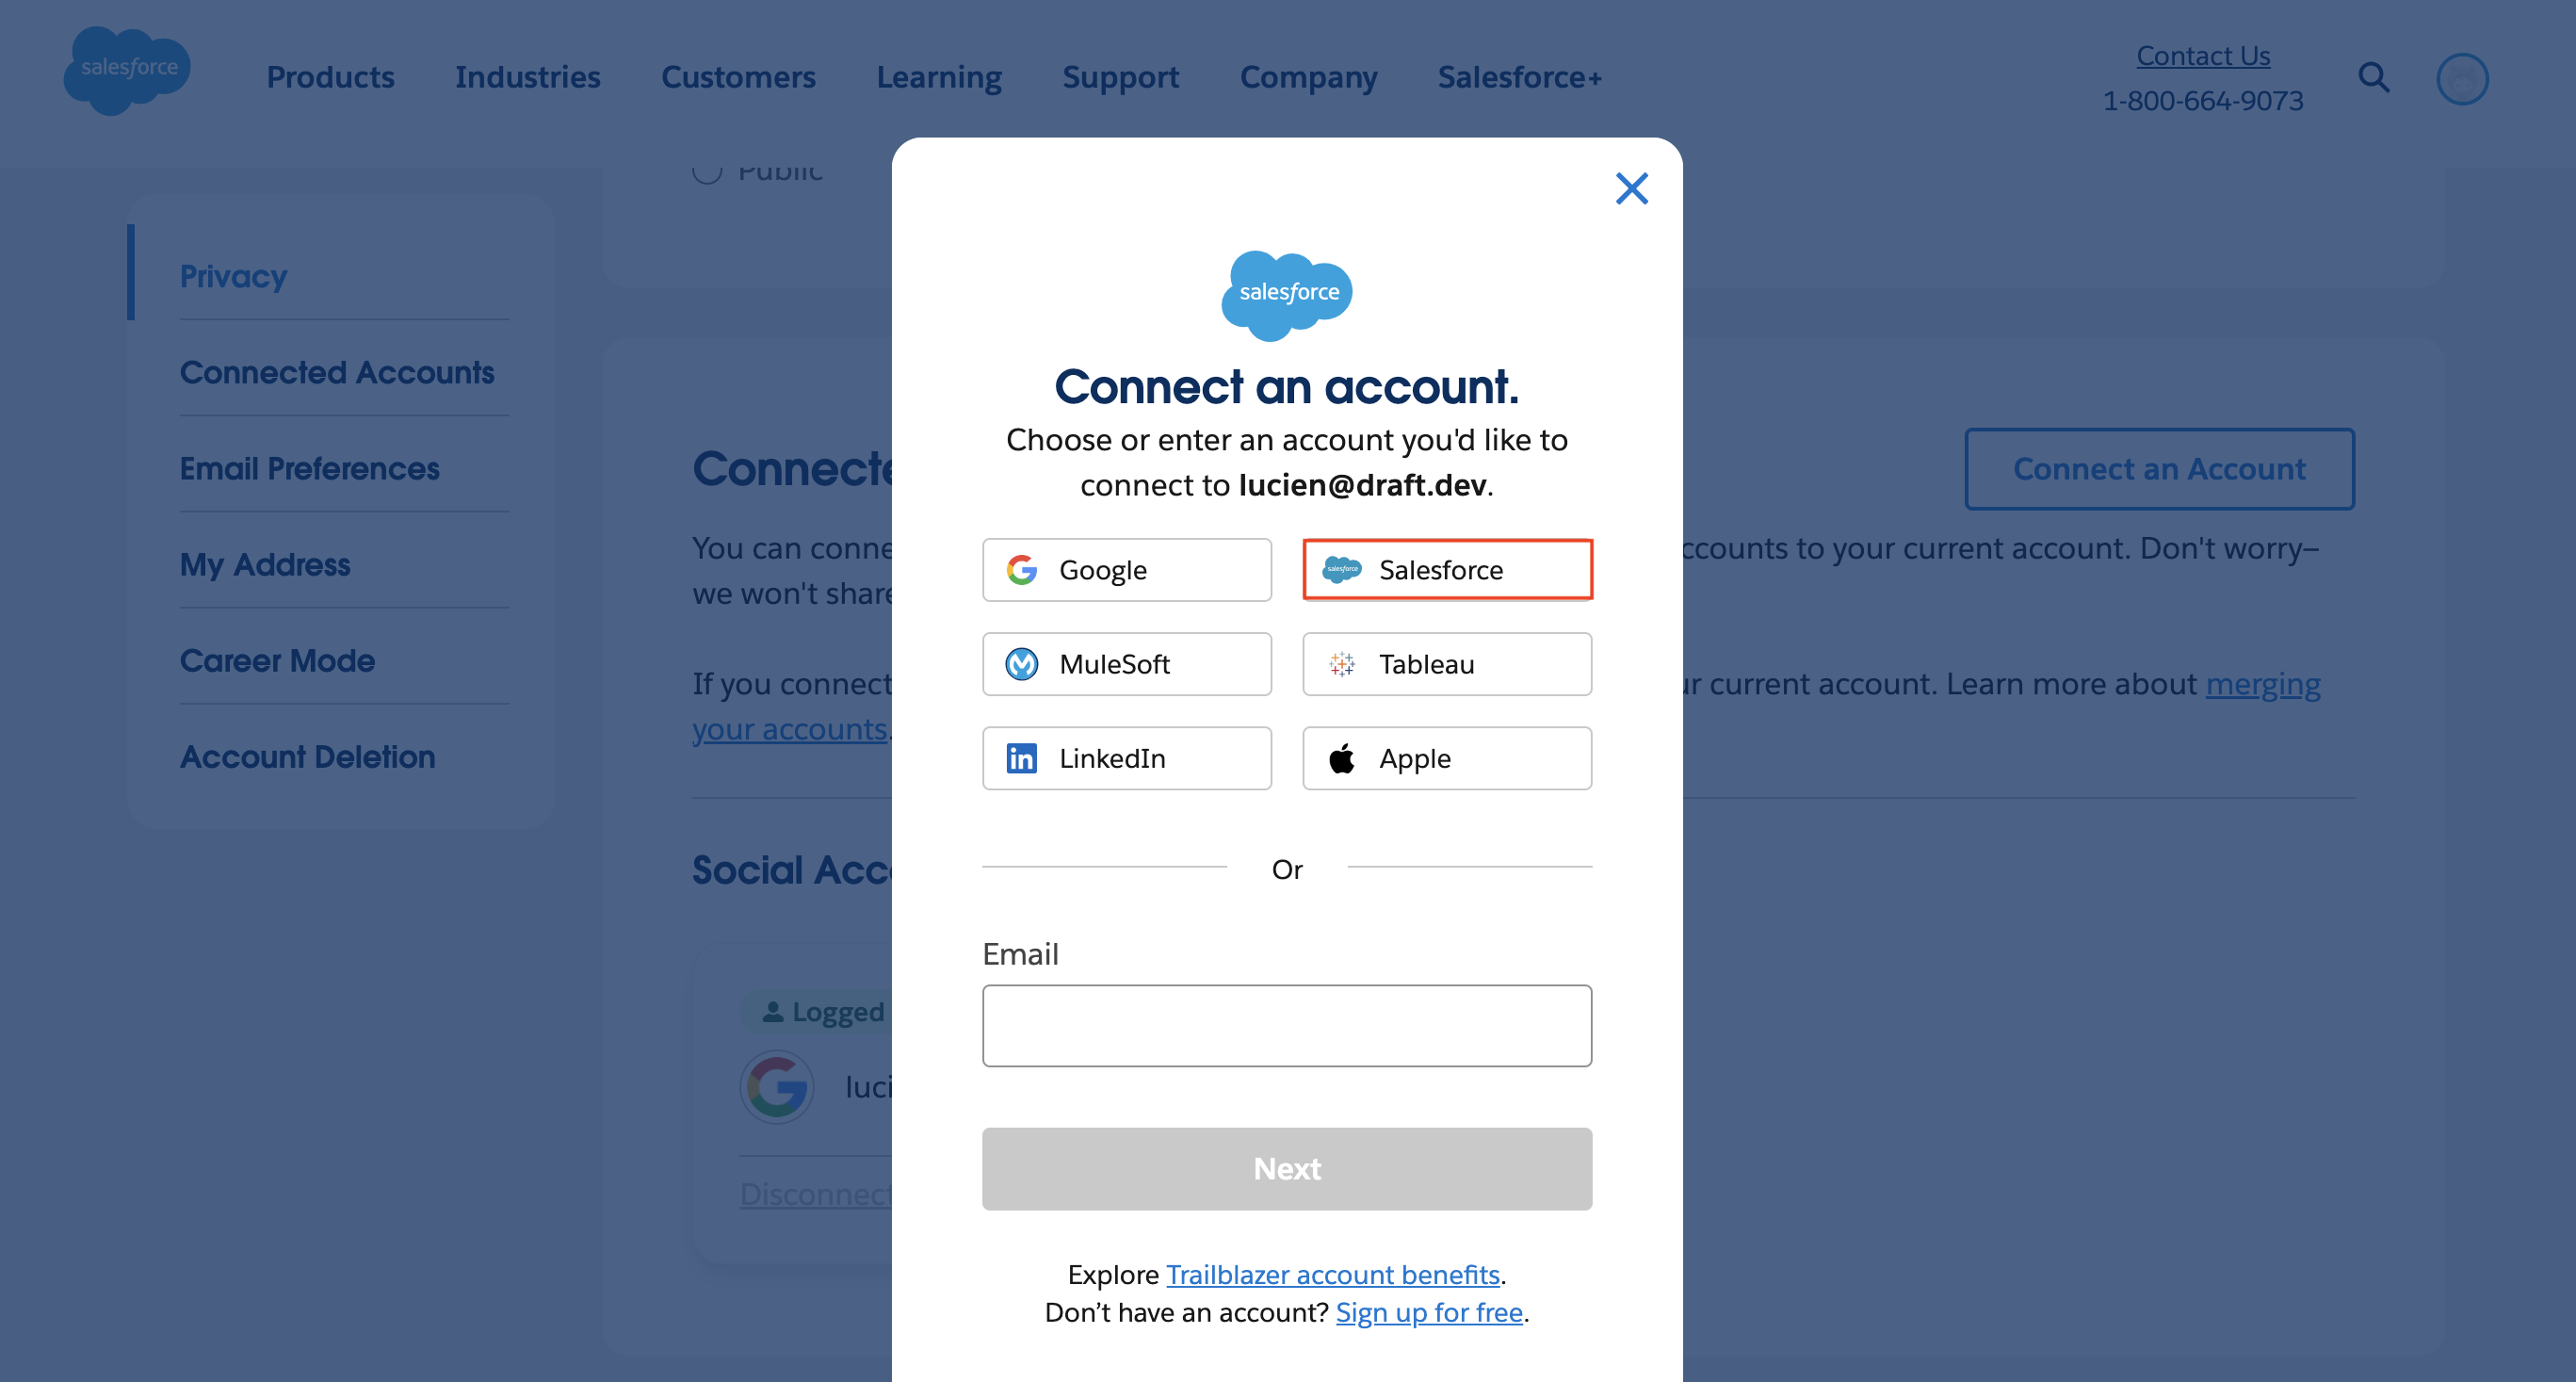
In the window that opens, select Salesforce:
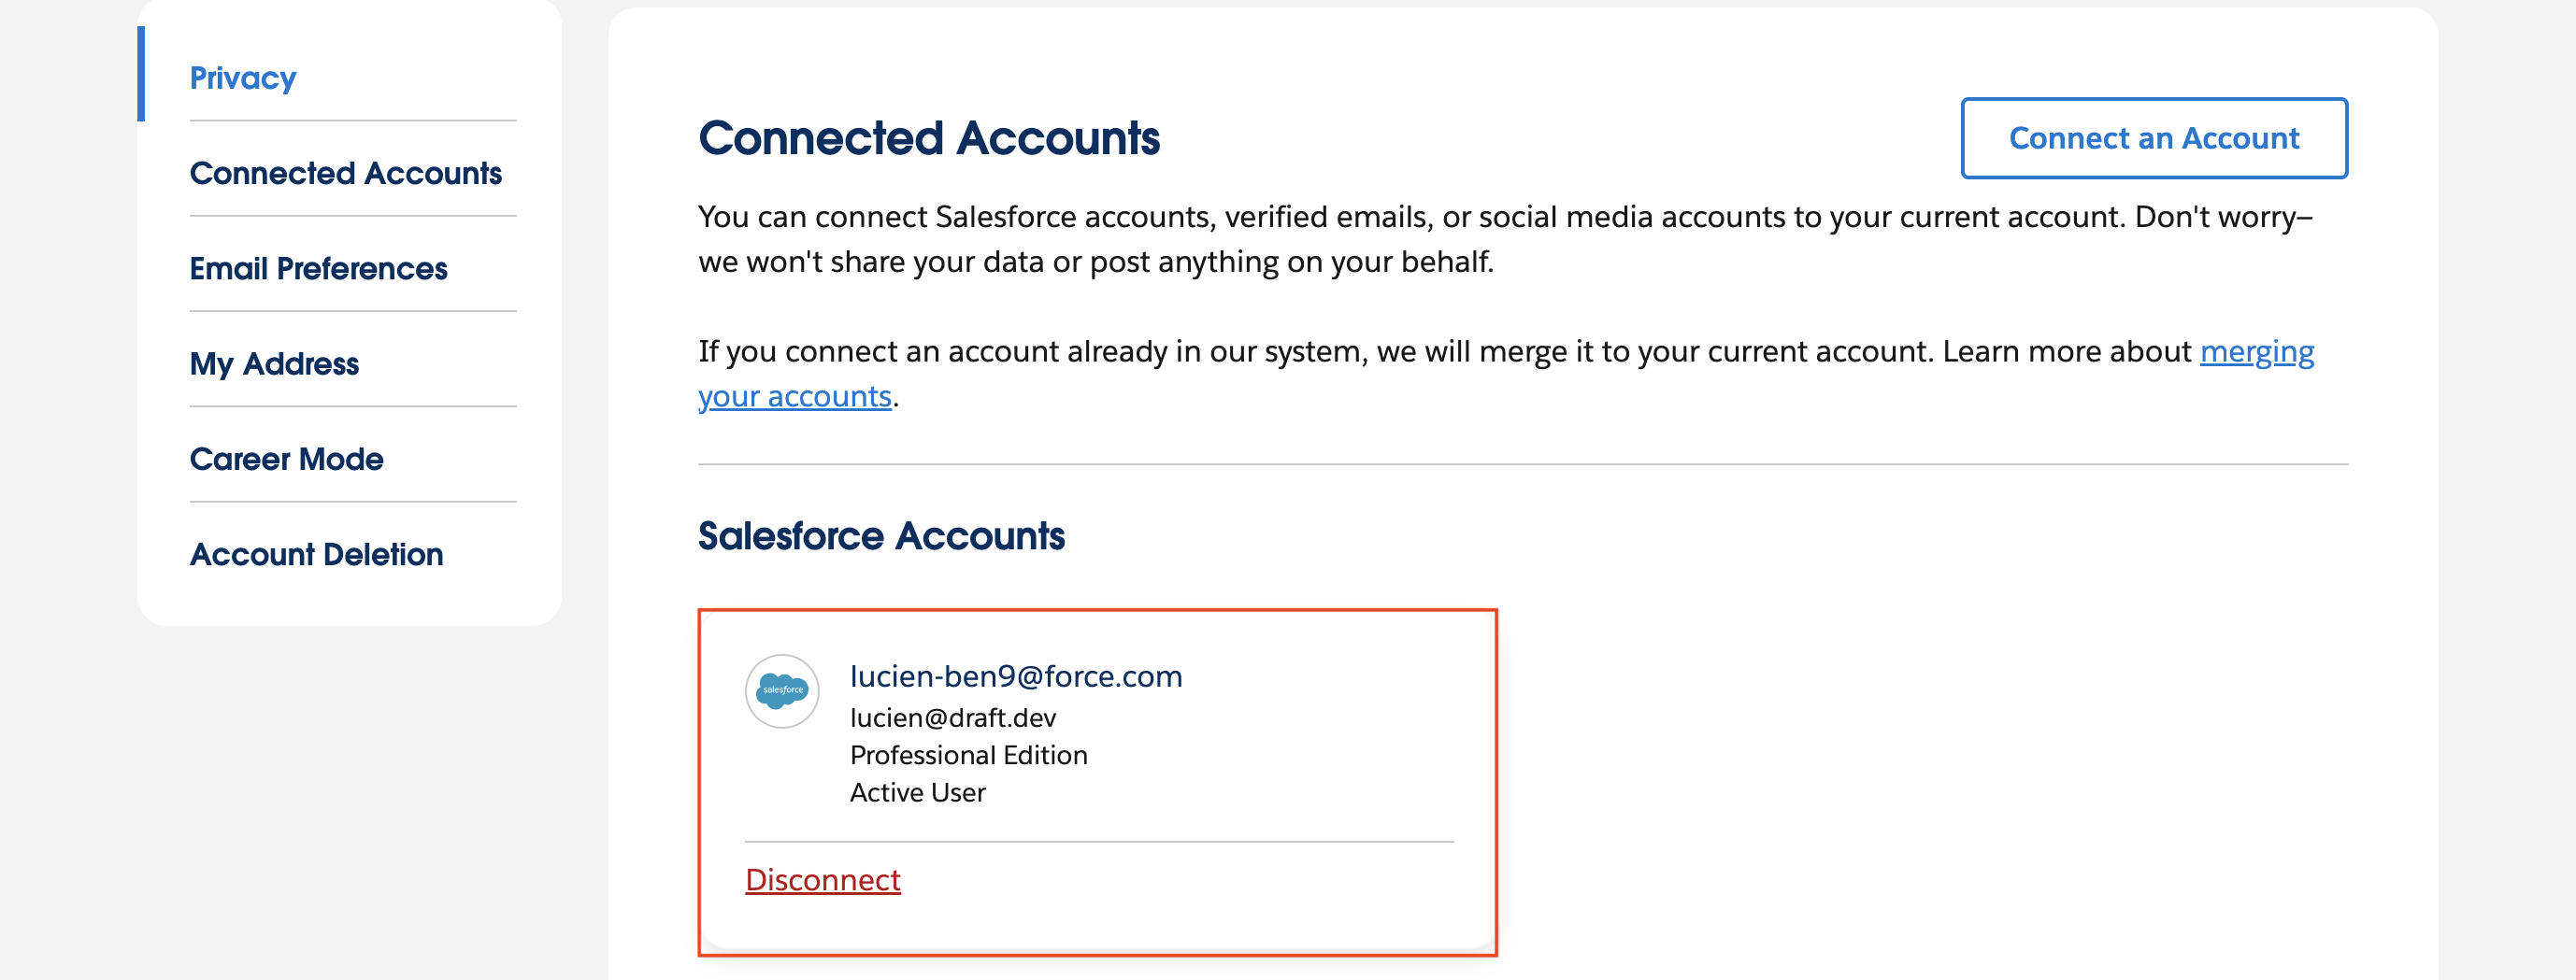
You are prompted to input your Salesforce credentials. When finished, you can see a confirmation that your Salesforce account was added under Salesforce Accounts:
Install Dropbox Sign with AppExchange
After connecting Trailblazer and your Salesforce account, it's time to use AppExchange to install Dropbox Sign into your Salesforce account.
Go to the Salesforce AppExchange marketplace and sign in with your Trailblazer account. Search for Dropbox sign and select it:
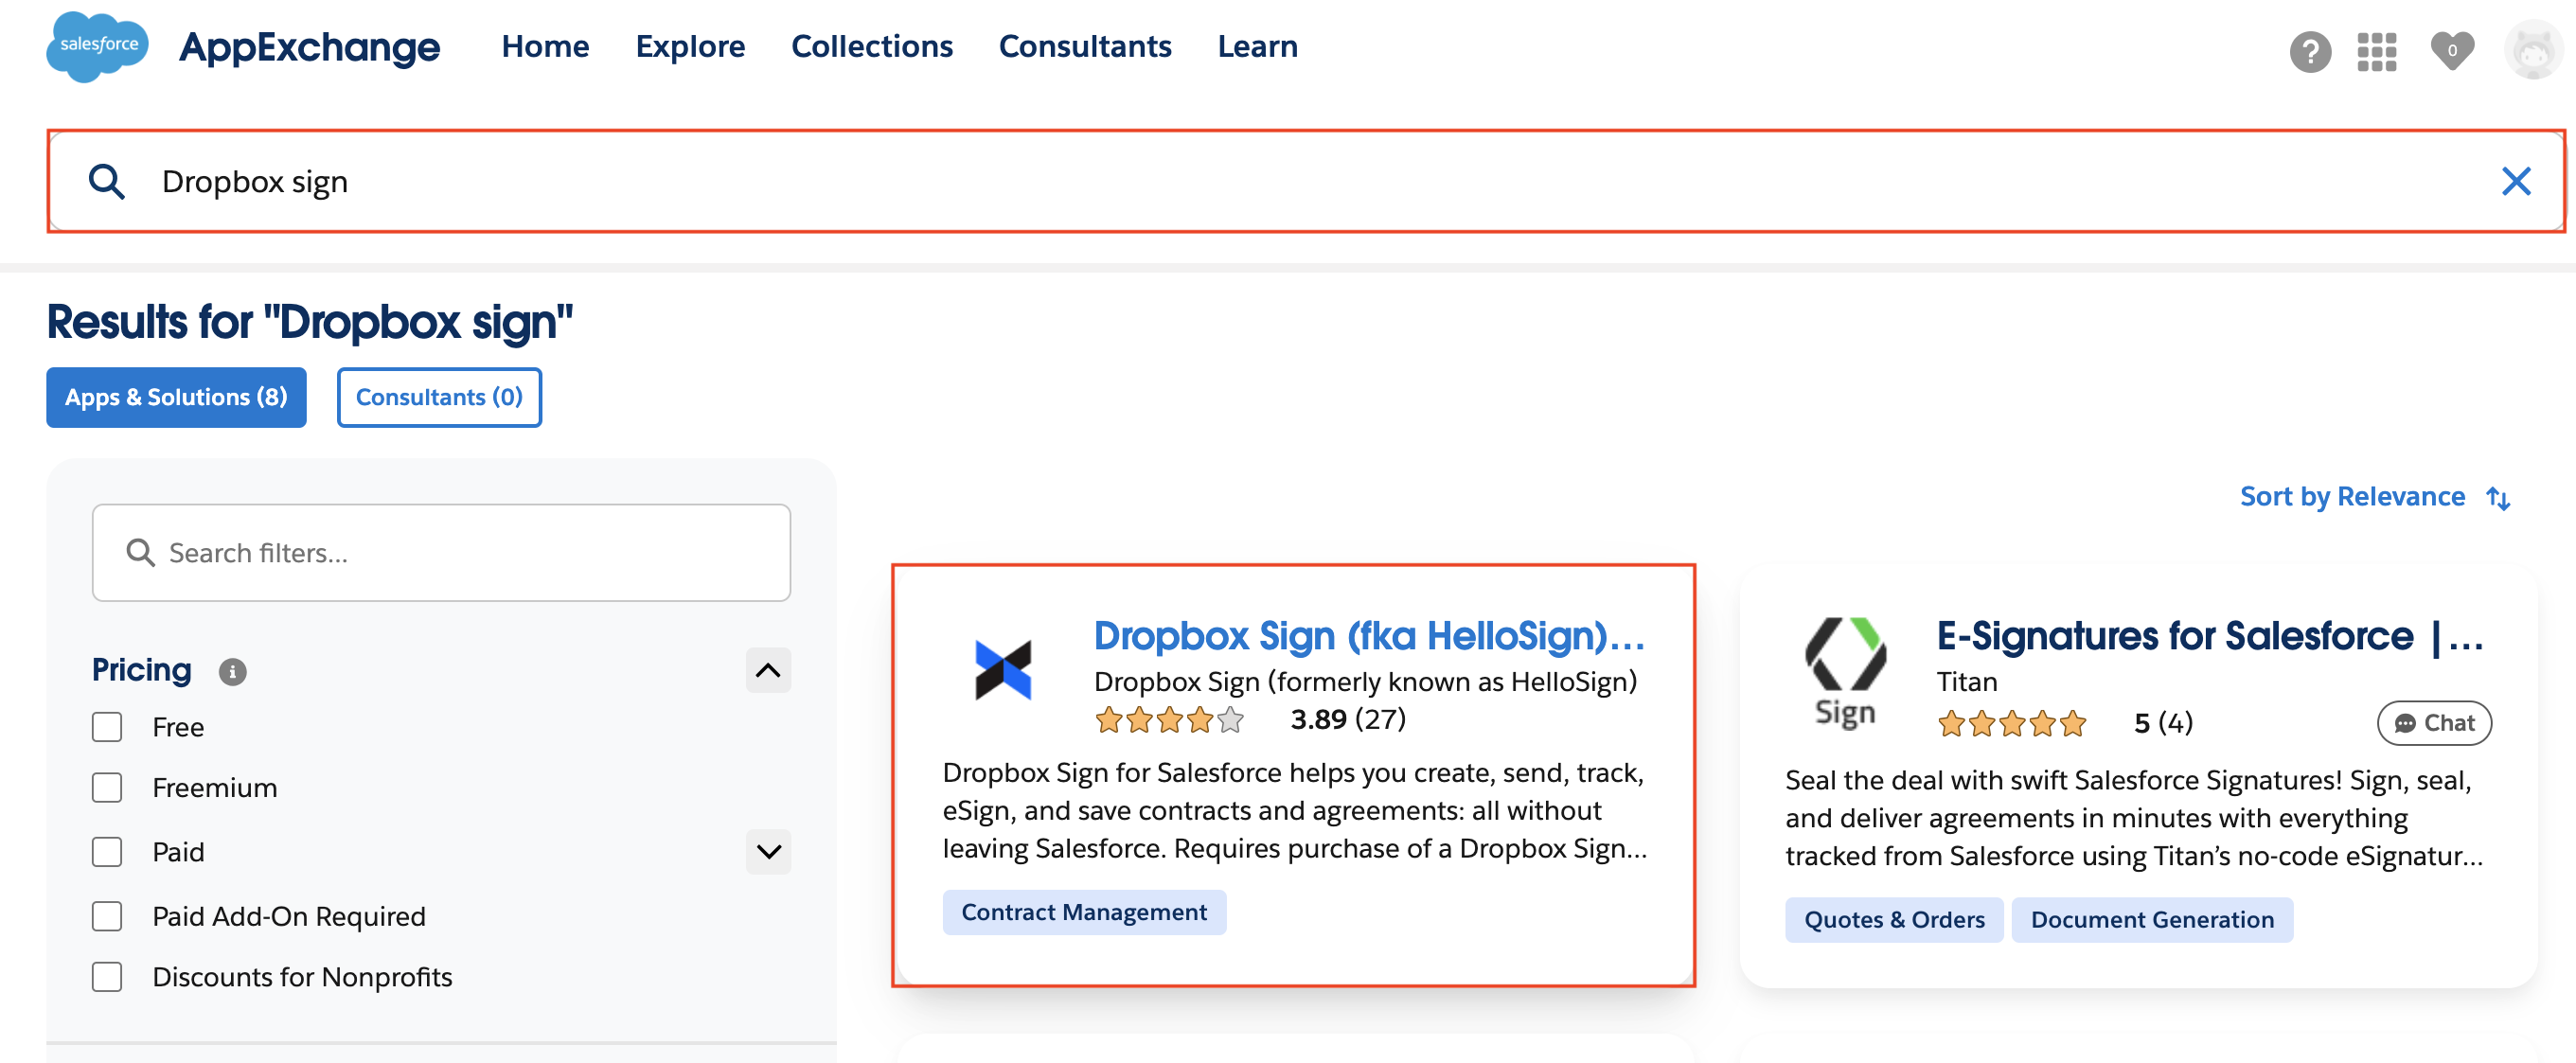
Once opened, click Get it now. A new window opens. Select Install in Production:

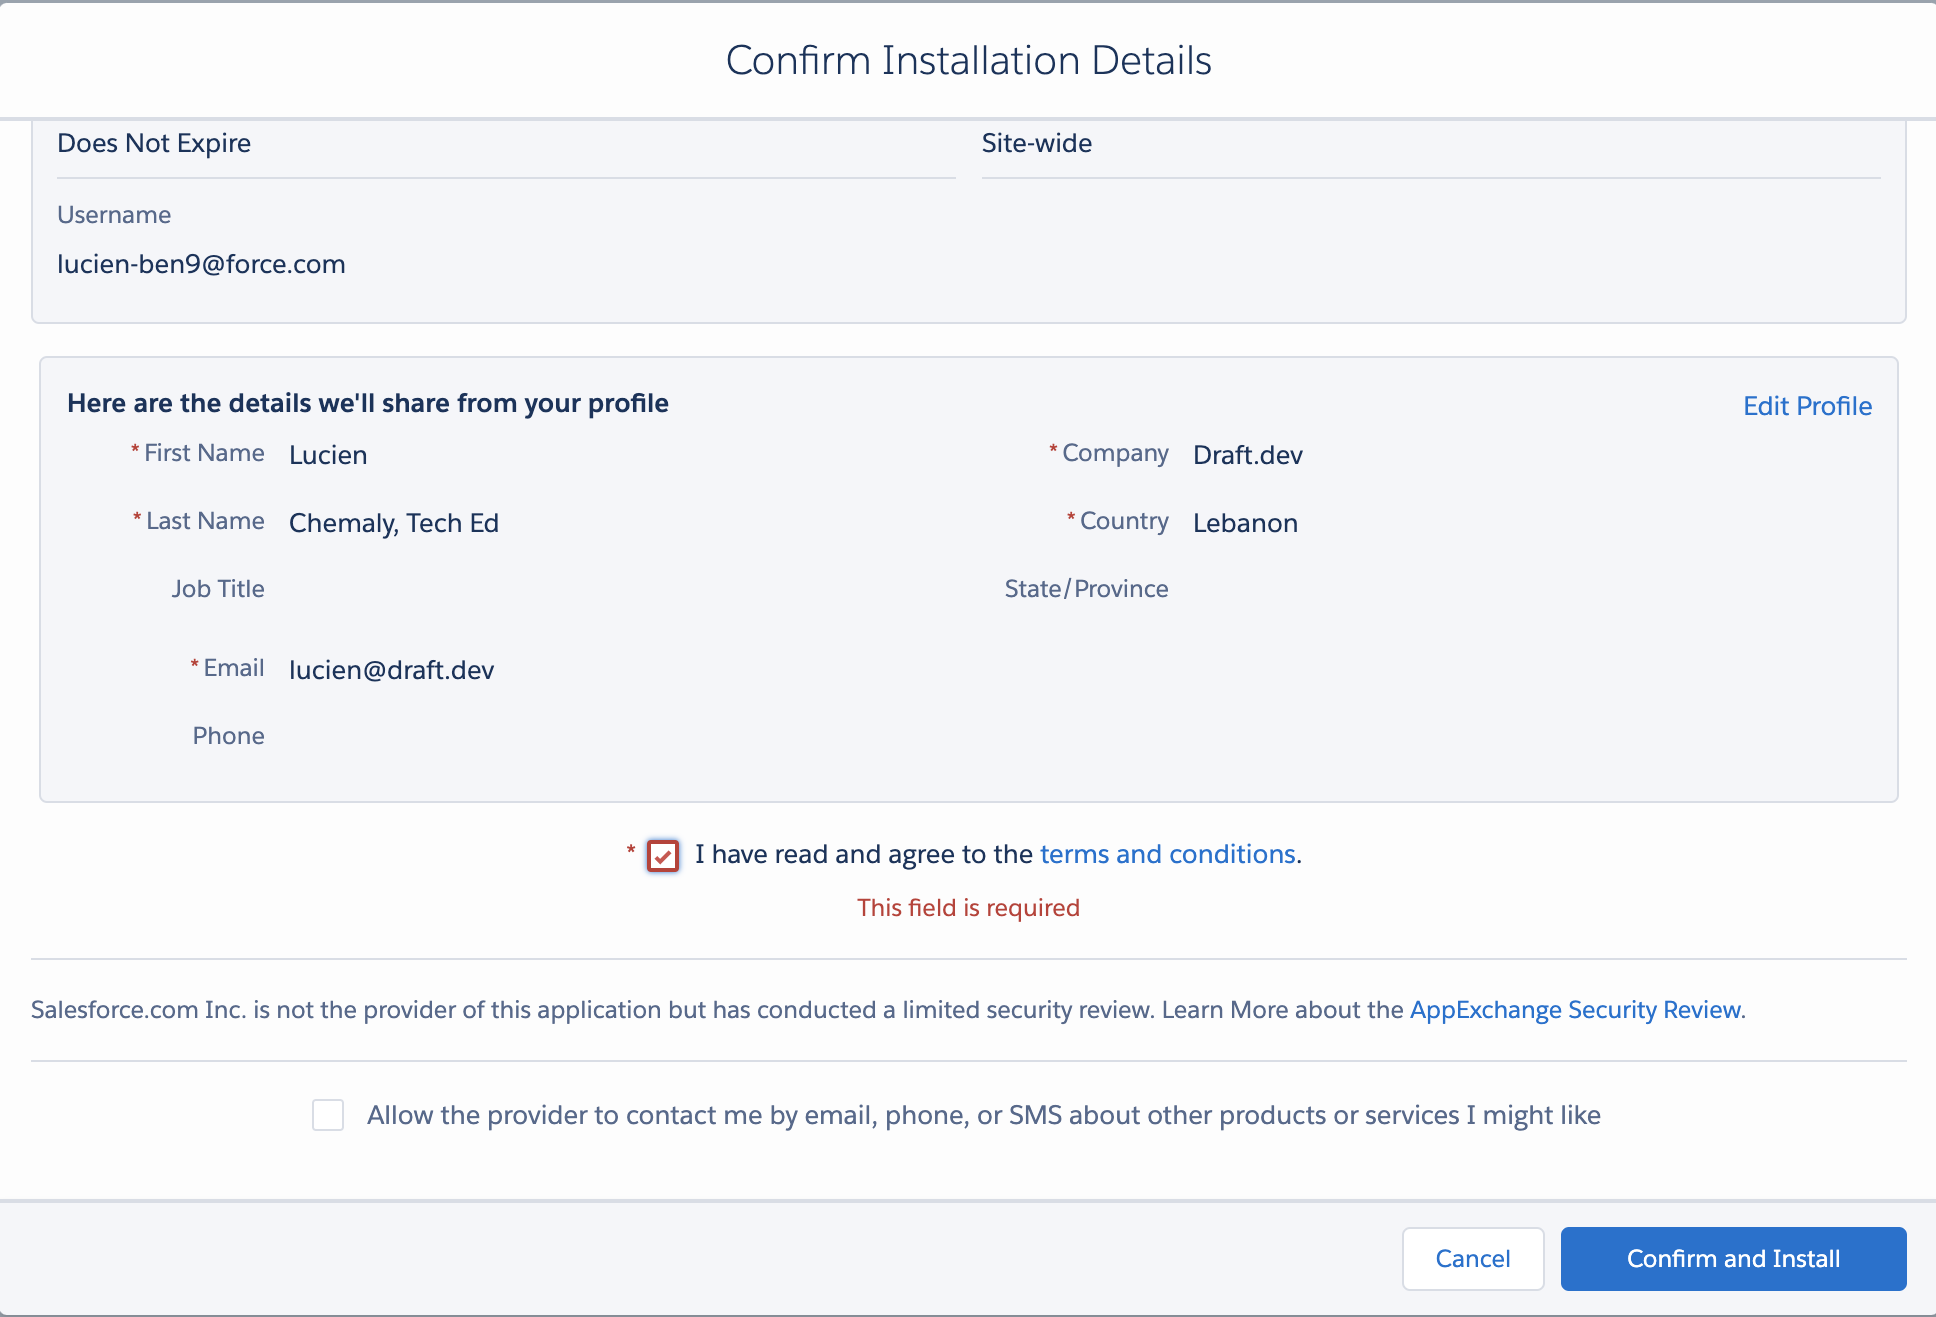
Follow the prompts, review and agree to the terms and conditions, and then select Confirm and Install:
At this point, you are redirected to your Salesforce account login. Go ahead and log in. You should then see the Install HelloSign page. Click Install for All Users:
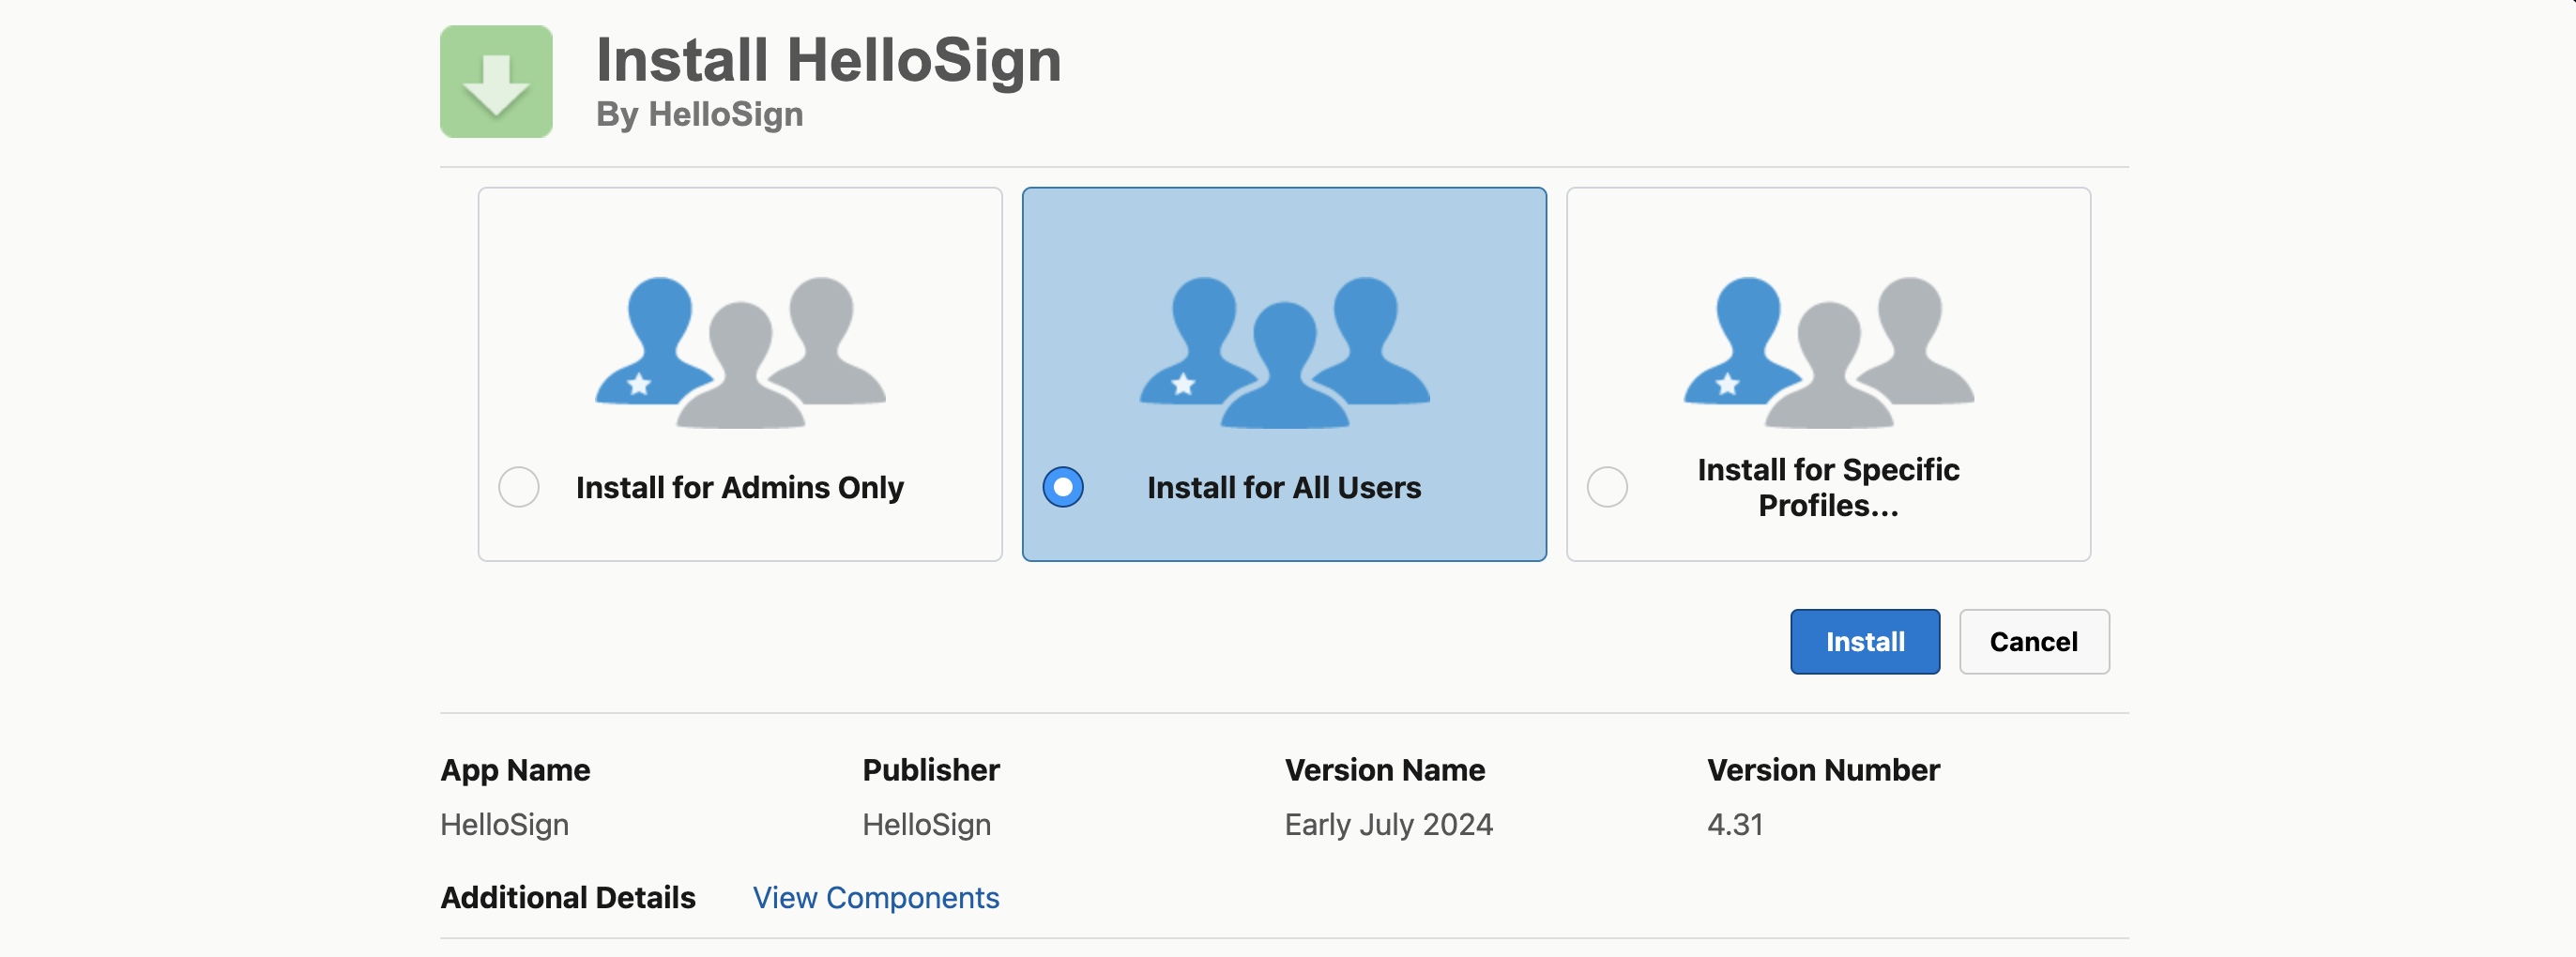
After clicking Install for All Users, a prompt opens. Follow the steps to grant third-party access. The installation process should automatically start. This usually takes a few minutes, and you receive an email when it's finished.
Connect Dropbox Sign to your Salesforce account
It's time to connect the last two accounts: Dropbox Sign and Salesforce. To do so, log in to your Salesforce account. Then click the More icon, search for Dropbox Sign, and click it:

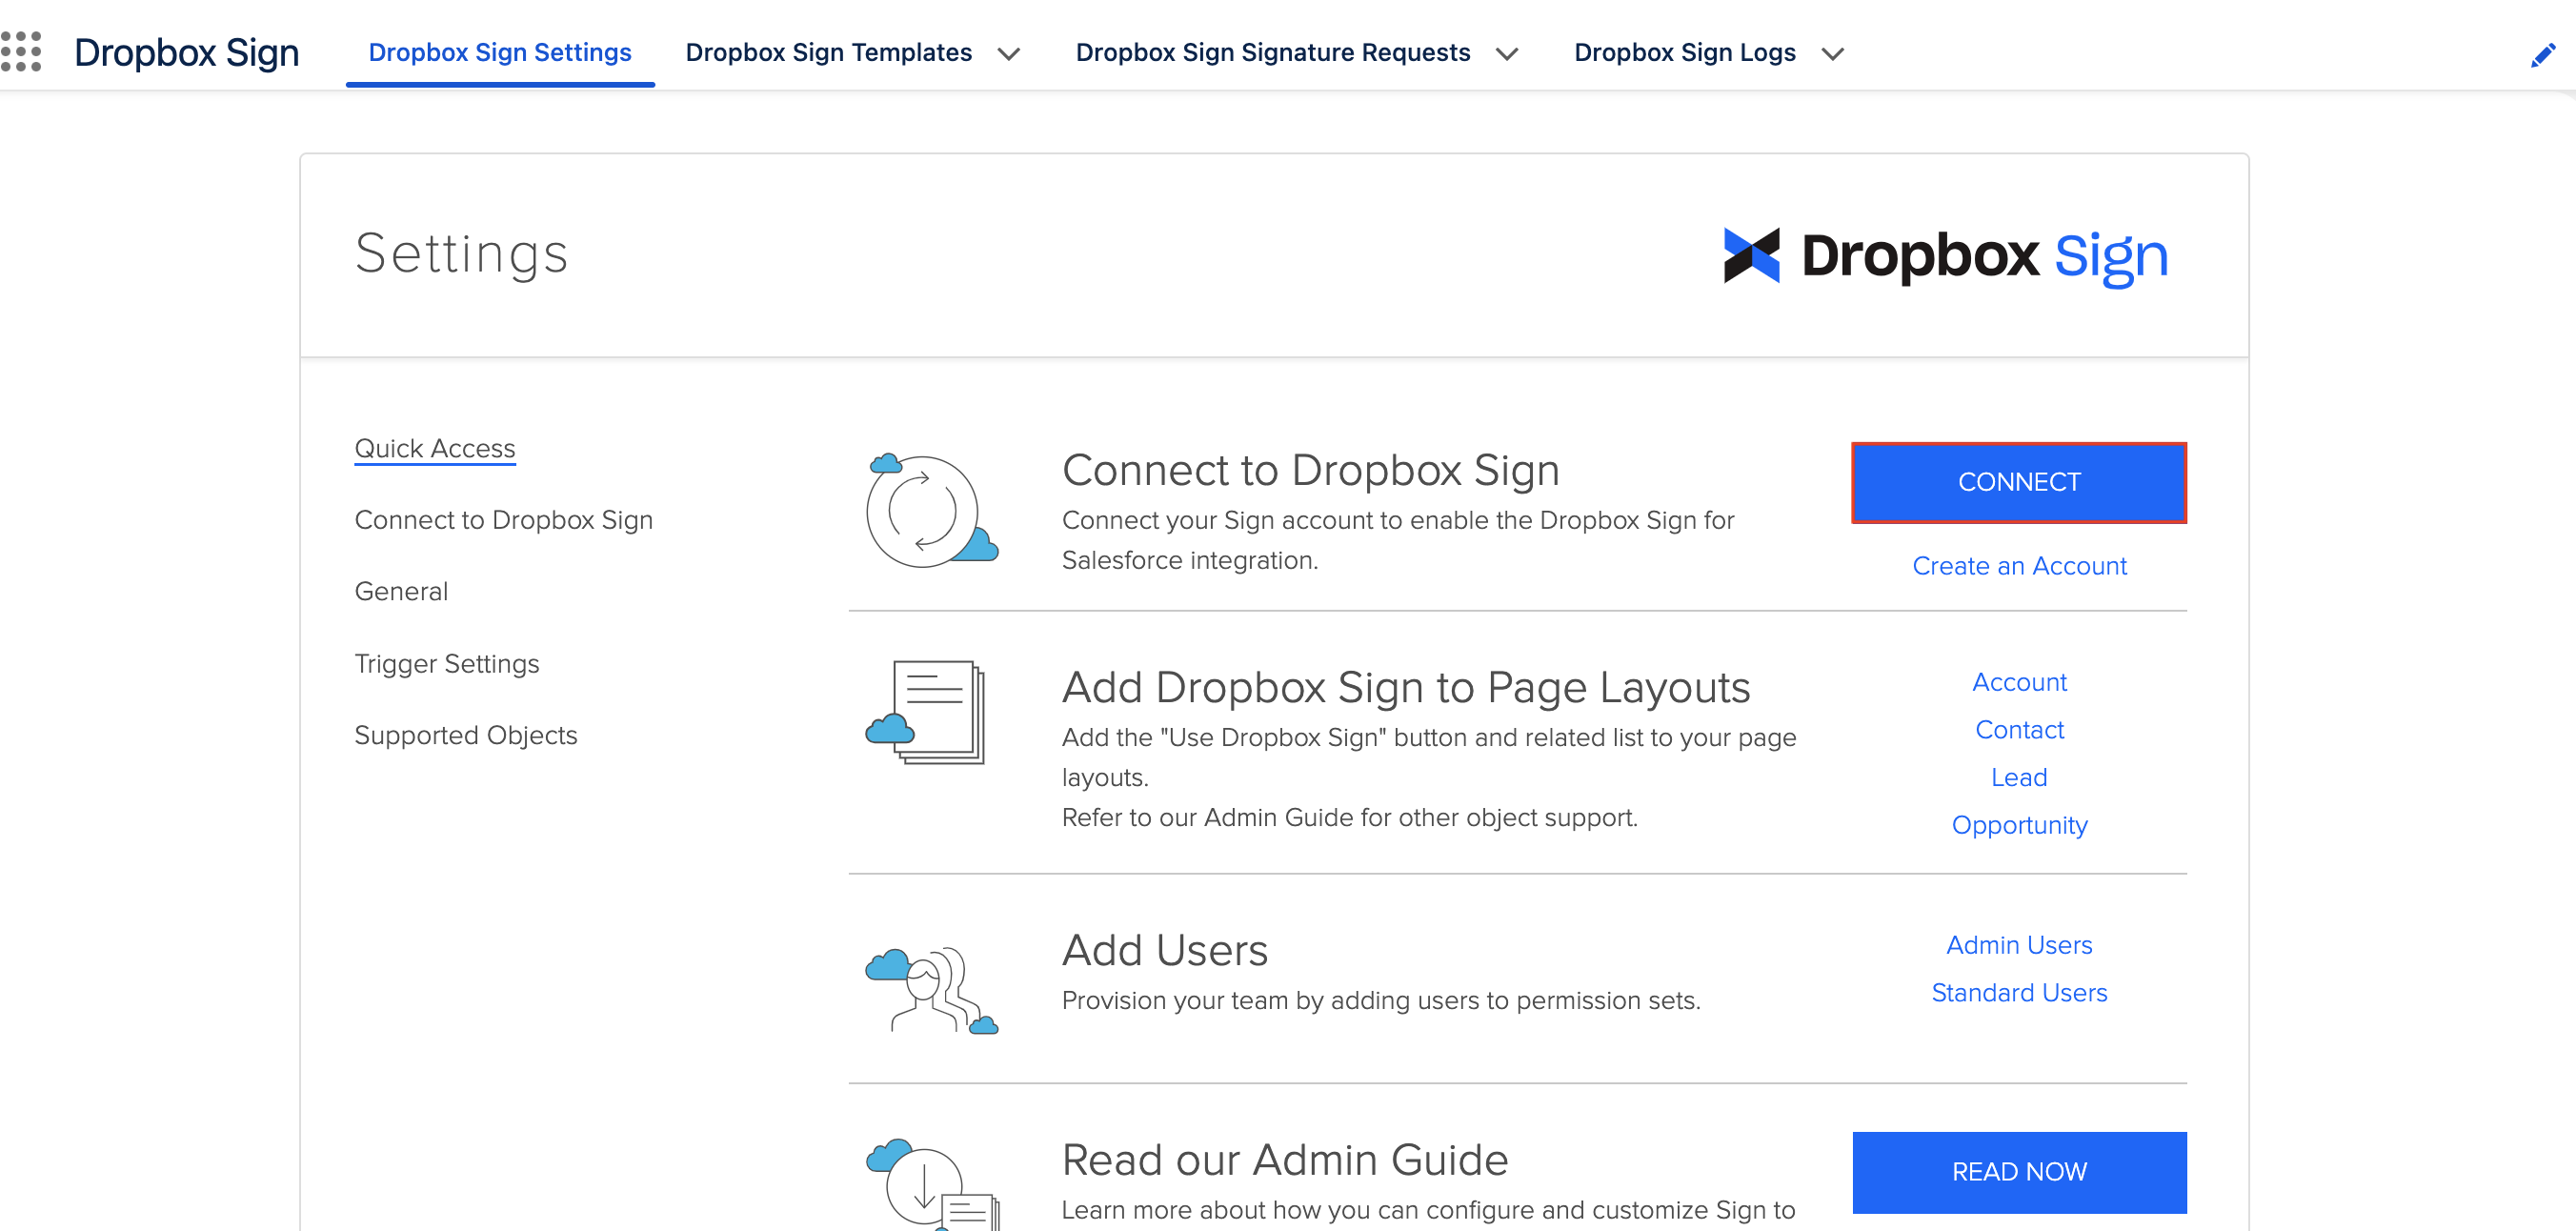
Click Connect and follow the prompts:
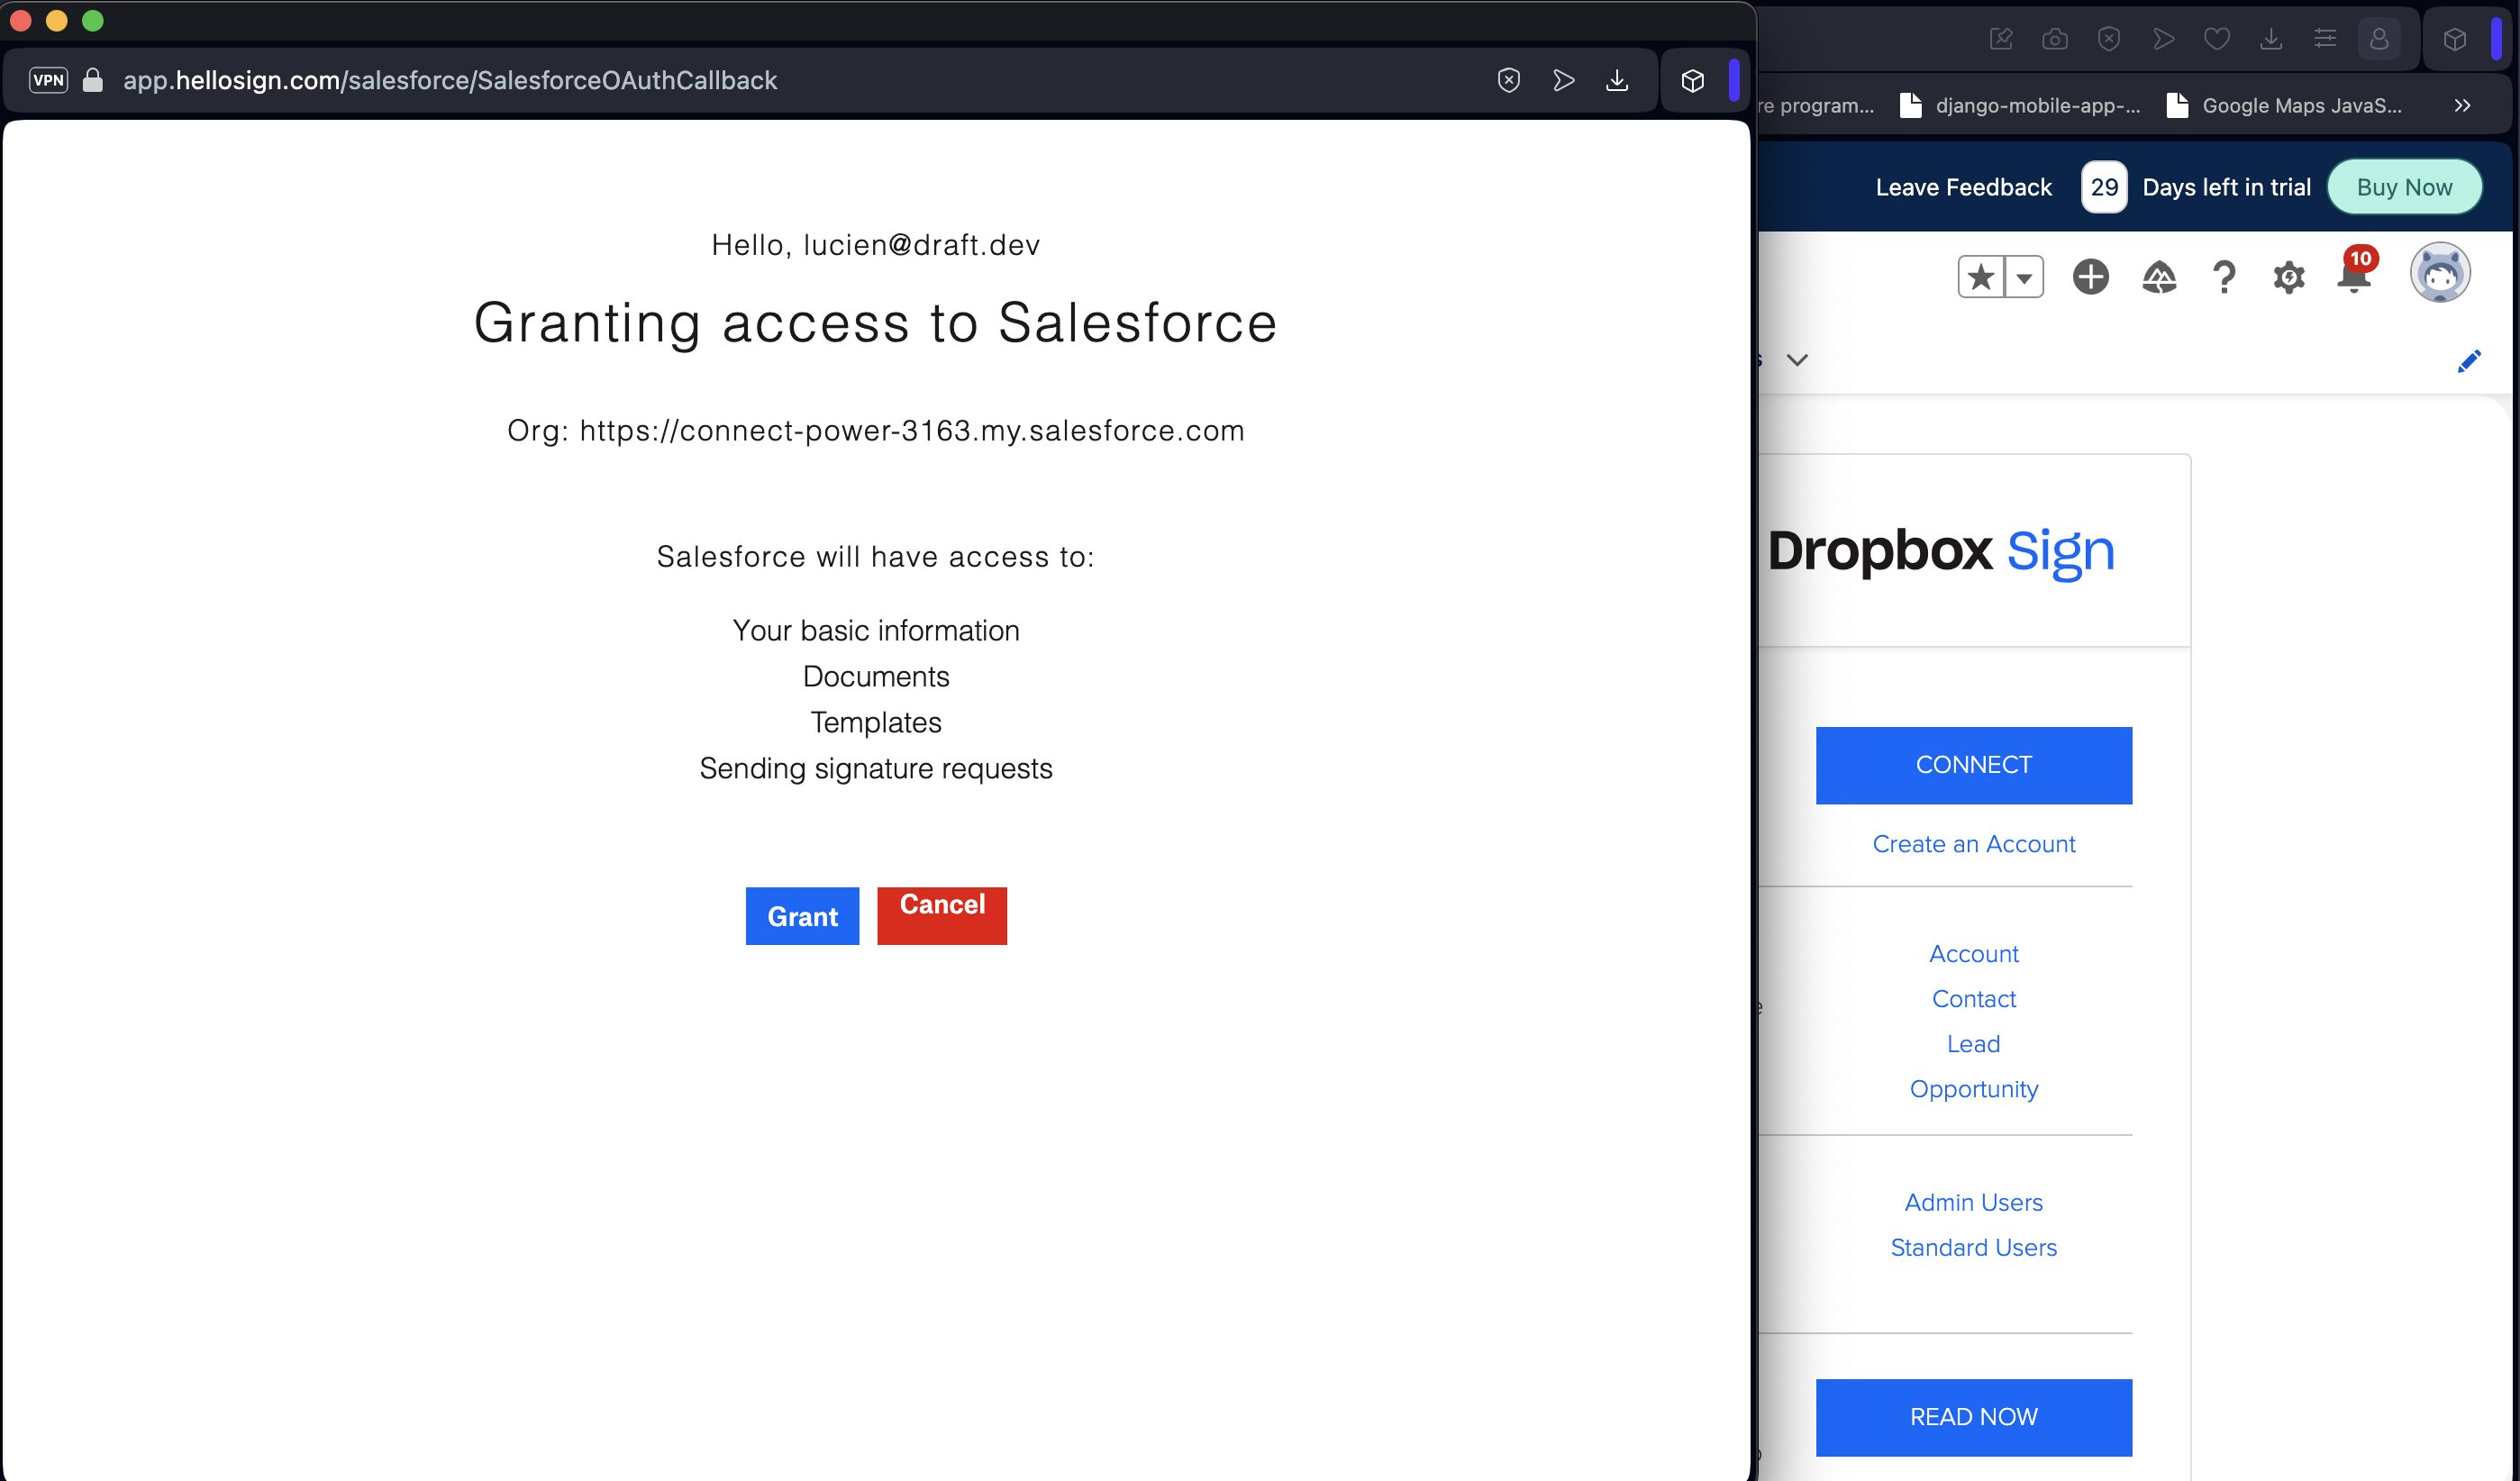
Finally, click Grant to grant access to Salesforce:
Create a Dropbox Sign template
At this point, you have everything set up and configured. Now, it's time to create a template that defines the automation and workflow. In this scenario, you send rent agreements to different contacts through Salesforce.
To create a new Dropbox Sign template, go to your Salesforce account and open the Dropbox Sign App that you installed in the previous step. You can open the Dropbox Sign App by searching for it from the search field of the App Launcher:

Click Dropbox Sign Templates and then select New Dropbox Sign Template:

Input the following template properties:
- Template Name: Rental Agreement
- Source Object: Contact
- Delivery: Request via Email

Click Next. You are then asked to upload a file. You can populate one of your own, but this tutorial uses a test rent agreement:
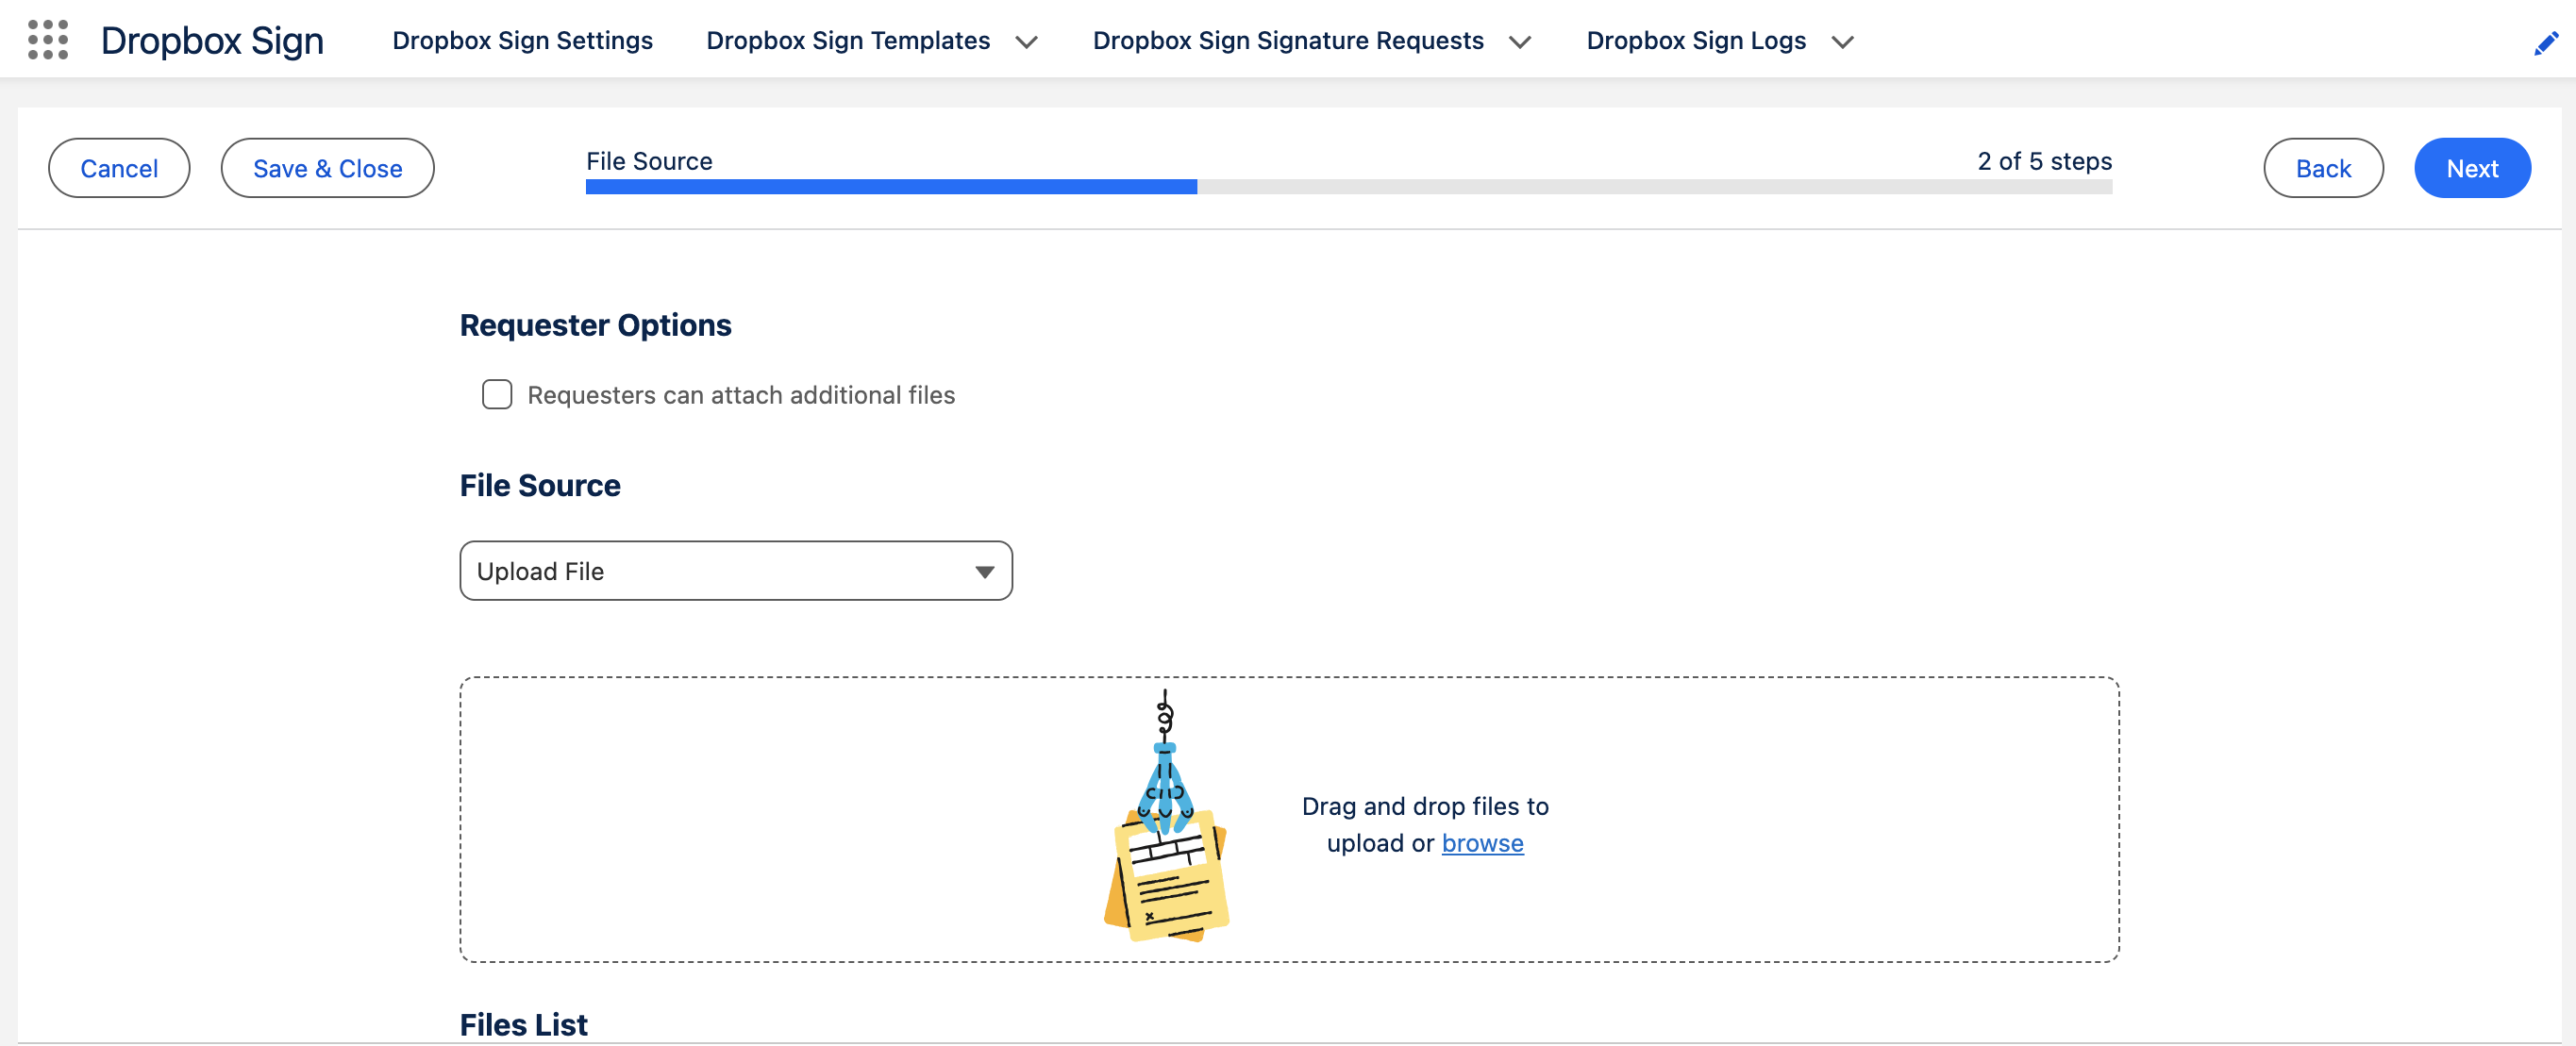
Upload the contract and click Next.
Select a contact (you can choose any contact from your Salesforce account) and select the action Sign. Make sure you have access to the selected contact's email as you need to access the account later on:
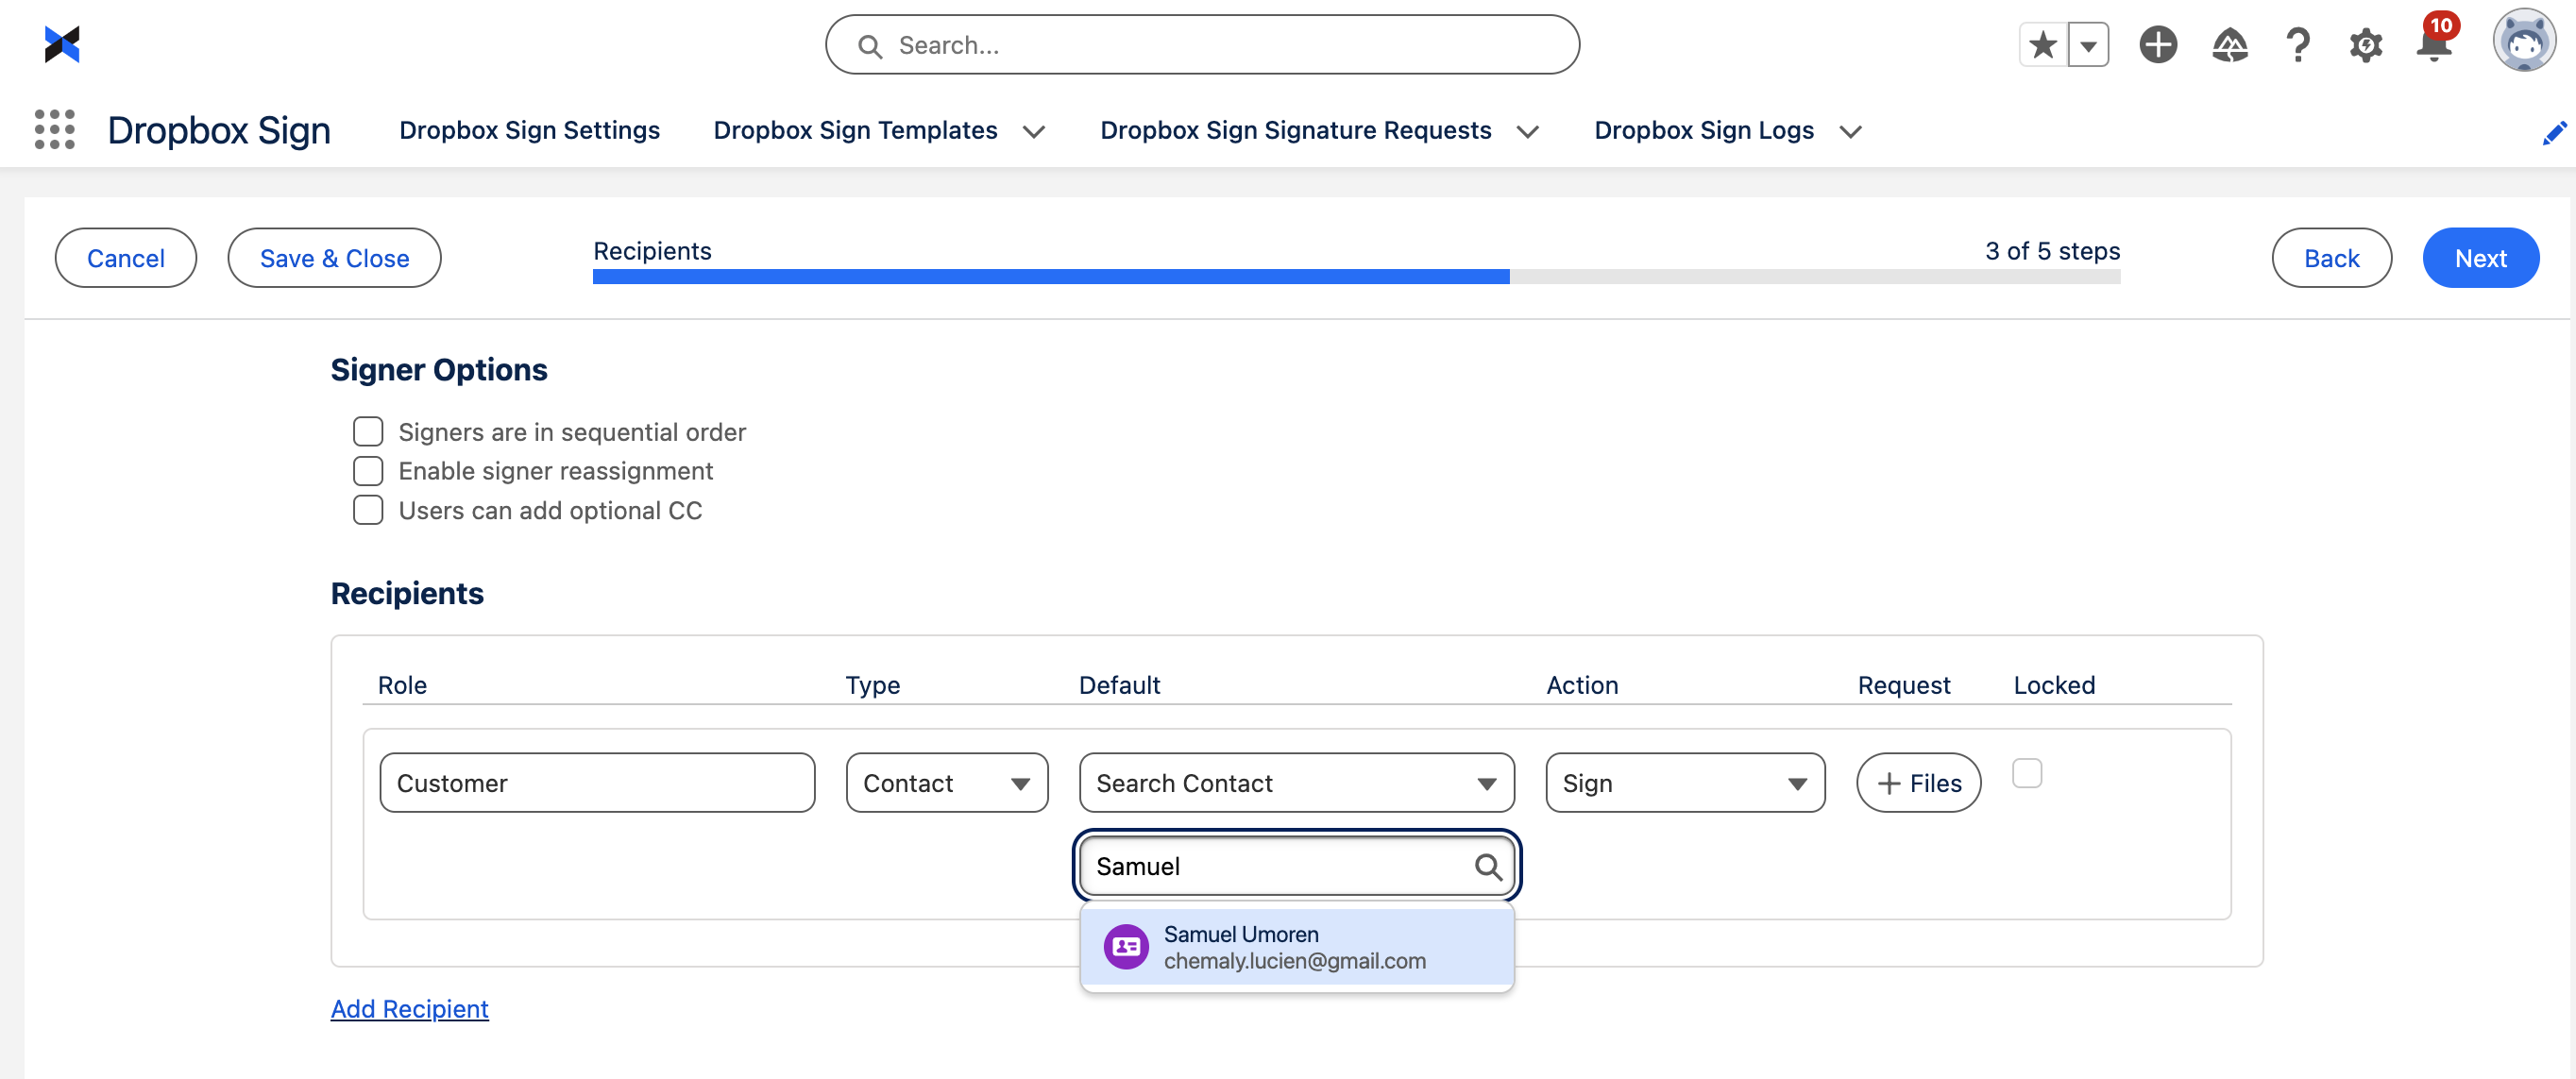
Click Next. On the Merge Fields, keep the defaults and go to the next page. Specify the default message and the subject. Then, fill in the details as outlined in the following image:
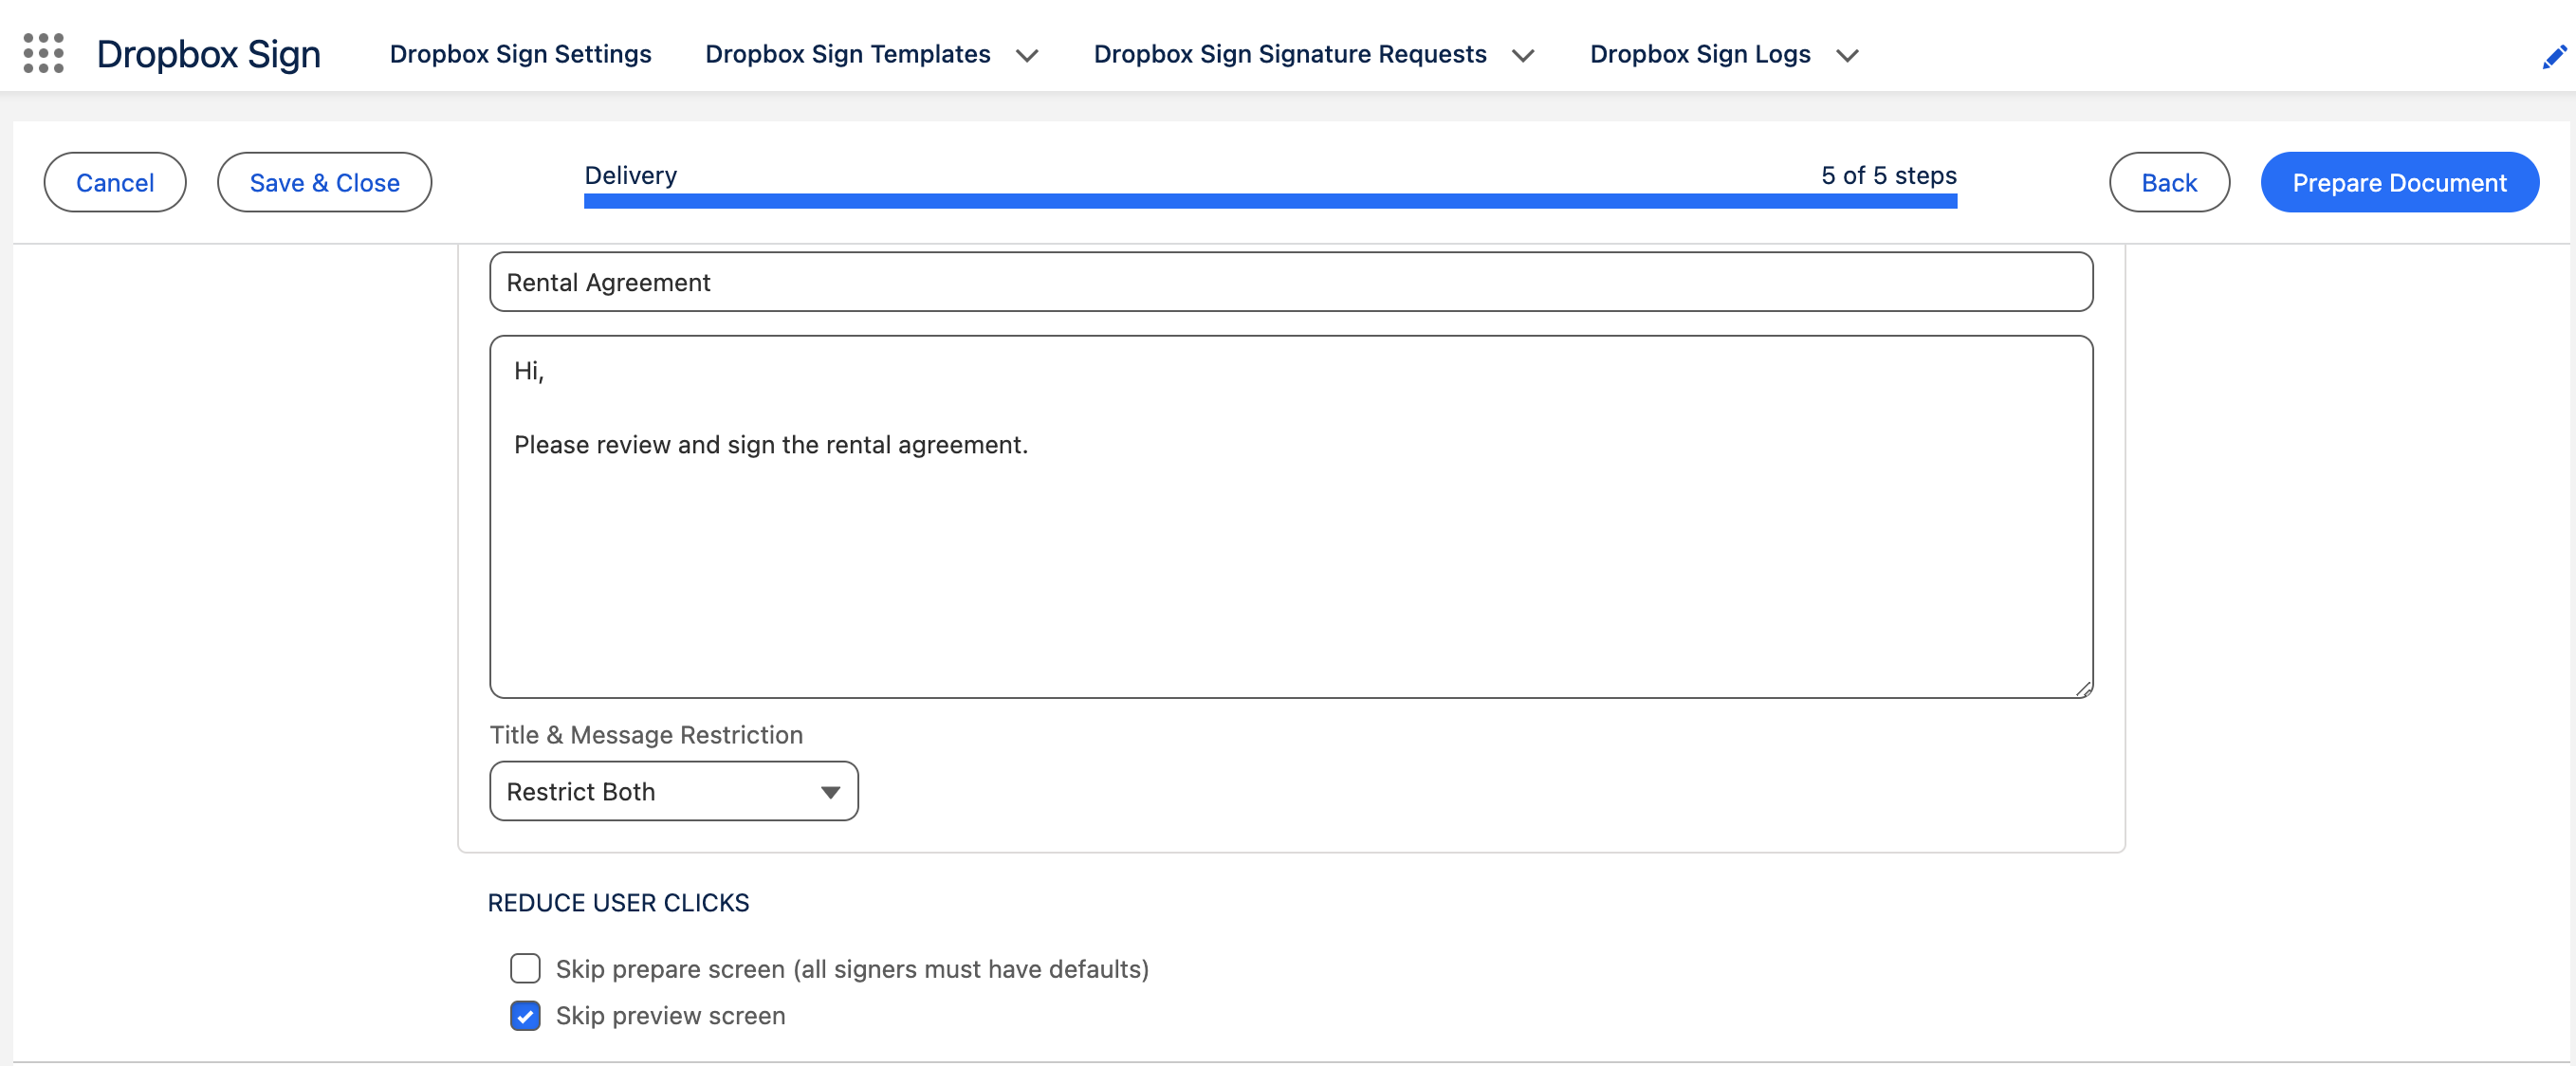
When finished, click Prepare Document. A pop-up window appears. This pop-up is an embedded iFrame for Dropbox Sign. Select the signature field and drag and drop it in the Tenant signature area:
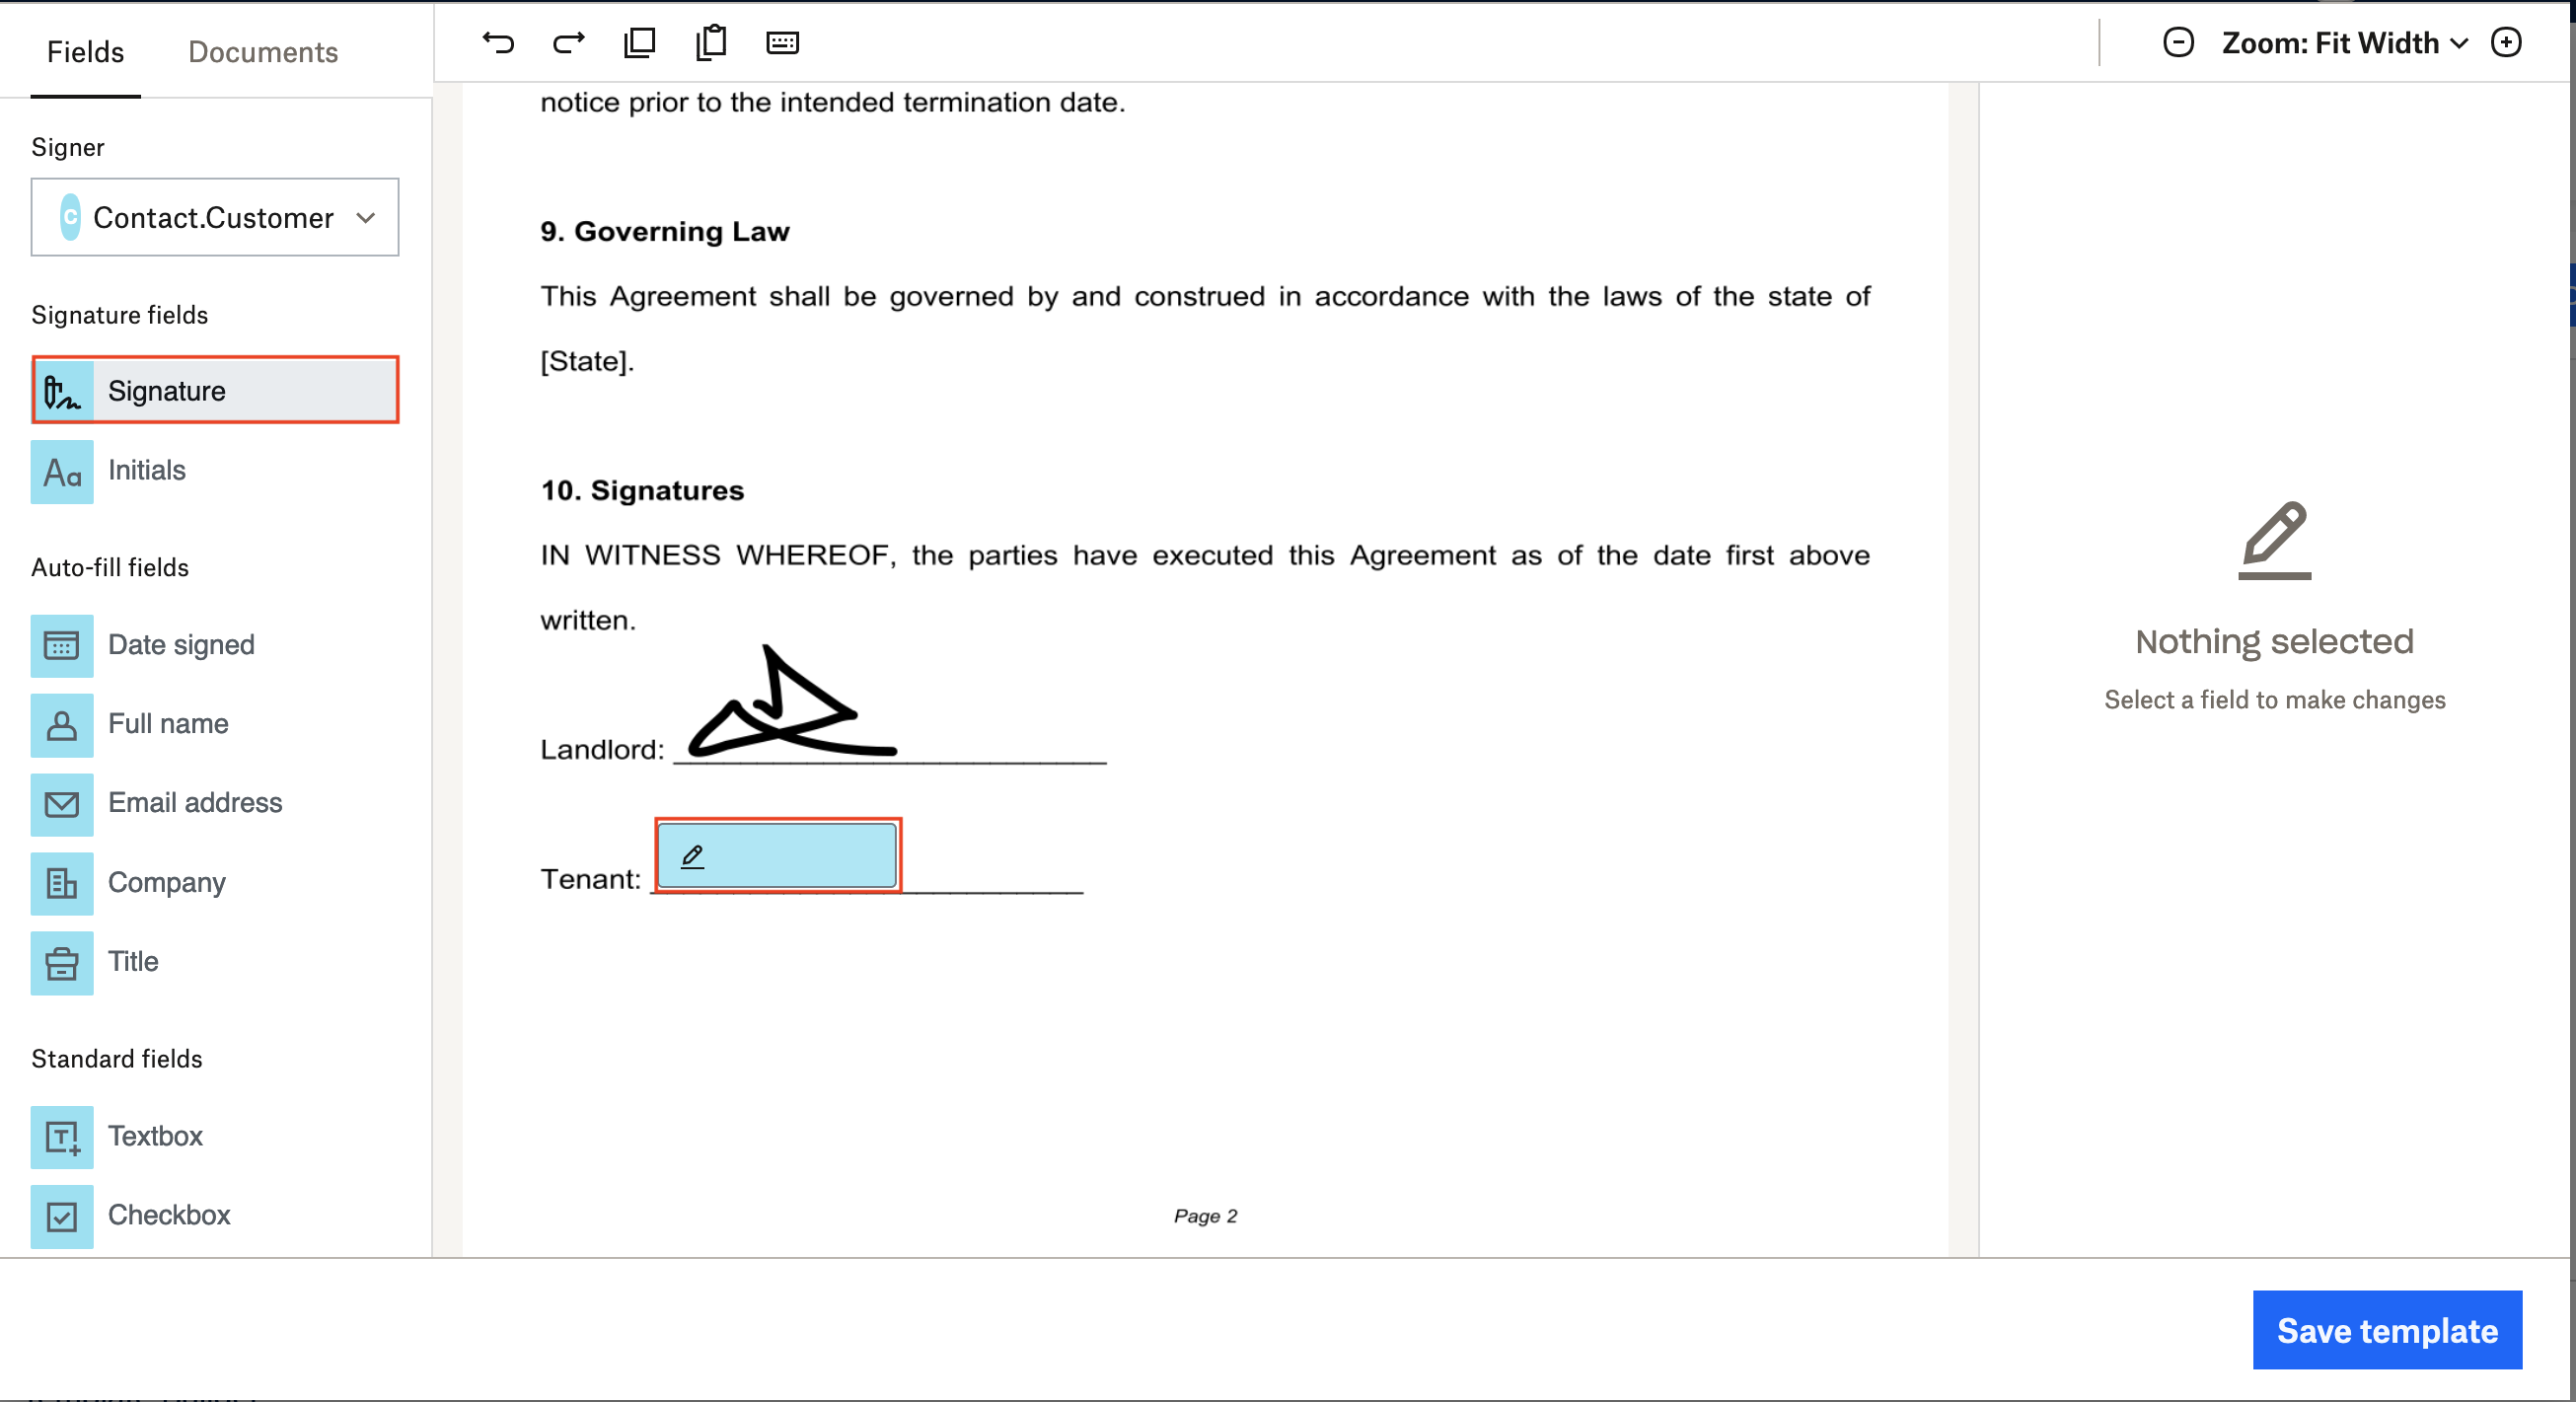
When finished, click Save Template.
> Note: If you face any Content Security Policy (CSP) issues when preparing the document, you need to install a plugin to manage this issue. If you're using Firefox, you can use the Content Security Policy (CSP) Generator plugin, and similar extensions are available for other browsers. Once you enable the plugin, make sure you click Prepare Document before proceeding. Then, don't forget to disable the plugin when you're finished with the tutorial.
Configure your contact page with the Salesforce App Builder
Once you have the Dropbox Sign template ready, add a field on the Contact page. To do so, navigate to Setup from your Salesforce account:

Then go to the Object Manager and open the Contact:
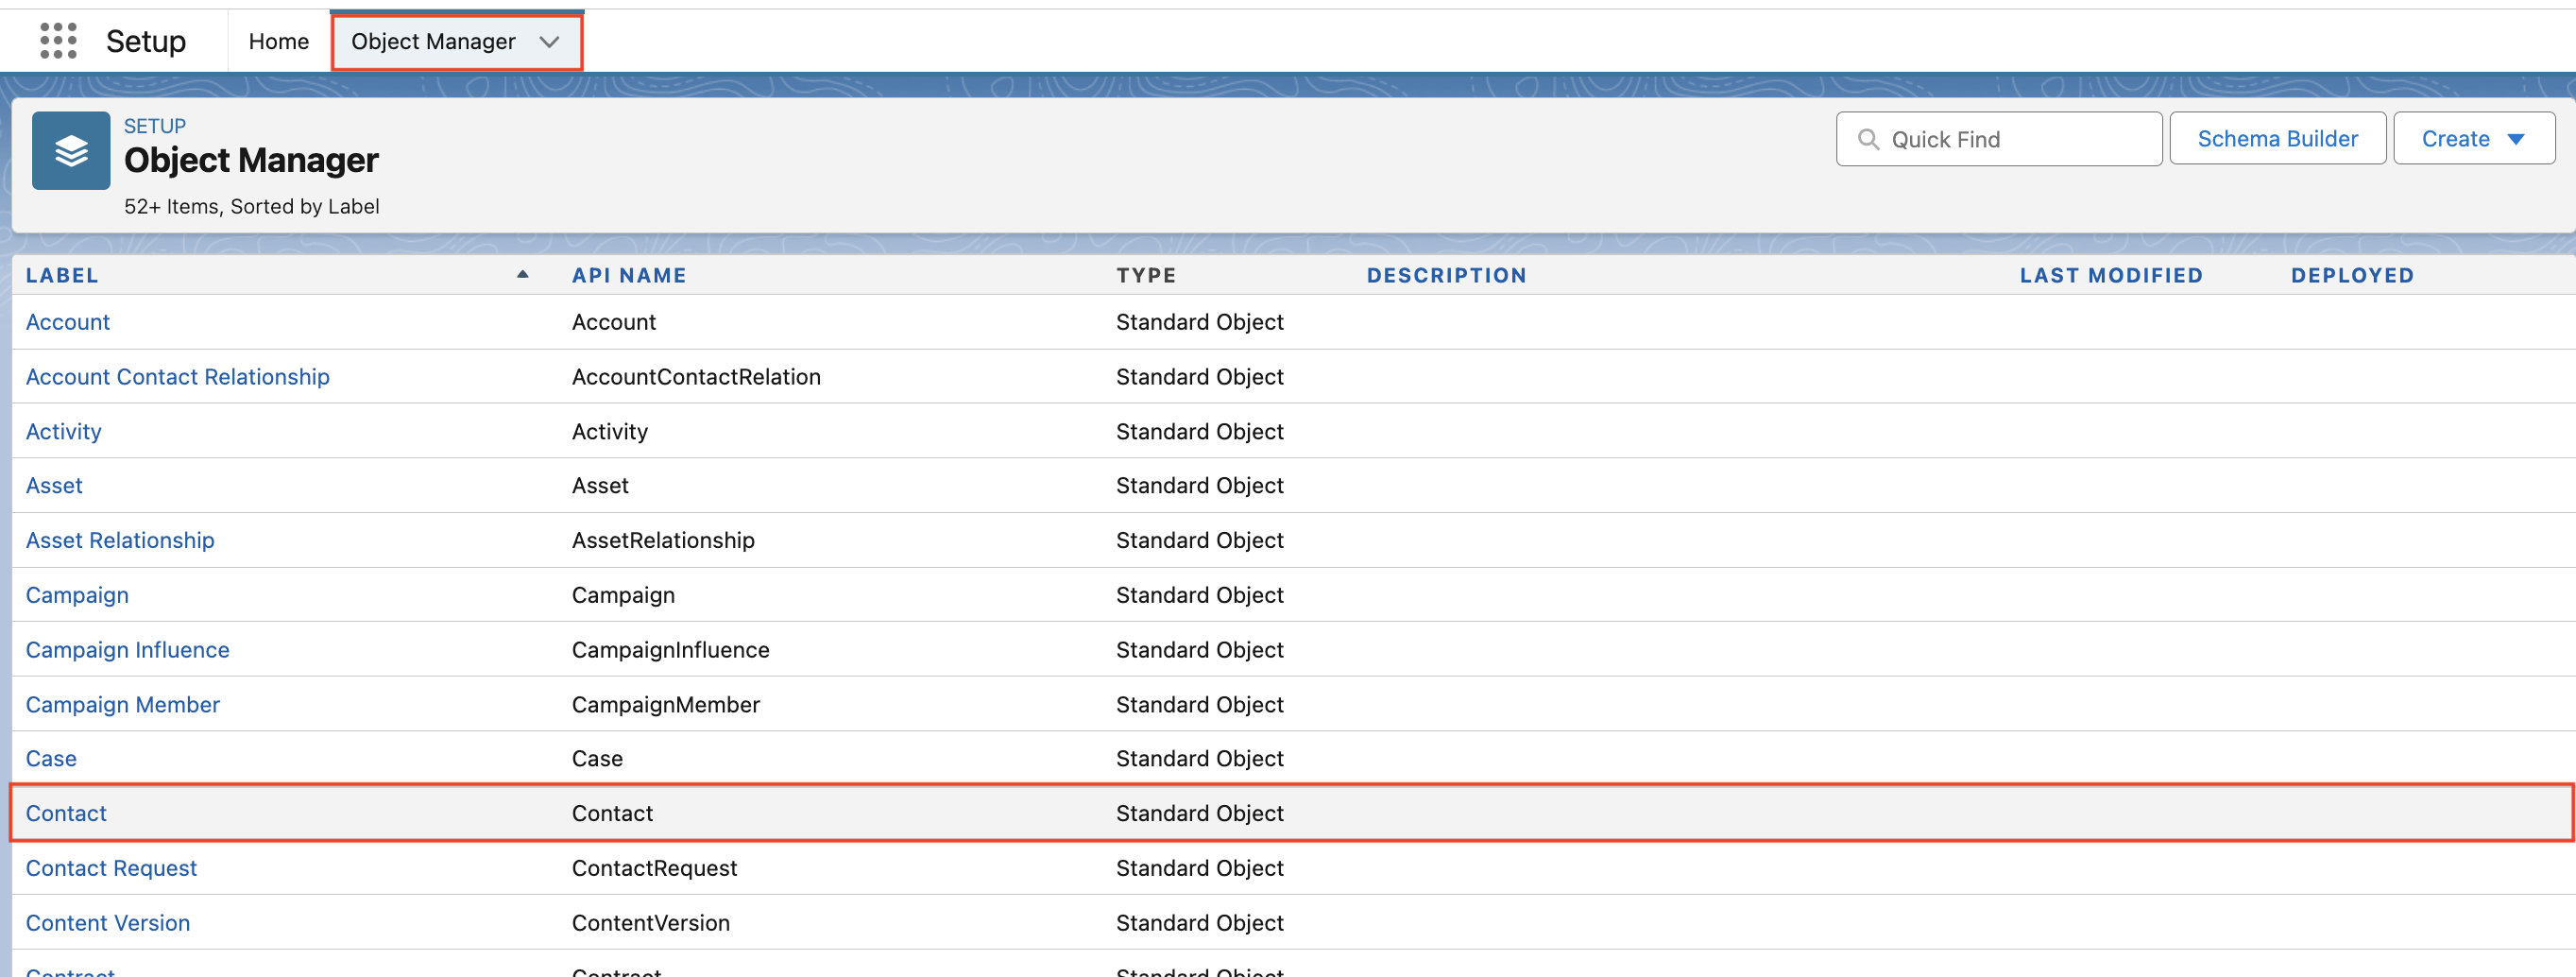
Select the Lightning Record Pages and click to open the record page named Contact Record Page - Three Column:

Click edit to open the App builder page, which allows you to configure the UI and add fields to the contact page:

Search for HelloSign - Send Template and then drag and drop this field to the contact card on the bottom right:
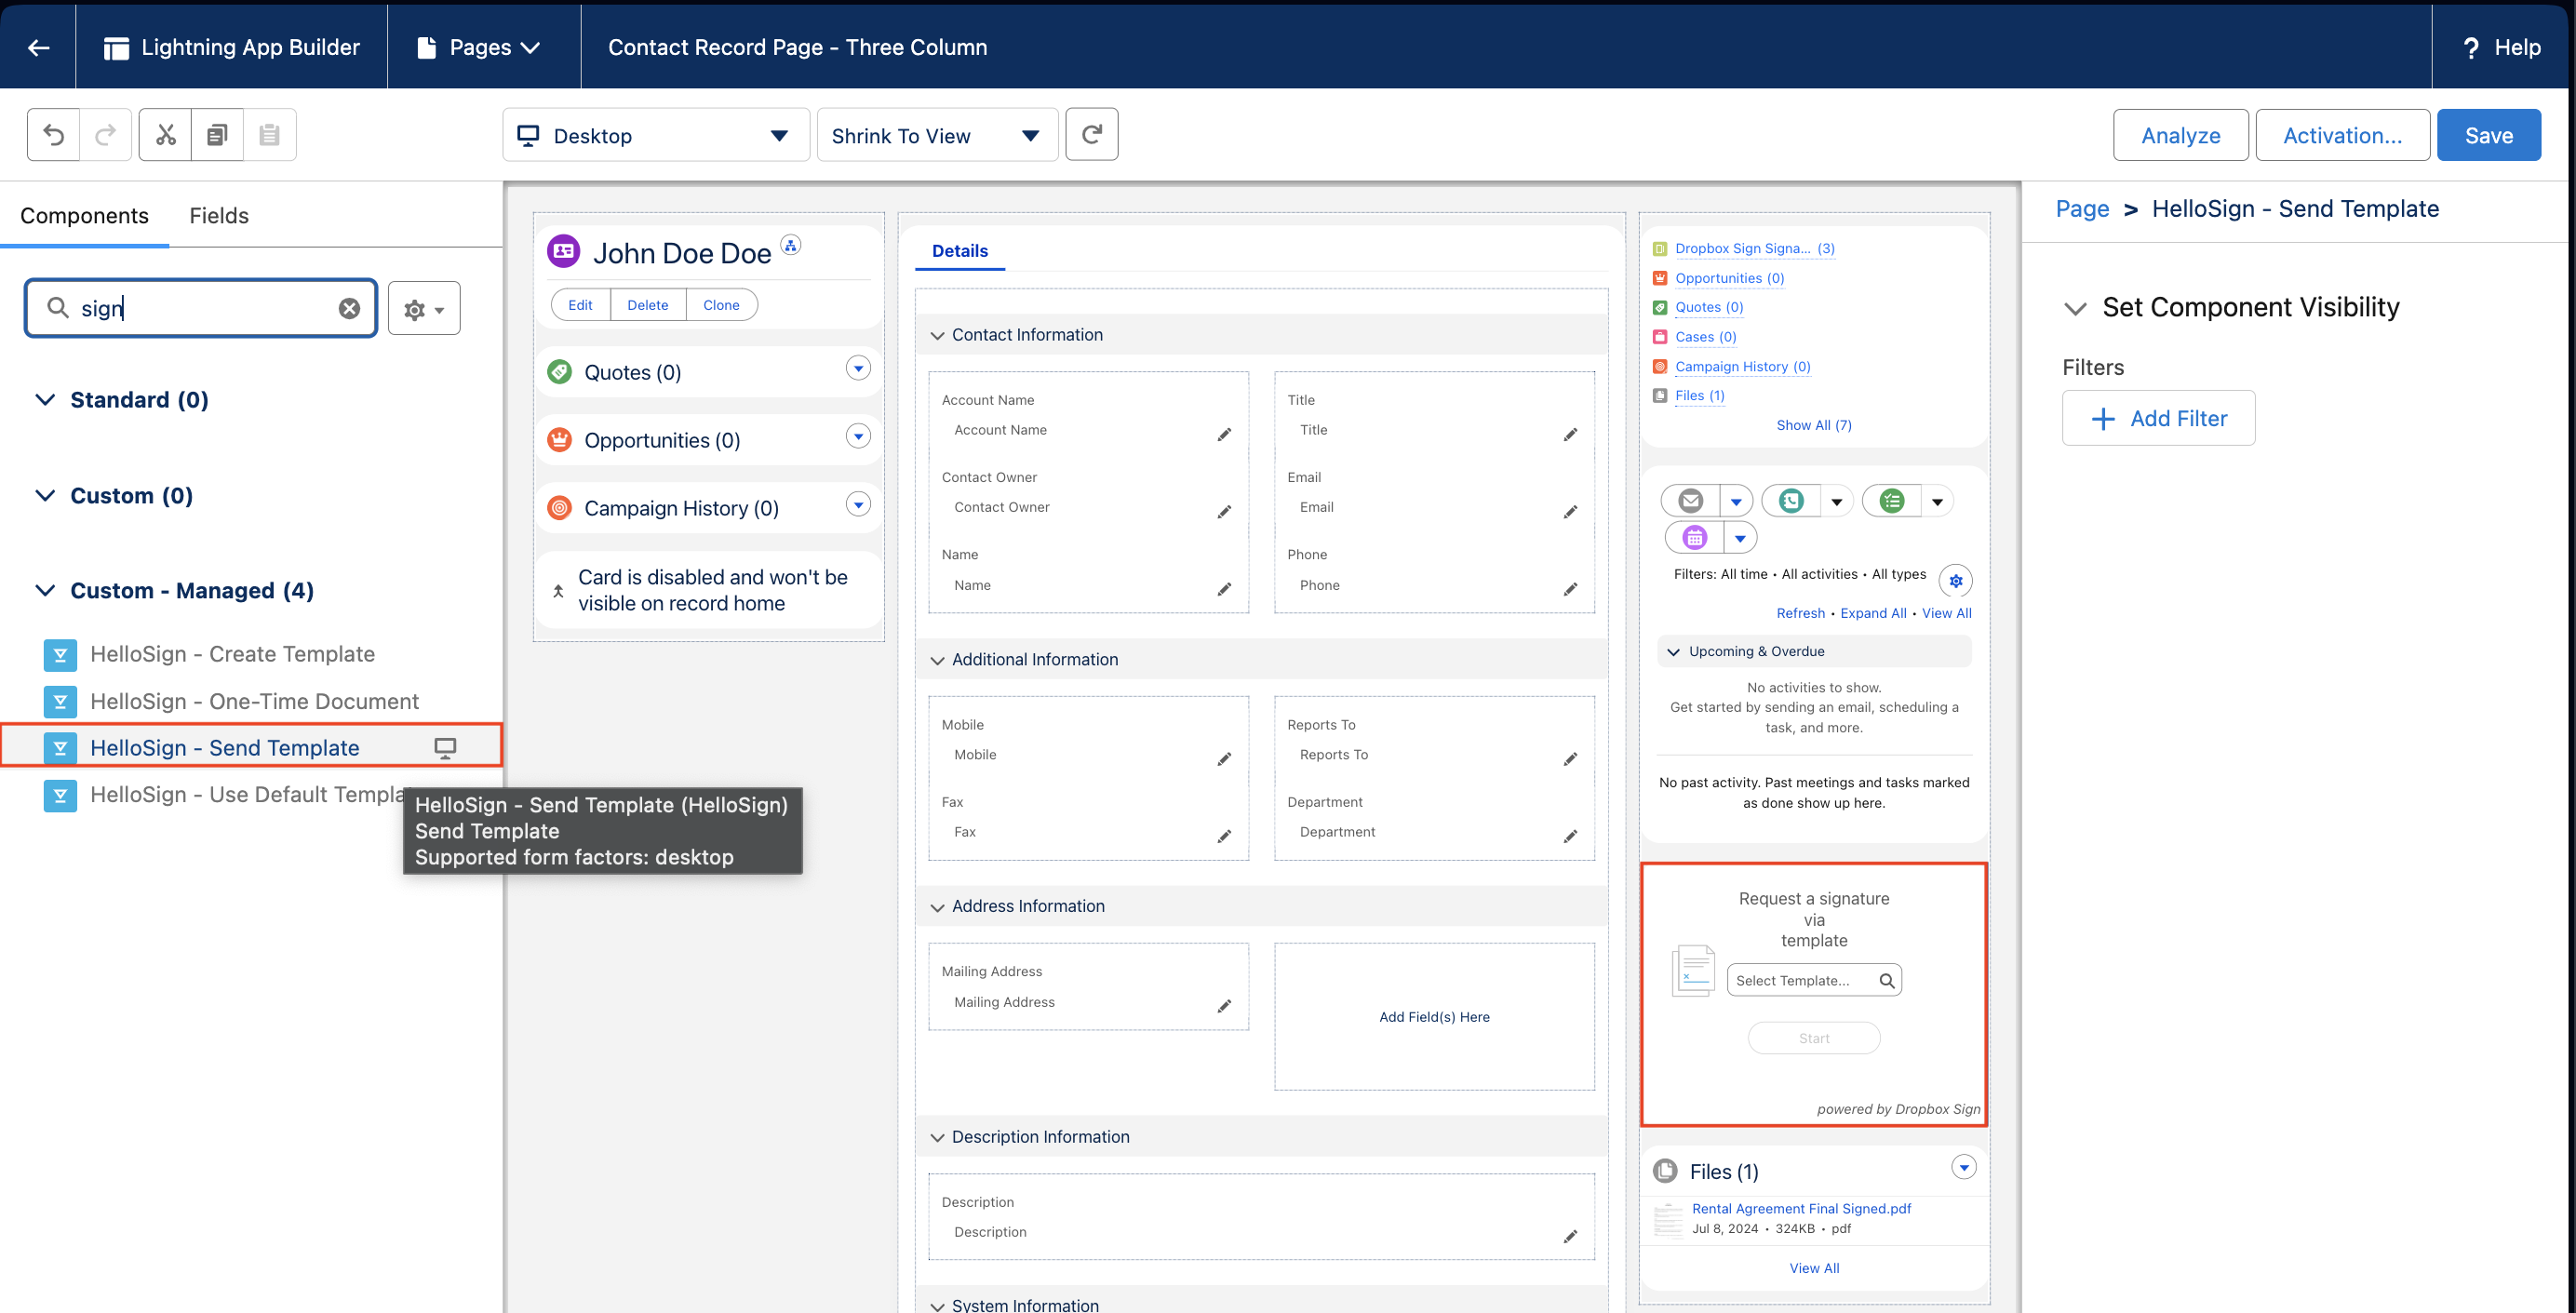
Once done, select Save.
Send a signature request from Salesforce
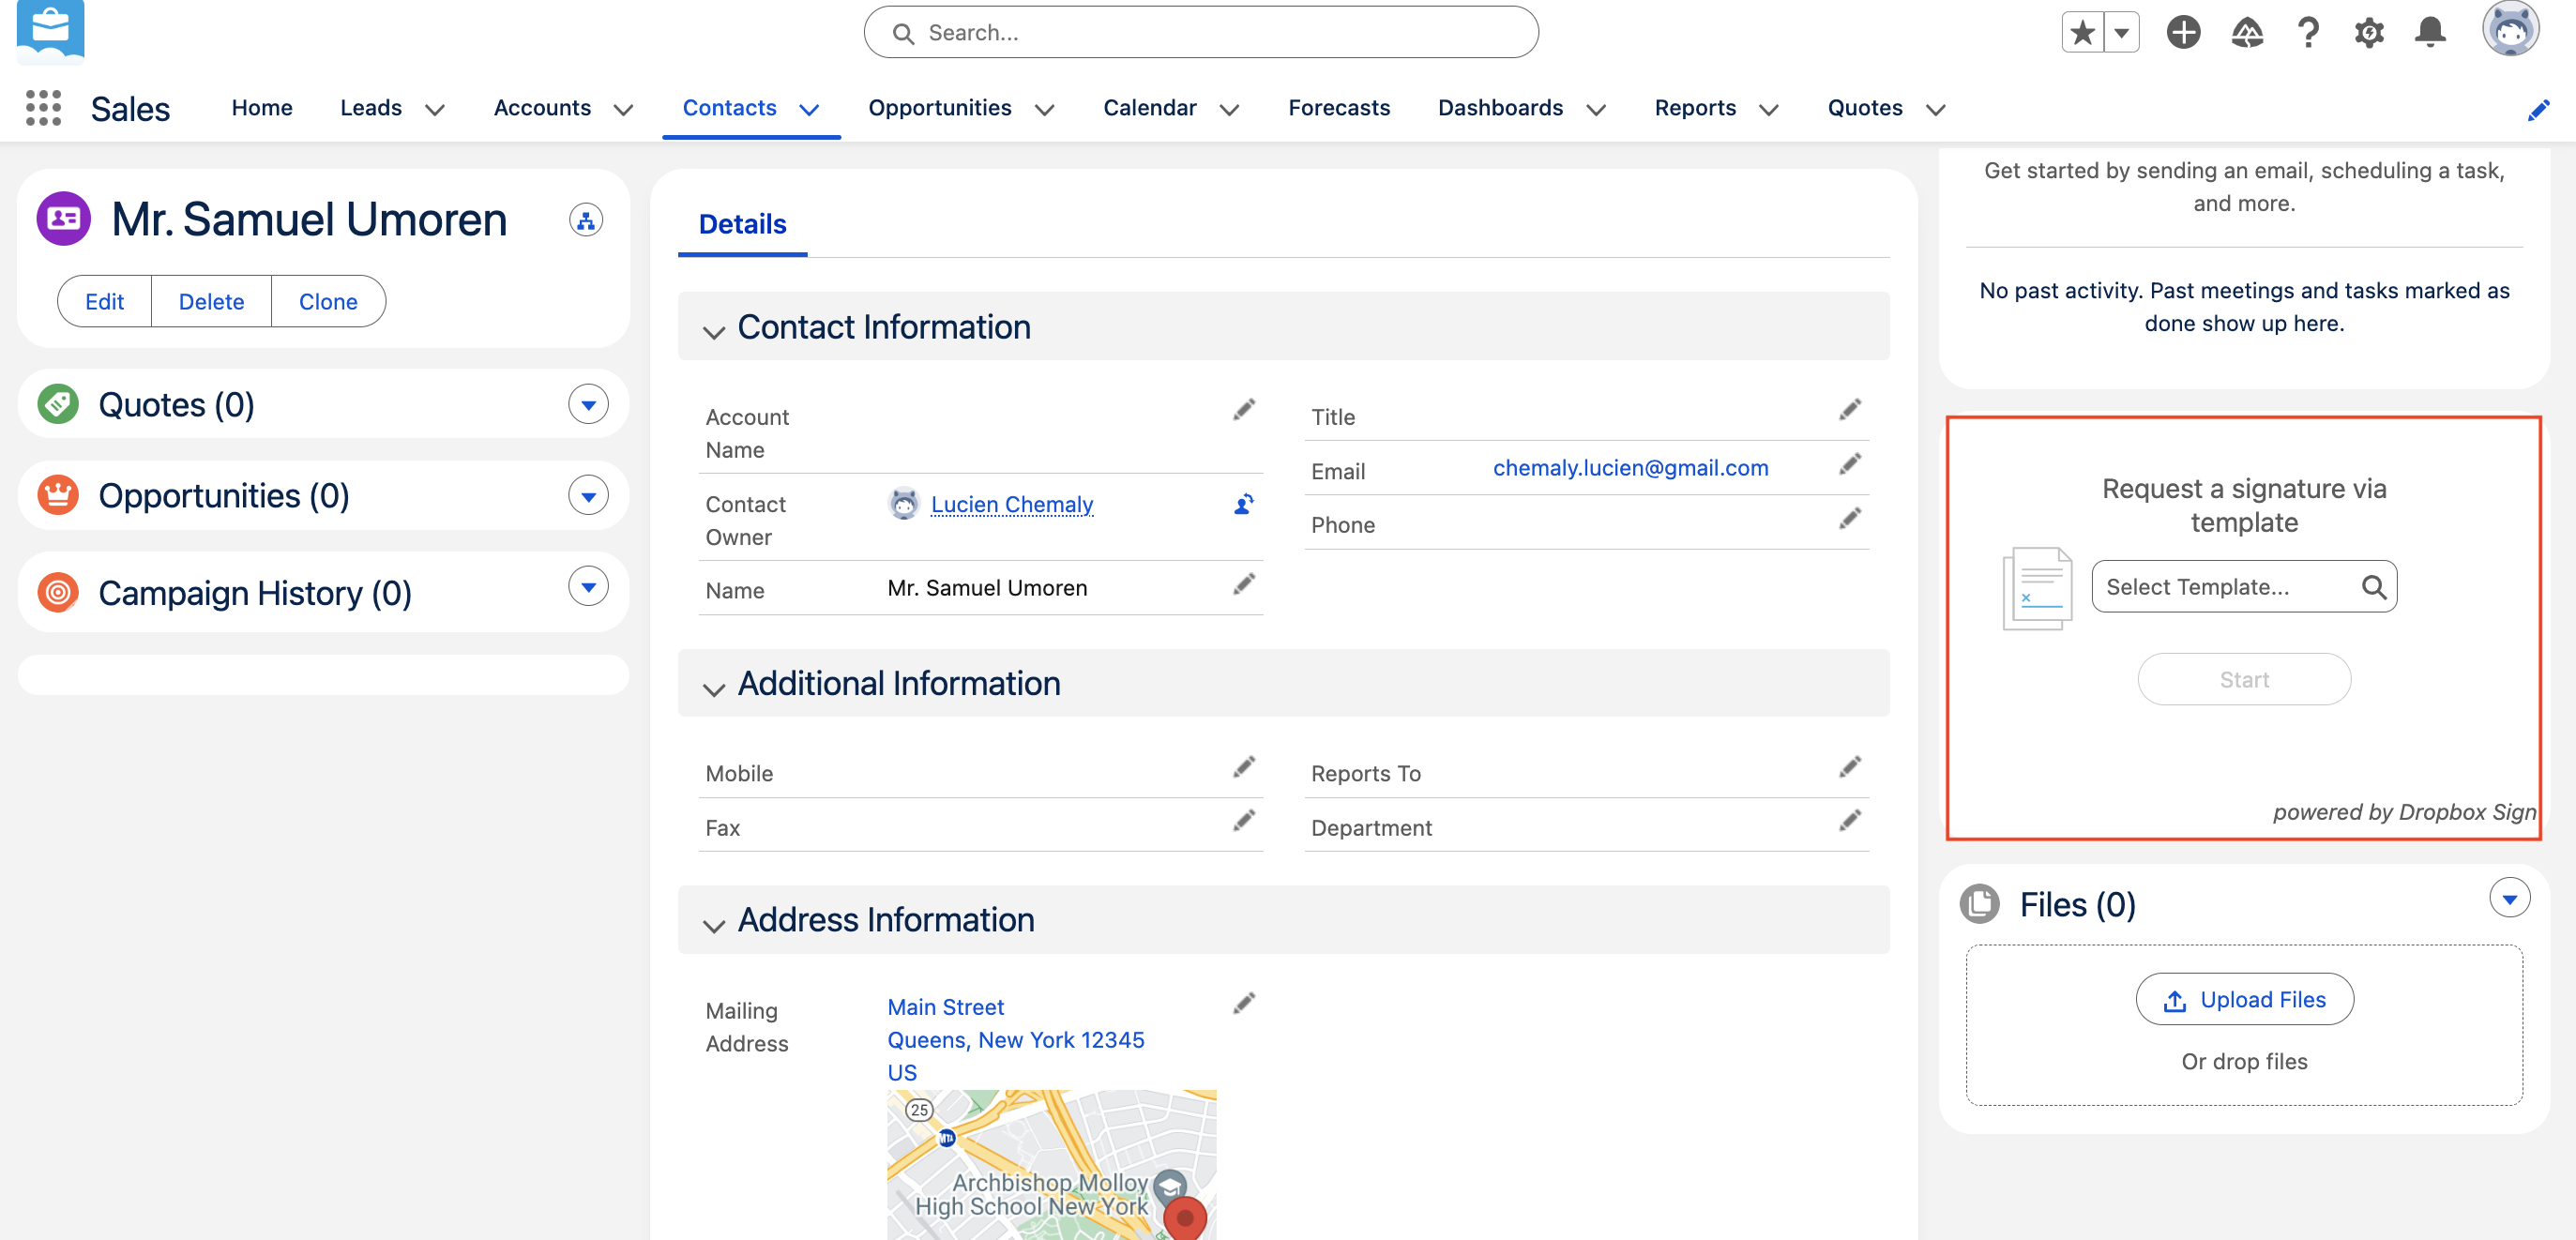
To test the implementation, go to your Salesforce sales dashboard and navigate to your Contacts page. From the list of contacts, open any contact. You should then see the field Request a signature via template:
From the Request a signature via template field, search for and select the template you created in the previous step:
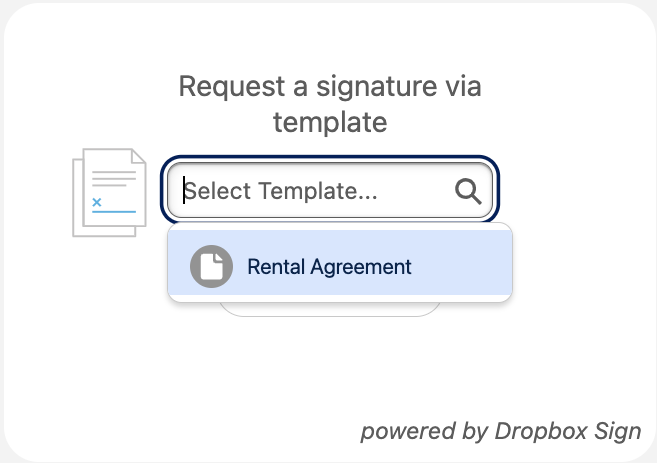
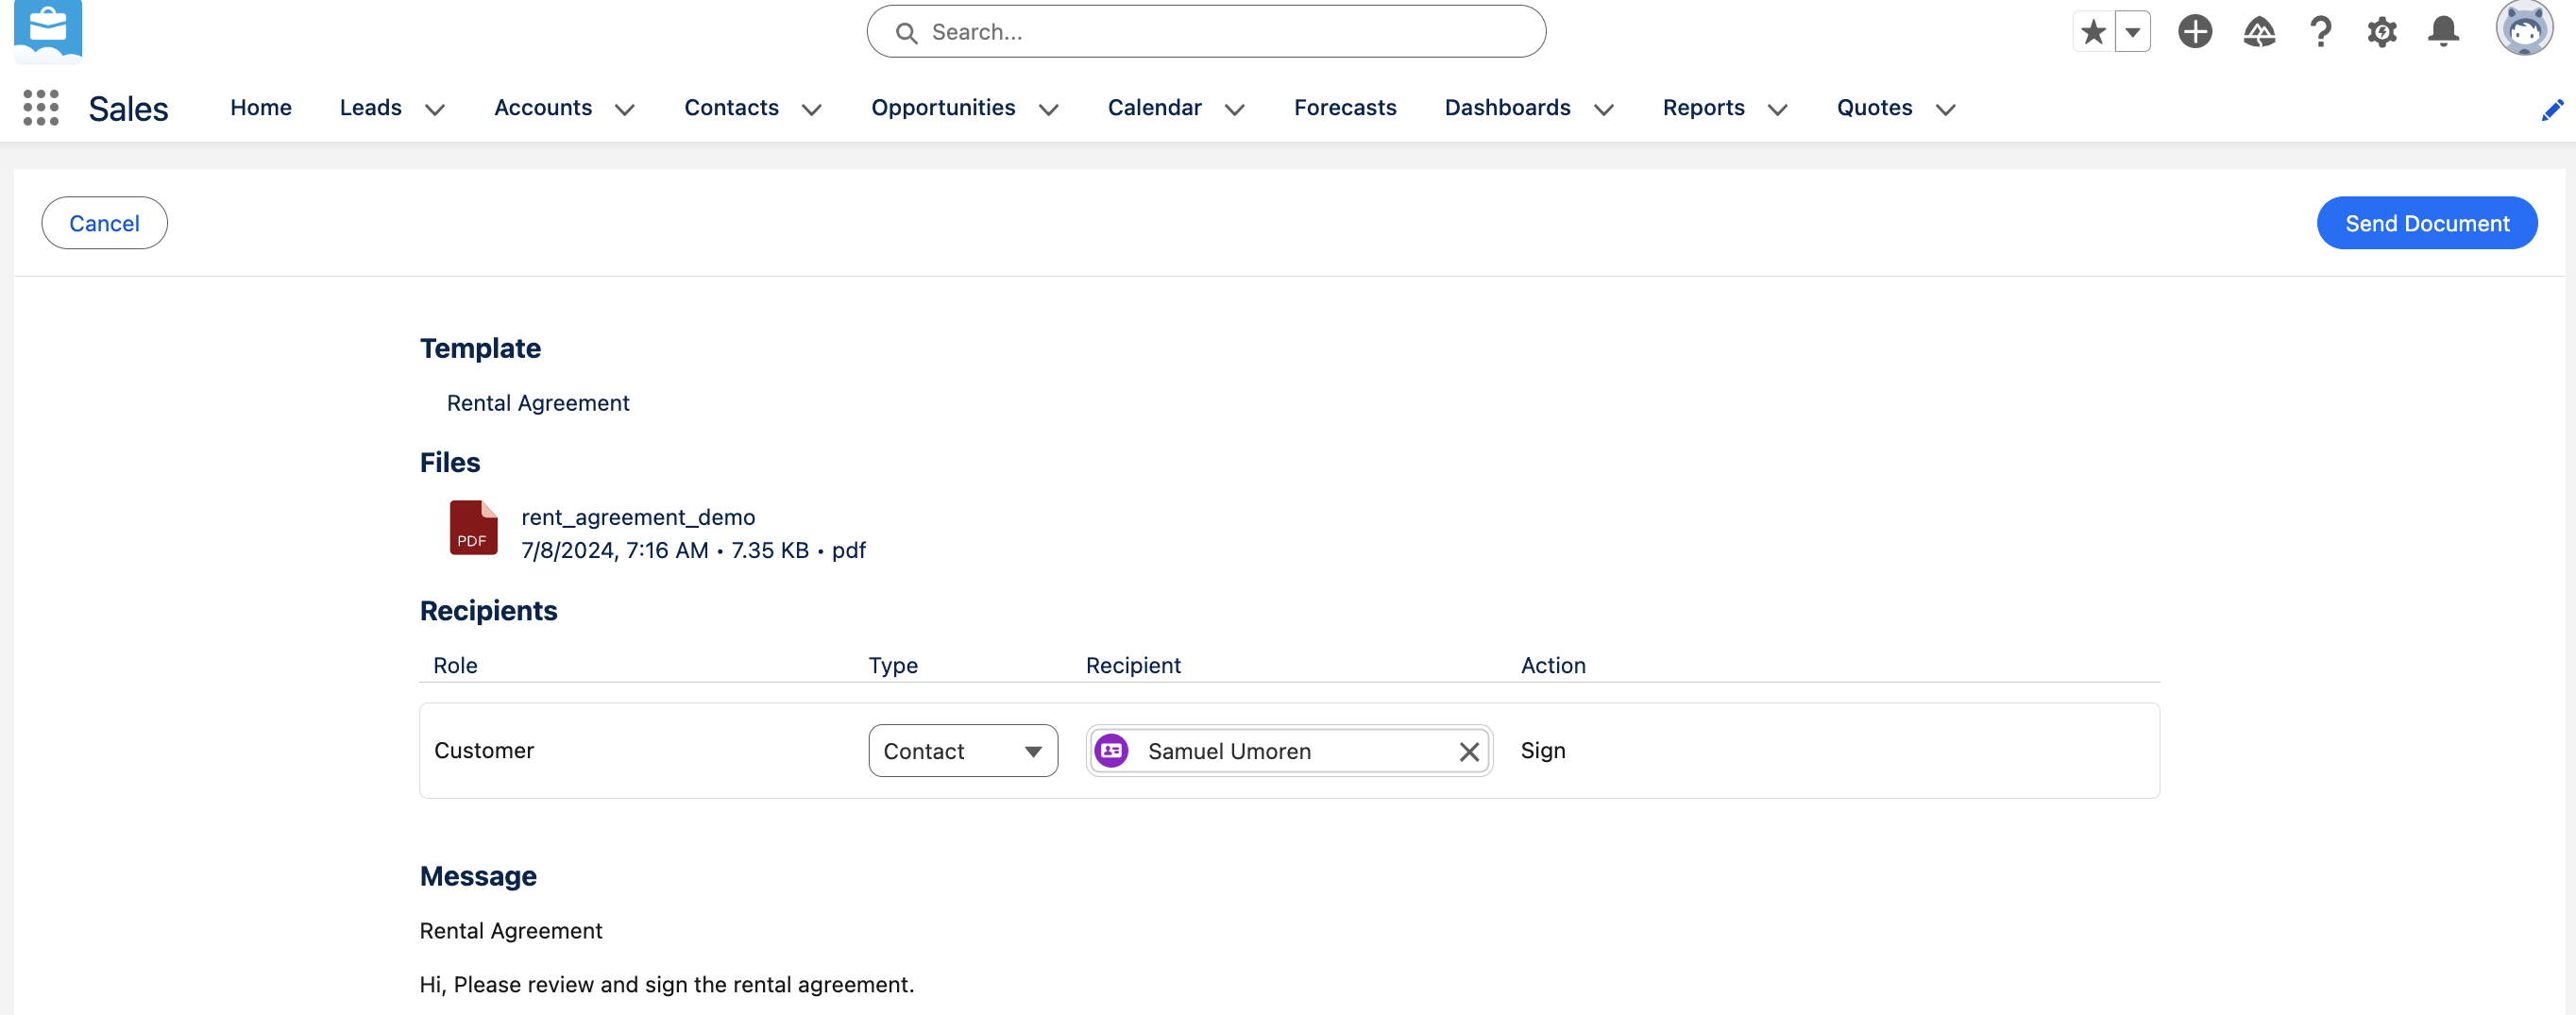
Select the Rental Agreement template and then click Start > Send Document:
At this point, you should receive an email asking you to sign the rental agreement:
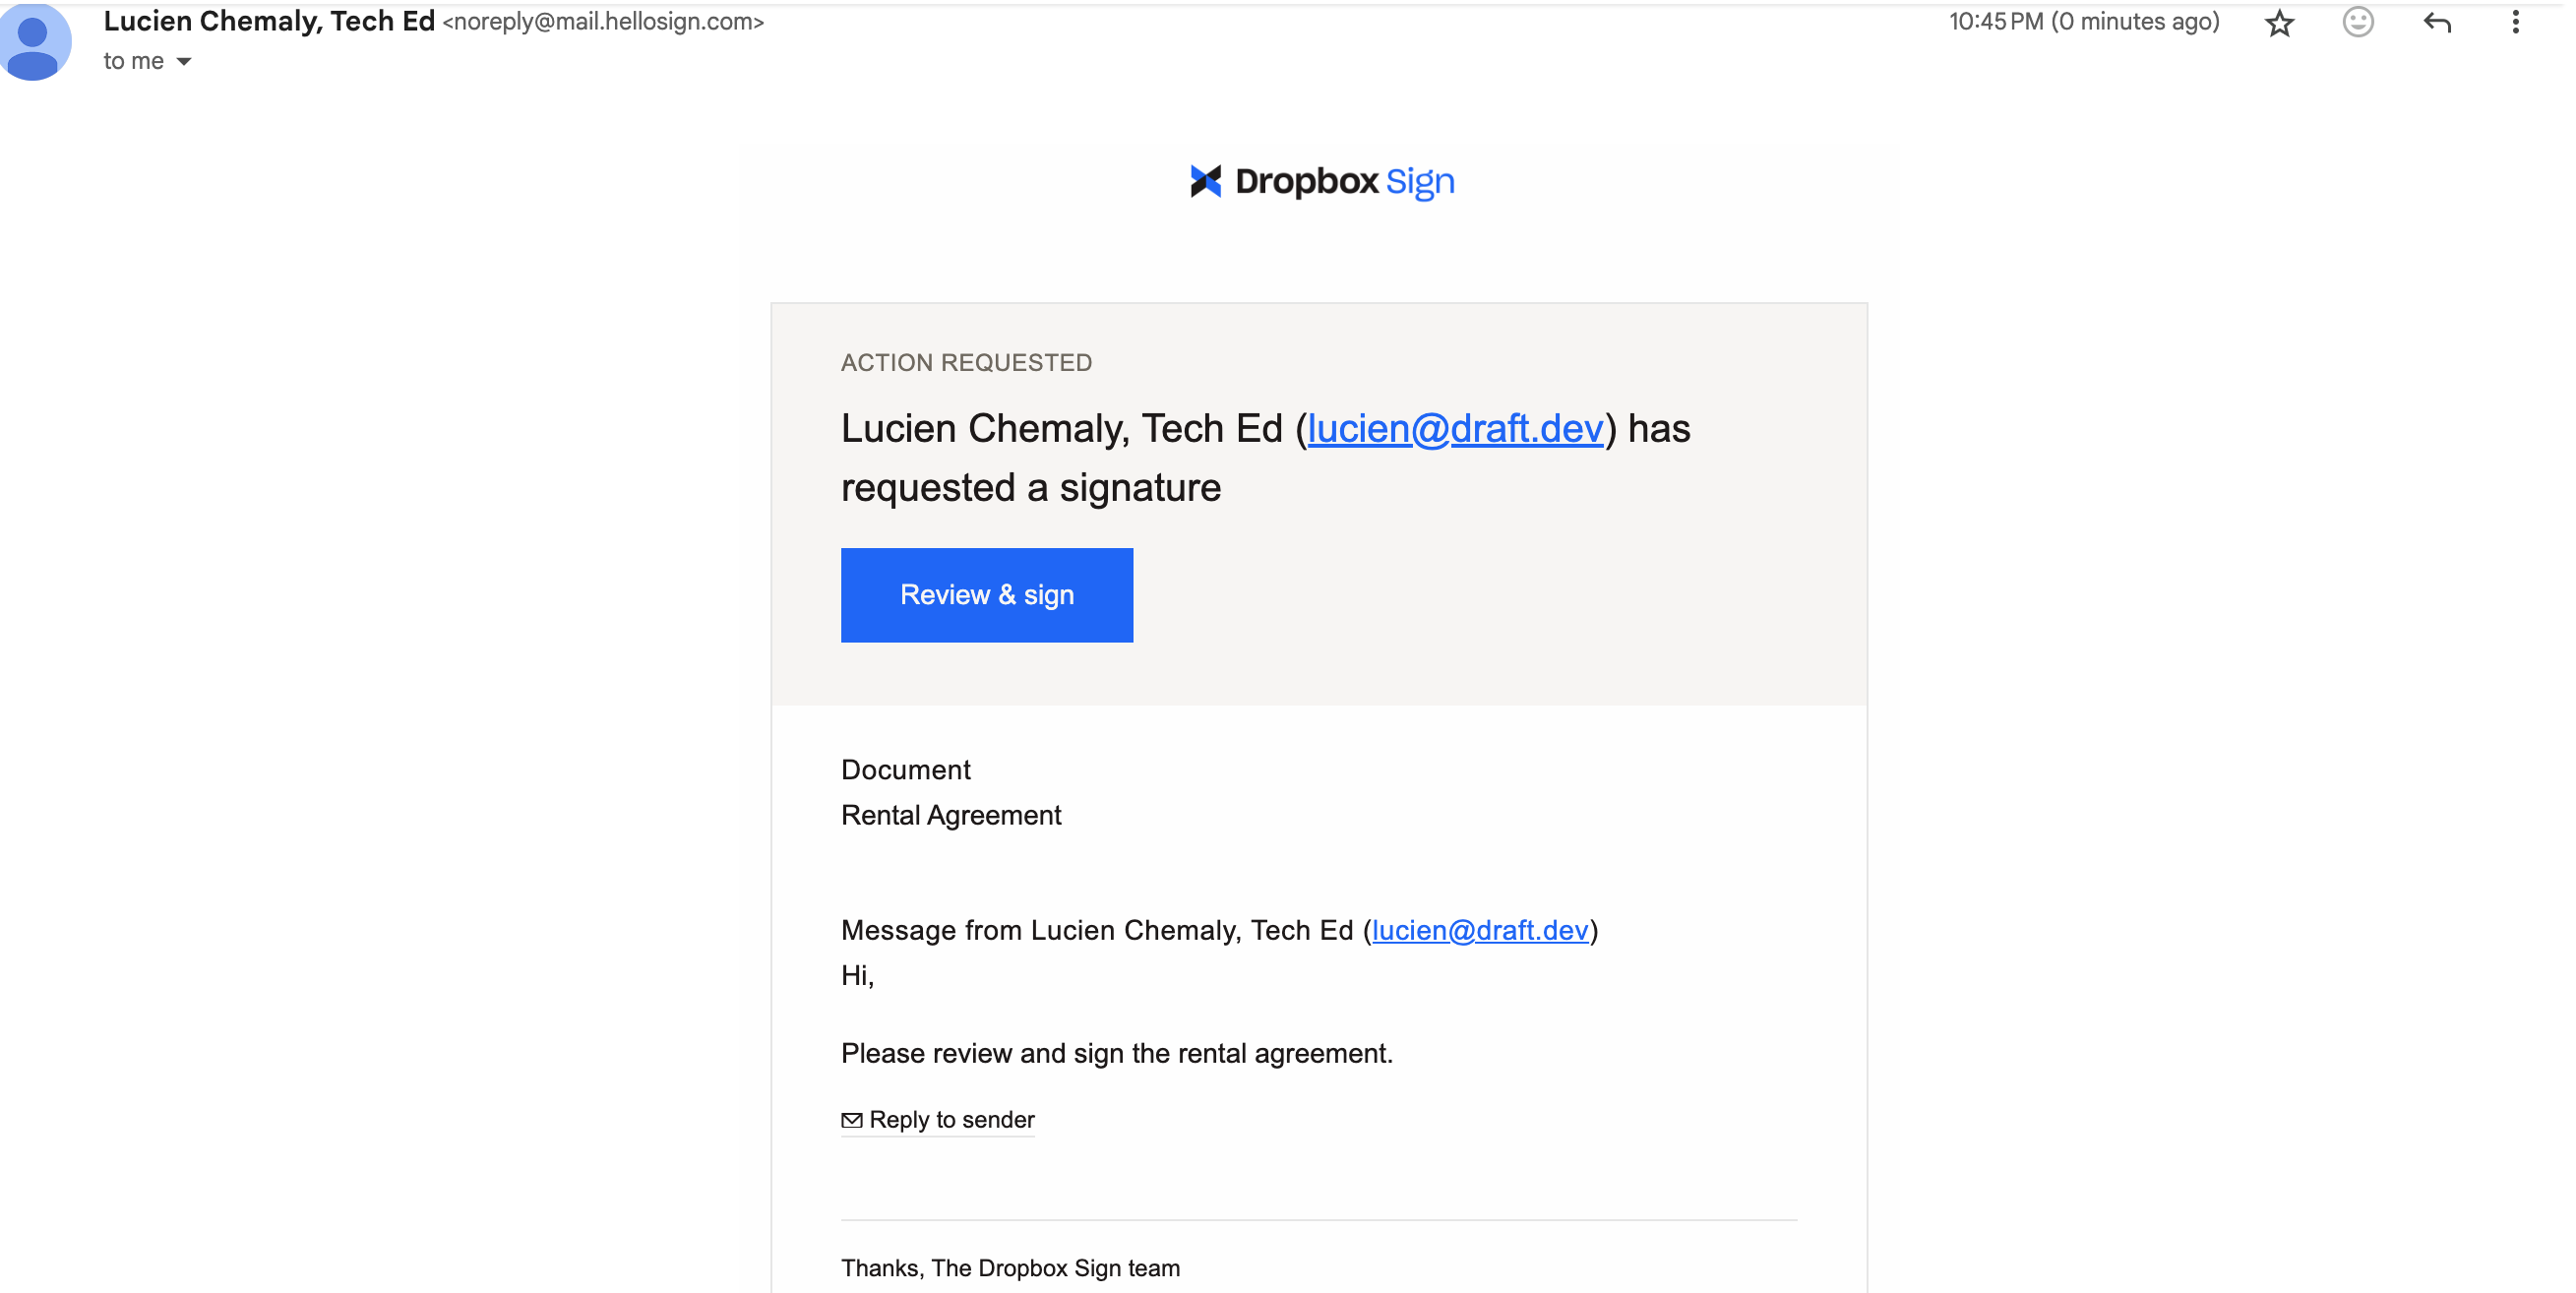
You can review and sign the document by clicking Review & sign, signing the document, and finalizing the process. Once finalized, you will receive another email confirming that this contact has signed your contract.
Check the status of your signature requests from the Dropbox Sign application under Dropbox Sign Signature Requests. This shows you the state of each contract:

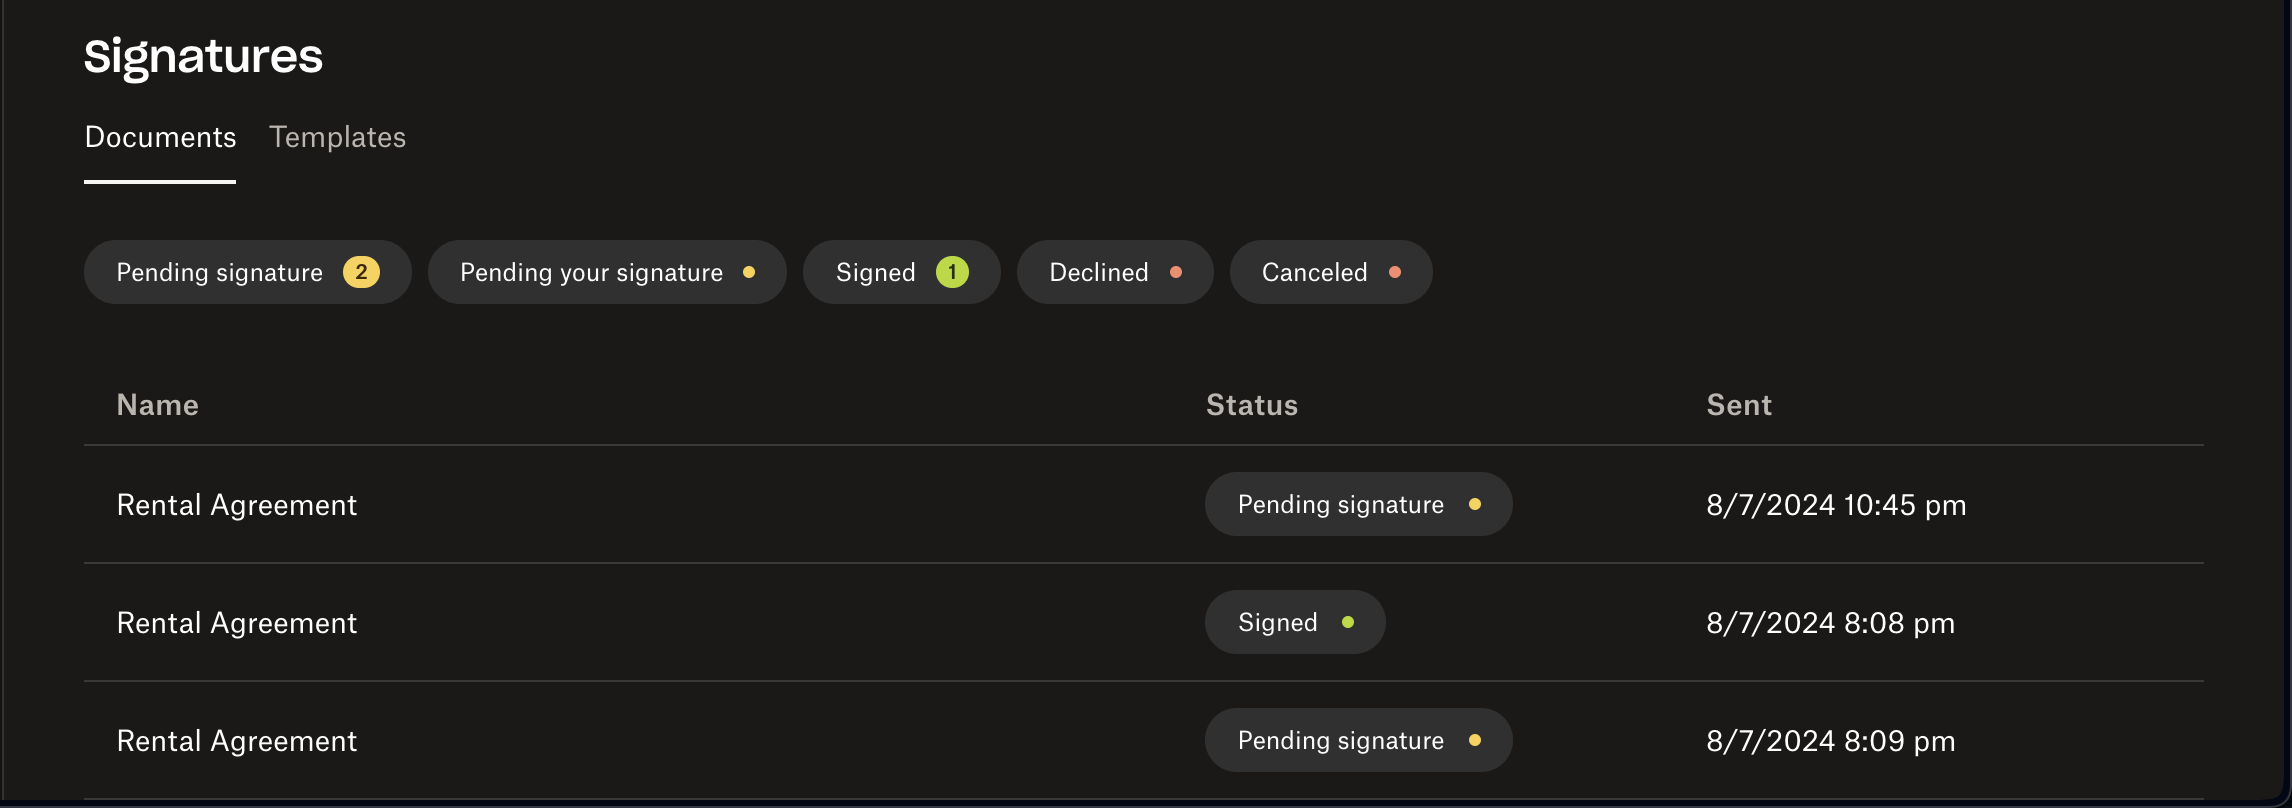
Each rental agreement is automatically updated and saved in your Dropbox Sign account. These saved contracts can be accessed and managed at any time. Open the Signatures page under the Home tab of your Dropbox account, and you should find the contracts stores with their respective statuses:
Use automation with Salesforce workflows
To streamline your workflow and ensure that documents are sent for signature automatically, you can use Salesforce workflows. To keep things simple, the following demonstrates how to automate the process so that when a new contract is sent for signature, you receive an email notification. However, you can extend this automation to include additional actions, such as creating tasks or updating records.
To automate your workflow, open the App Launcher from the menu and search for Flows:

Click New to create a new flow:

Then, select Start From Scratch:

Choose Record-Triggered Flow:
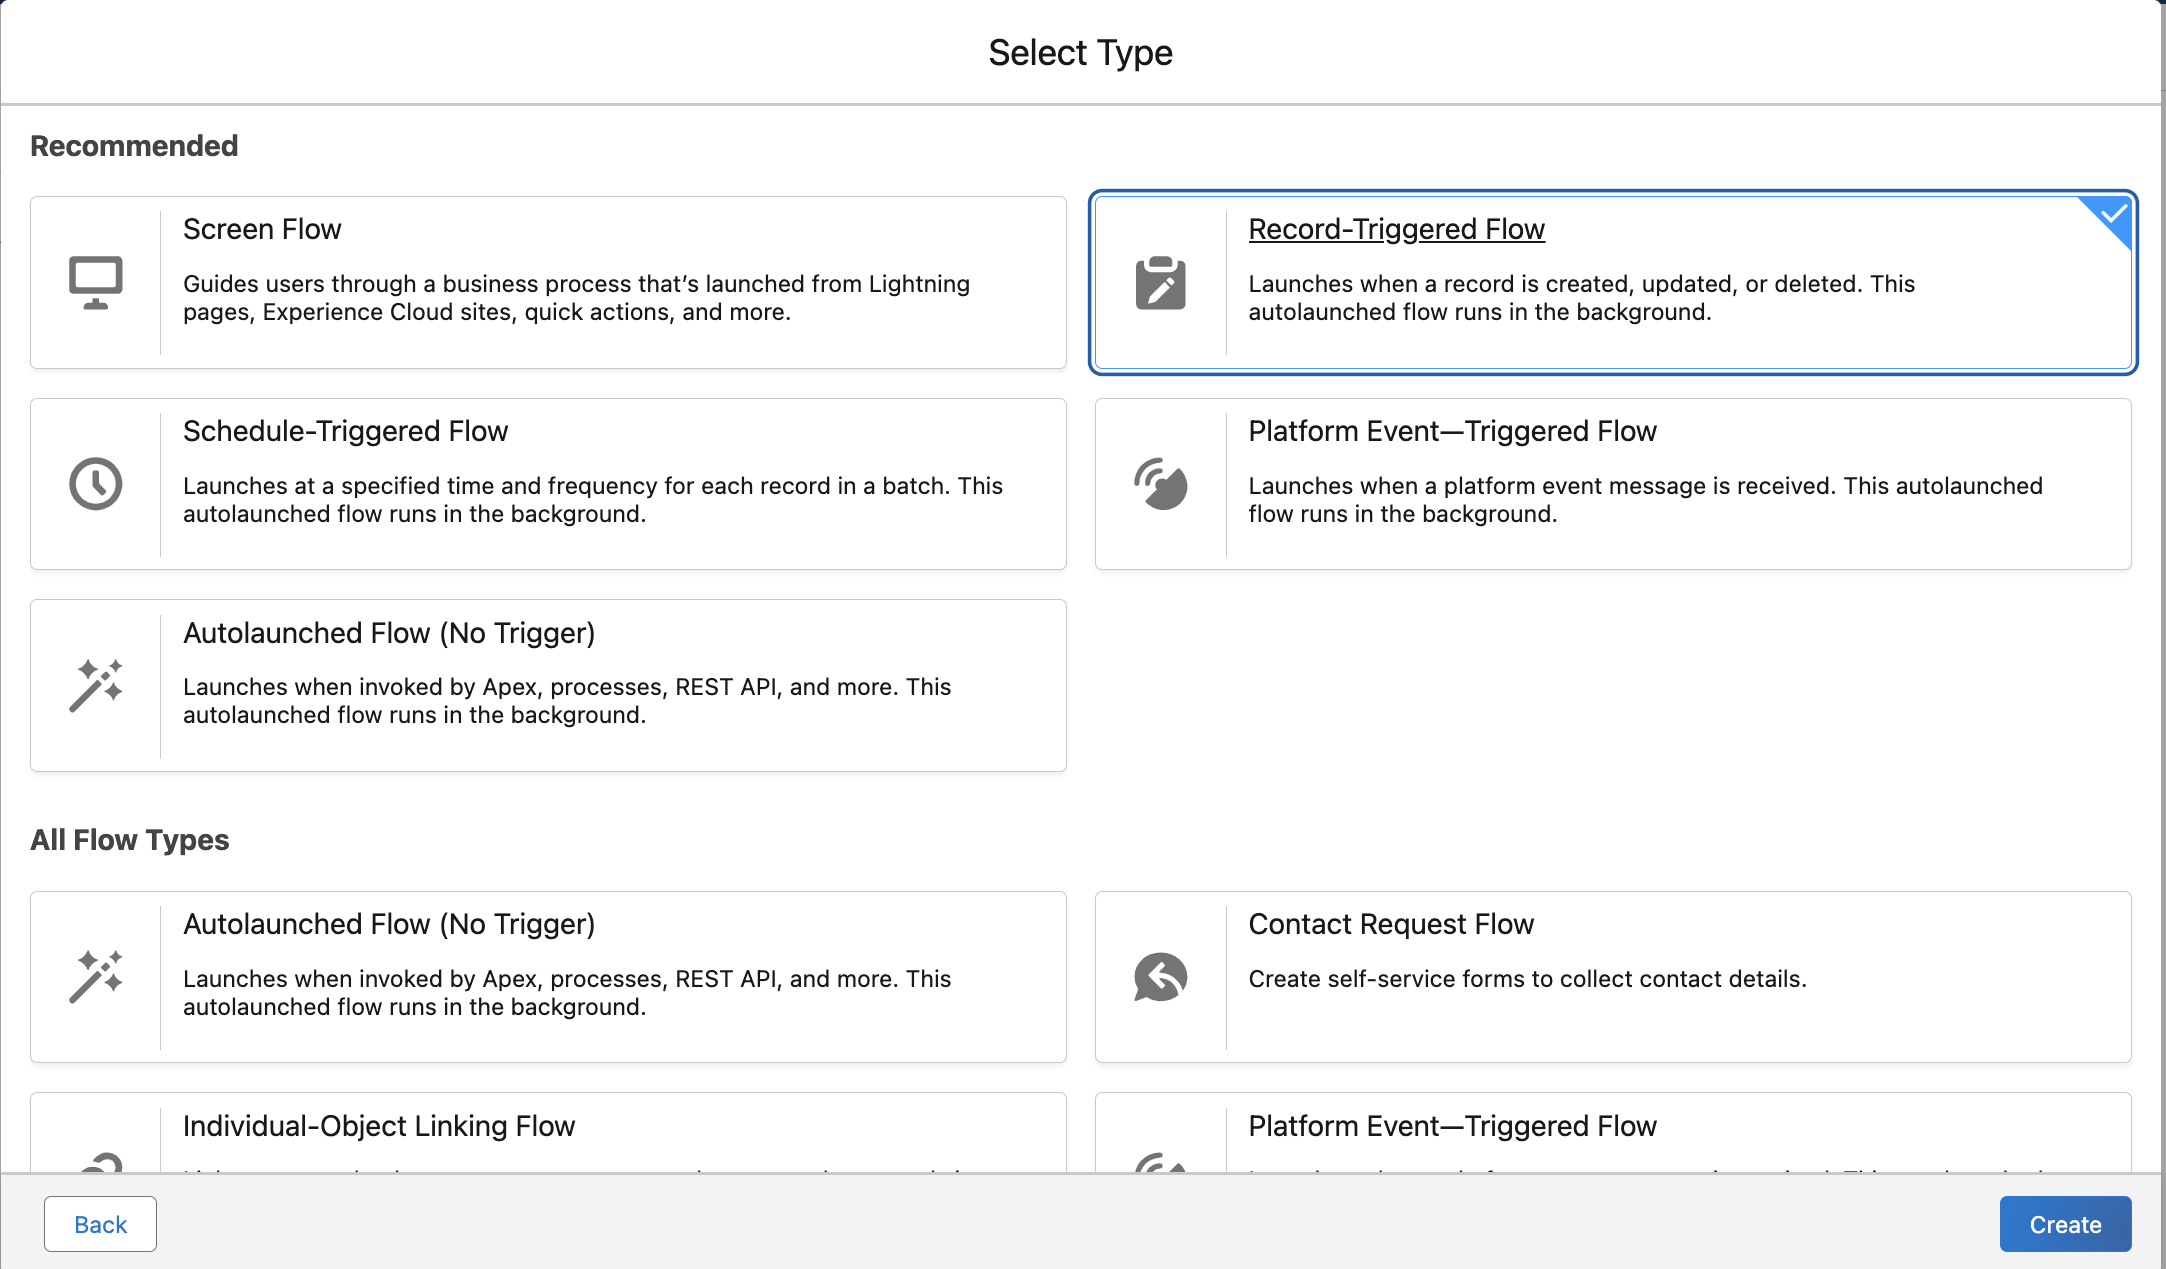
In the object field, select Dropbox Sign Signature Request > Actions and Related Records:

Under the Start component on the left side of the graphical representation of the flow, you can add additional components. Click under Run Immediately and add an Action element:
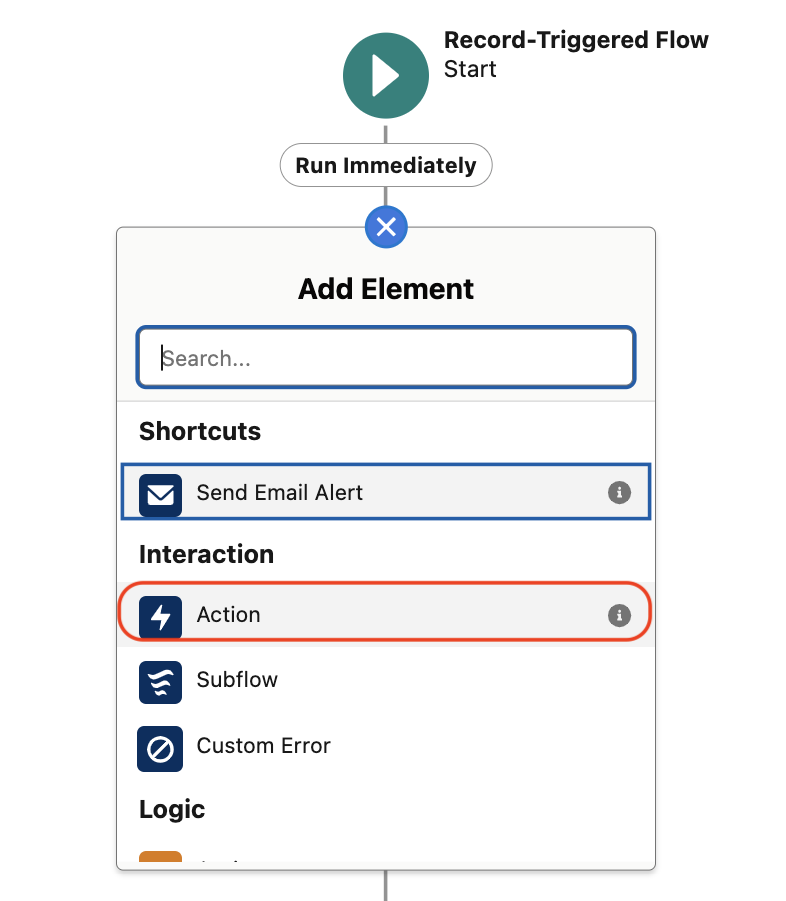
When the action opens, search for Send Email and select it to open it:

Fill in the Label and API Name for the Send Email action. These can be any unique name of your choosing:
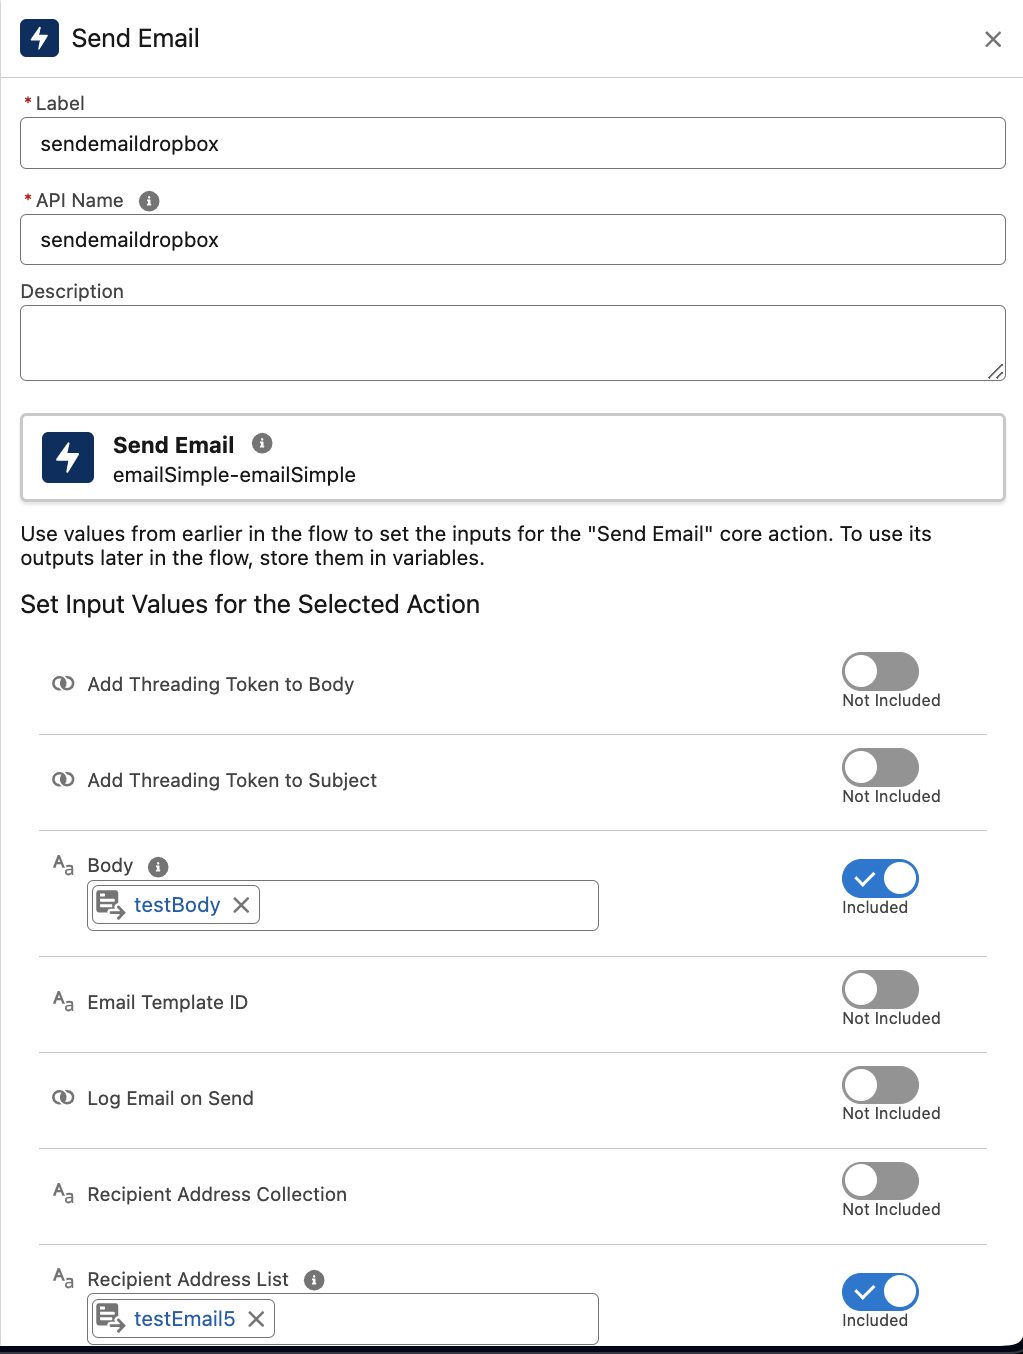
Then, fill in the Body, Recipient Address List, Sender Email Address, and Subject. Any dummy data works here. Just make sure the recipient has your email address:

Click Save in the top right of the screen. You are then asked to name your flow. Then click Save again:
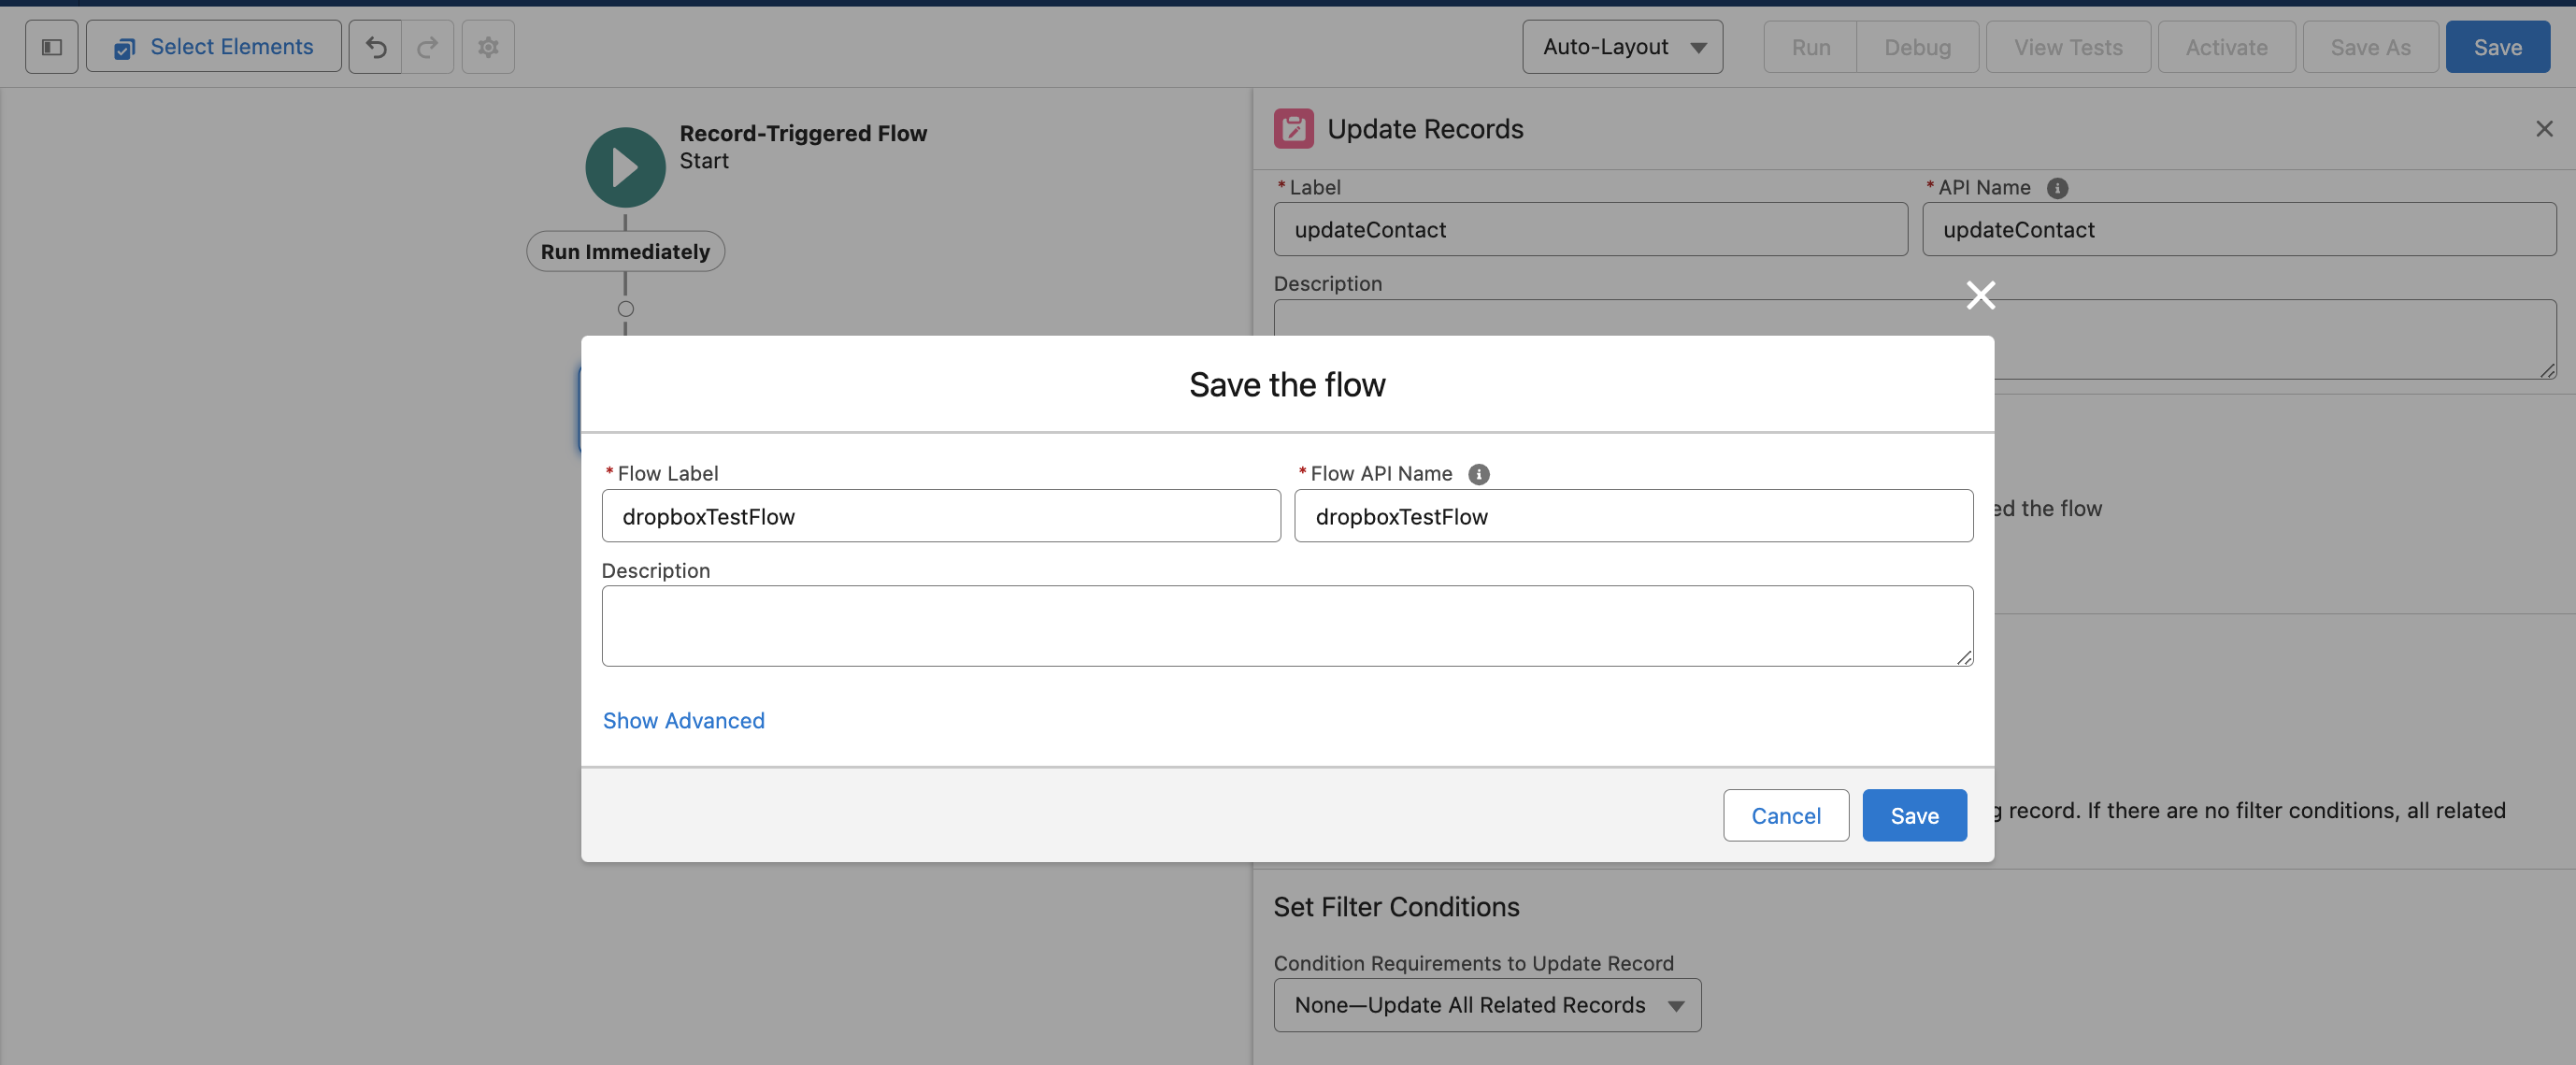
After you've saved the flow, you need to activate it by clicking Activate in the top navigation bar:

To test the implementation, you need to go to any contact and select the rental agreement template. Then, follow the same steps you did previously to send the document.
Once the document is sent for signature, you receive an email based on the defined email details you included in your flow:

Conclusion
Integrating Dropbox Sign with Salesforce significantly enhances operational efficiency, reduces errors, and accelerates the sales cycle. By following the steps outlined in this tutorial, you can automate the document signing process, track and manage documents seamlessly, and ensure secure storage and compliance.
If you're looking to streamline your document signing workflow, consider Dropbox Sign. It not only improves document management but is also fully customizable, offering flexibility and scalability as your business grows. With customizable branding and an embedded signing experience, Dropbox Sign can reduce bounce rates and increase document completion by as much as 26 percent. Plus, Dropbox Sign ensures your documents are legally binding, giving them the same legal standing as traditional paper forms.
時時參與其中
Thank you!
Thank you for subscribing!


