58% of businesses primarily focus on paperwork during the onboarding process. While we all know paperwork is important, it shouldn’t take away from time that could be spent improving the new hire experience and reducing time to hire.
Dropbox Sign can specifically save you time on formatting and data entry so that you can get your documents prepared and signed faster—and it’s helping businesses save huge amounts of time.
- Flow reduced the administrative time for hiring healthcare professionals by 50% using templates.
- Crelate’s applicant tracking system uses Dropbox Sign to help recruiters build templates with multiple eSignature fields in under one minute.
- And happy HR users are saying things like, “I set up some templates with Dropbox Sign and found them to be simple and extremely easy to remove redundancy. Great work!”
Looking for time-saving results like these? Follow our step-by-step guide on how to create templates in Dropbox Sign.
Setting up the template
1. If you’re starting from the Dropbox Sign app home, click Create a template.
2. Upload your document(s) by choosing Upload file or using cloud storage options, such as Dropbox, Google Drive, Evernote, or OneDrive. You can also drag-and-drop from your computer.

3. Once you've uploaded your documents, select Next.
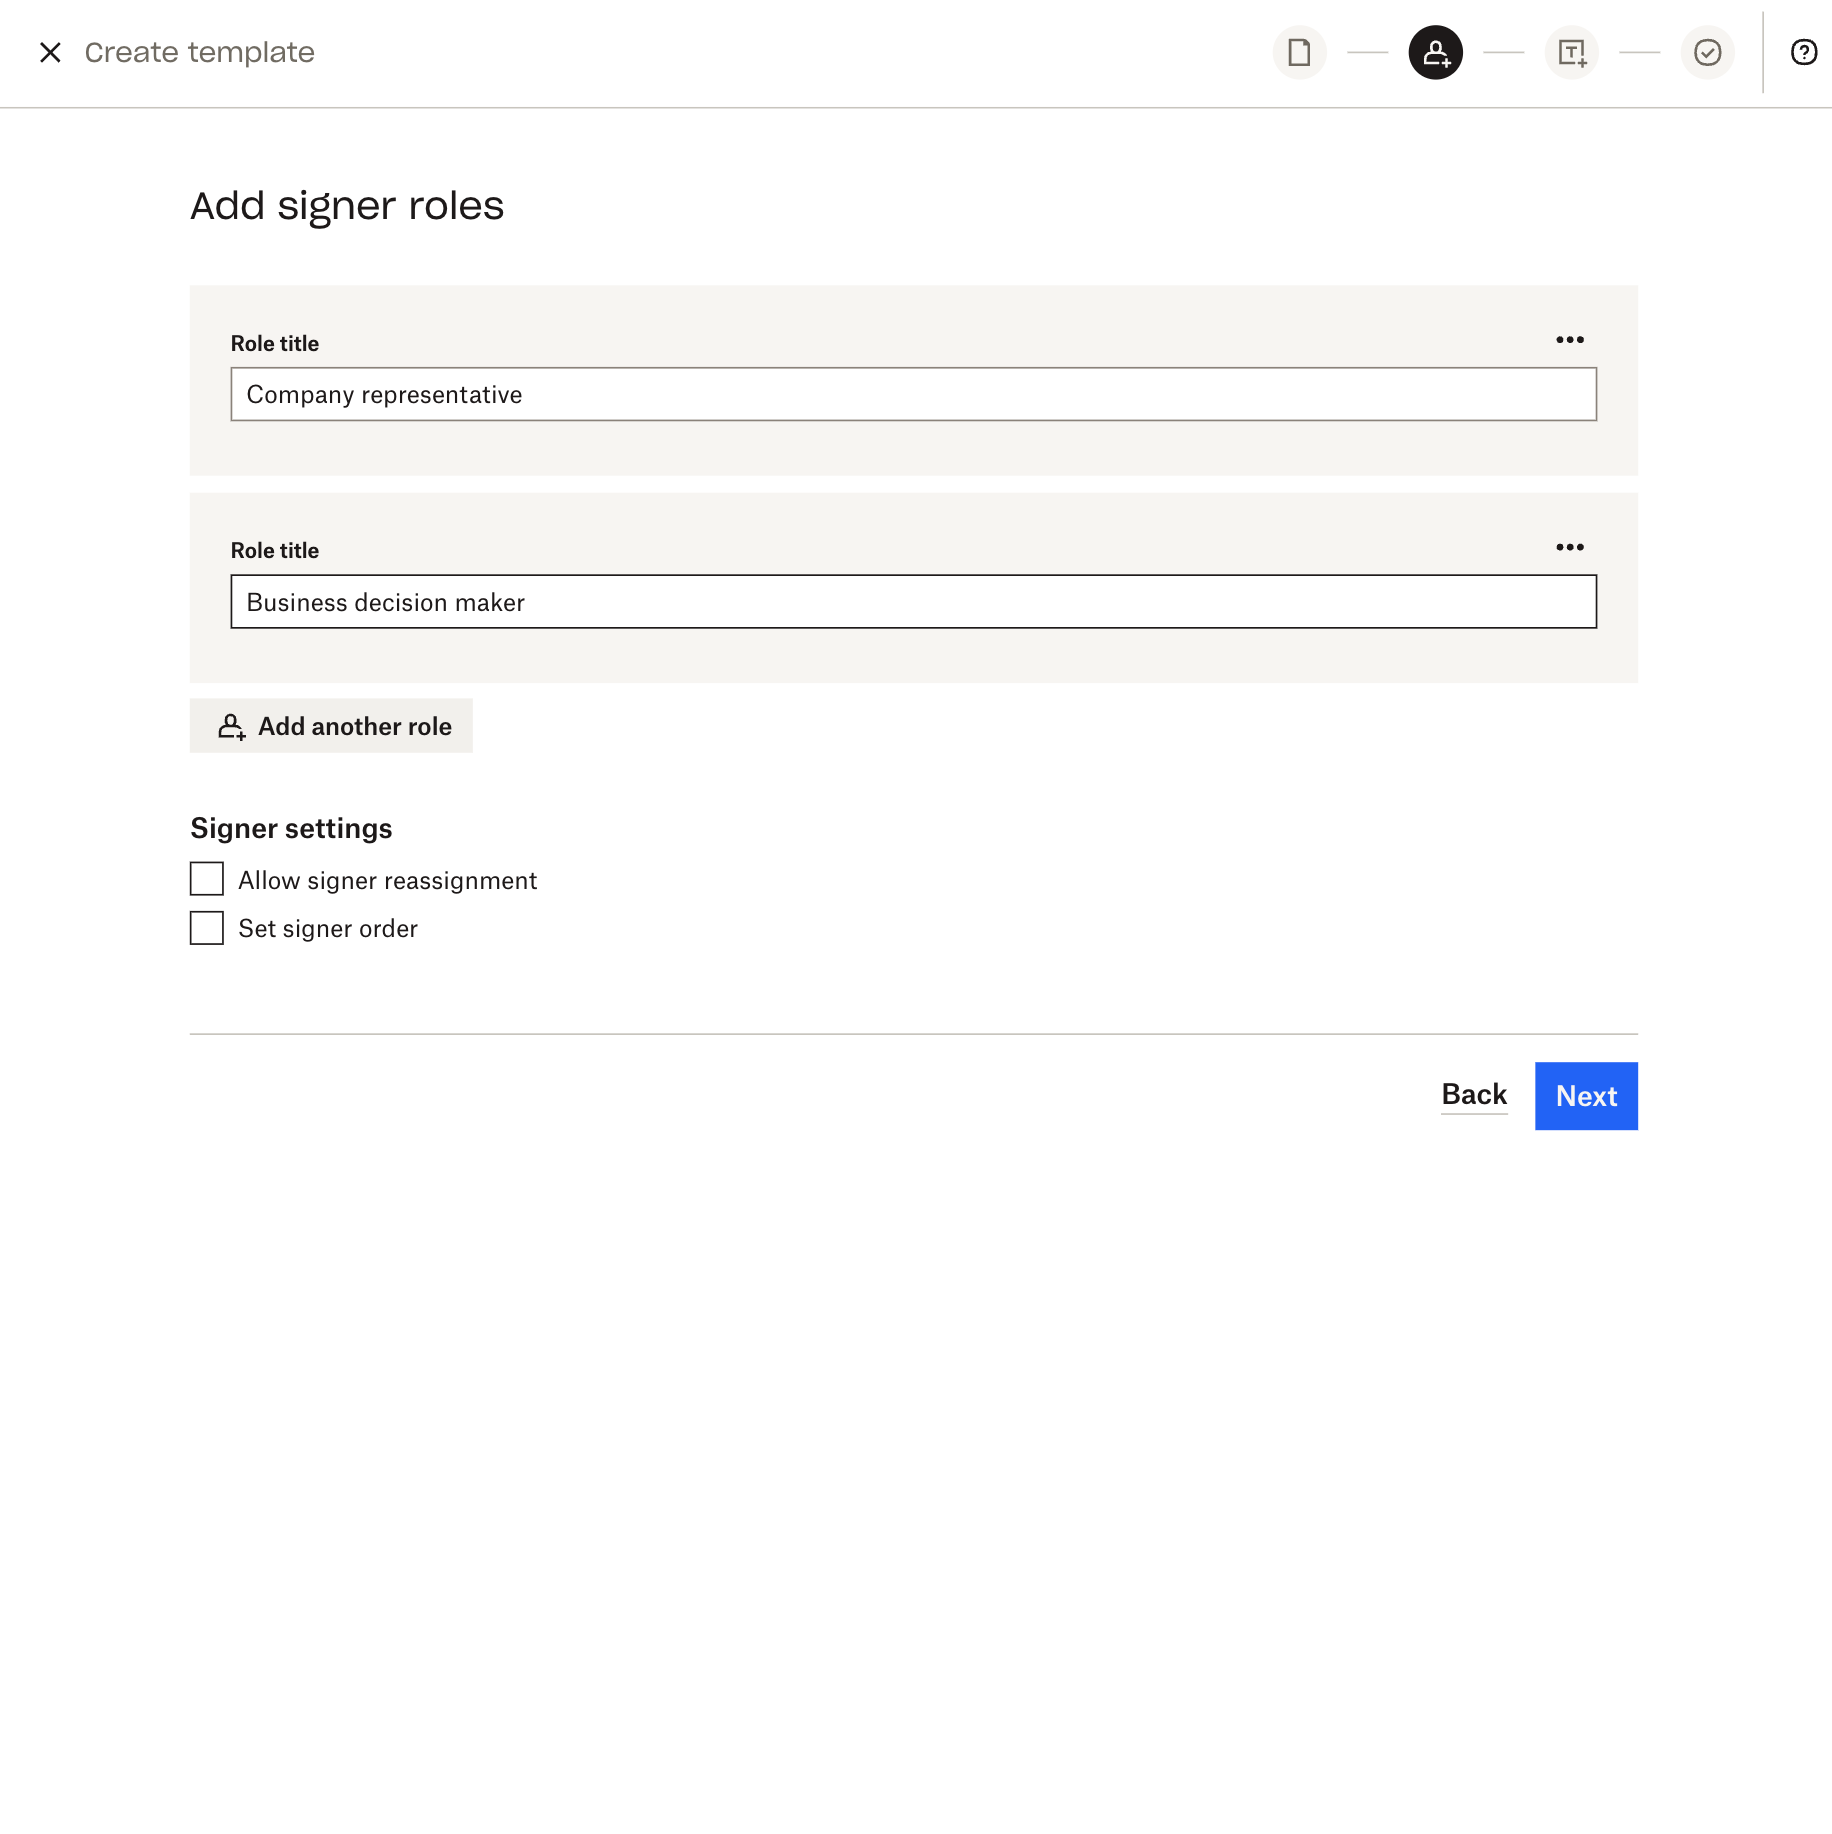
4. Add in the signer roles. For example, if you’re creating a social media policy template, you could enter “Company Representative” and “Internal Representative” for your Role titles.

4. You can also set the signer order here by toggling the Set signer order switch under Signer settings. Setting your signer order lets you determine who will sign the document first, second, third, and so on.
- If you don’t enable a signer order, all of your signers will receive the signature request when it hits their inbox, so they won’t have to wait for anyone else to sign the document.
5. Click Next.
Editing your template
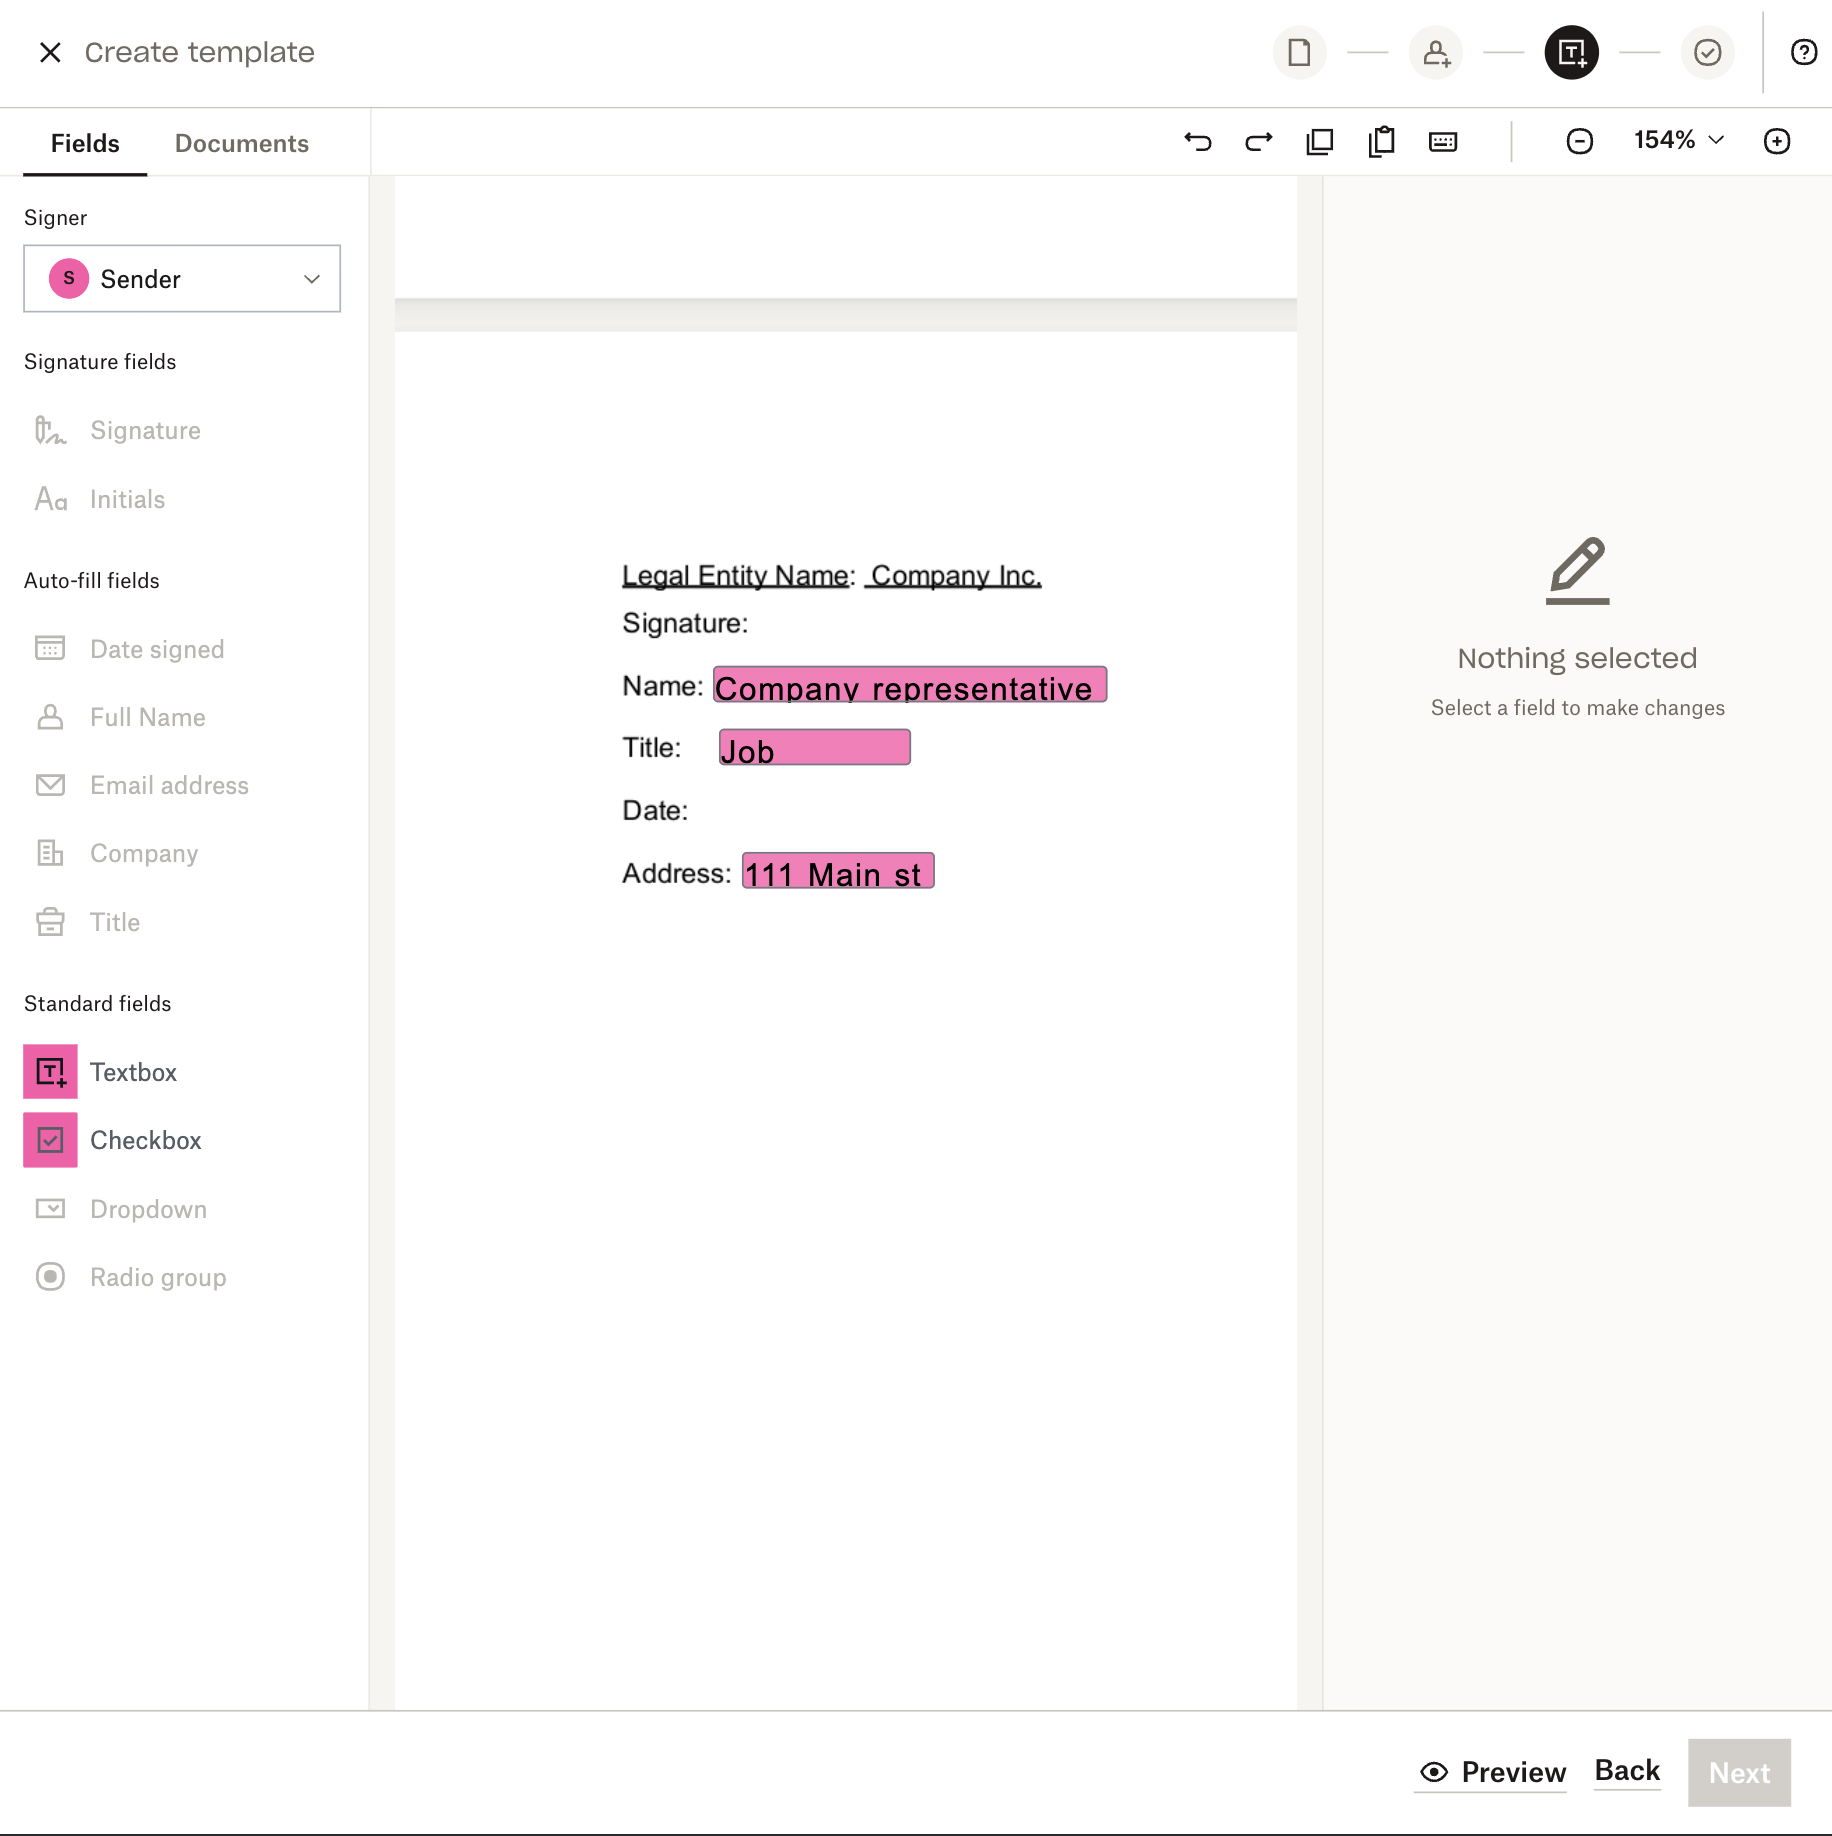
1. Once you’re in the editor—the place where you add fields like name and signature to your uploaded document—you can pre-populate information on your template by choosing an option from the drop-down menu under Signers.
- Note that if you use the Me (now) option, the same information will be pre-populated on all requests using that specific template. But if instead you’d like to pre-populate information that will change every time, select Sender.

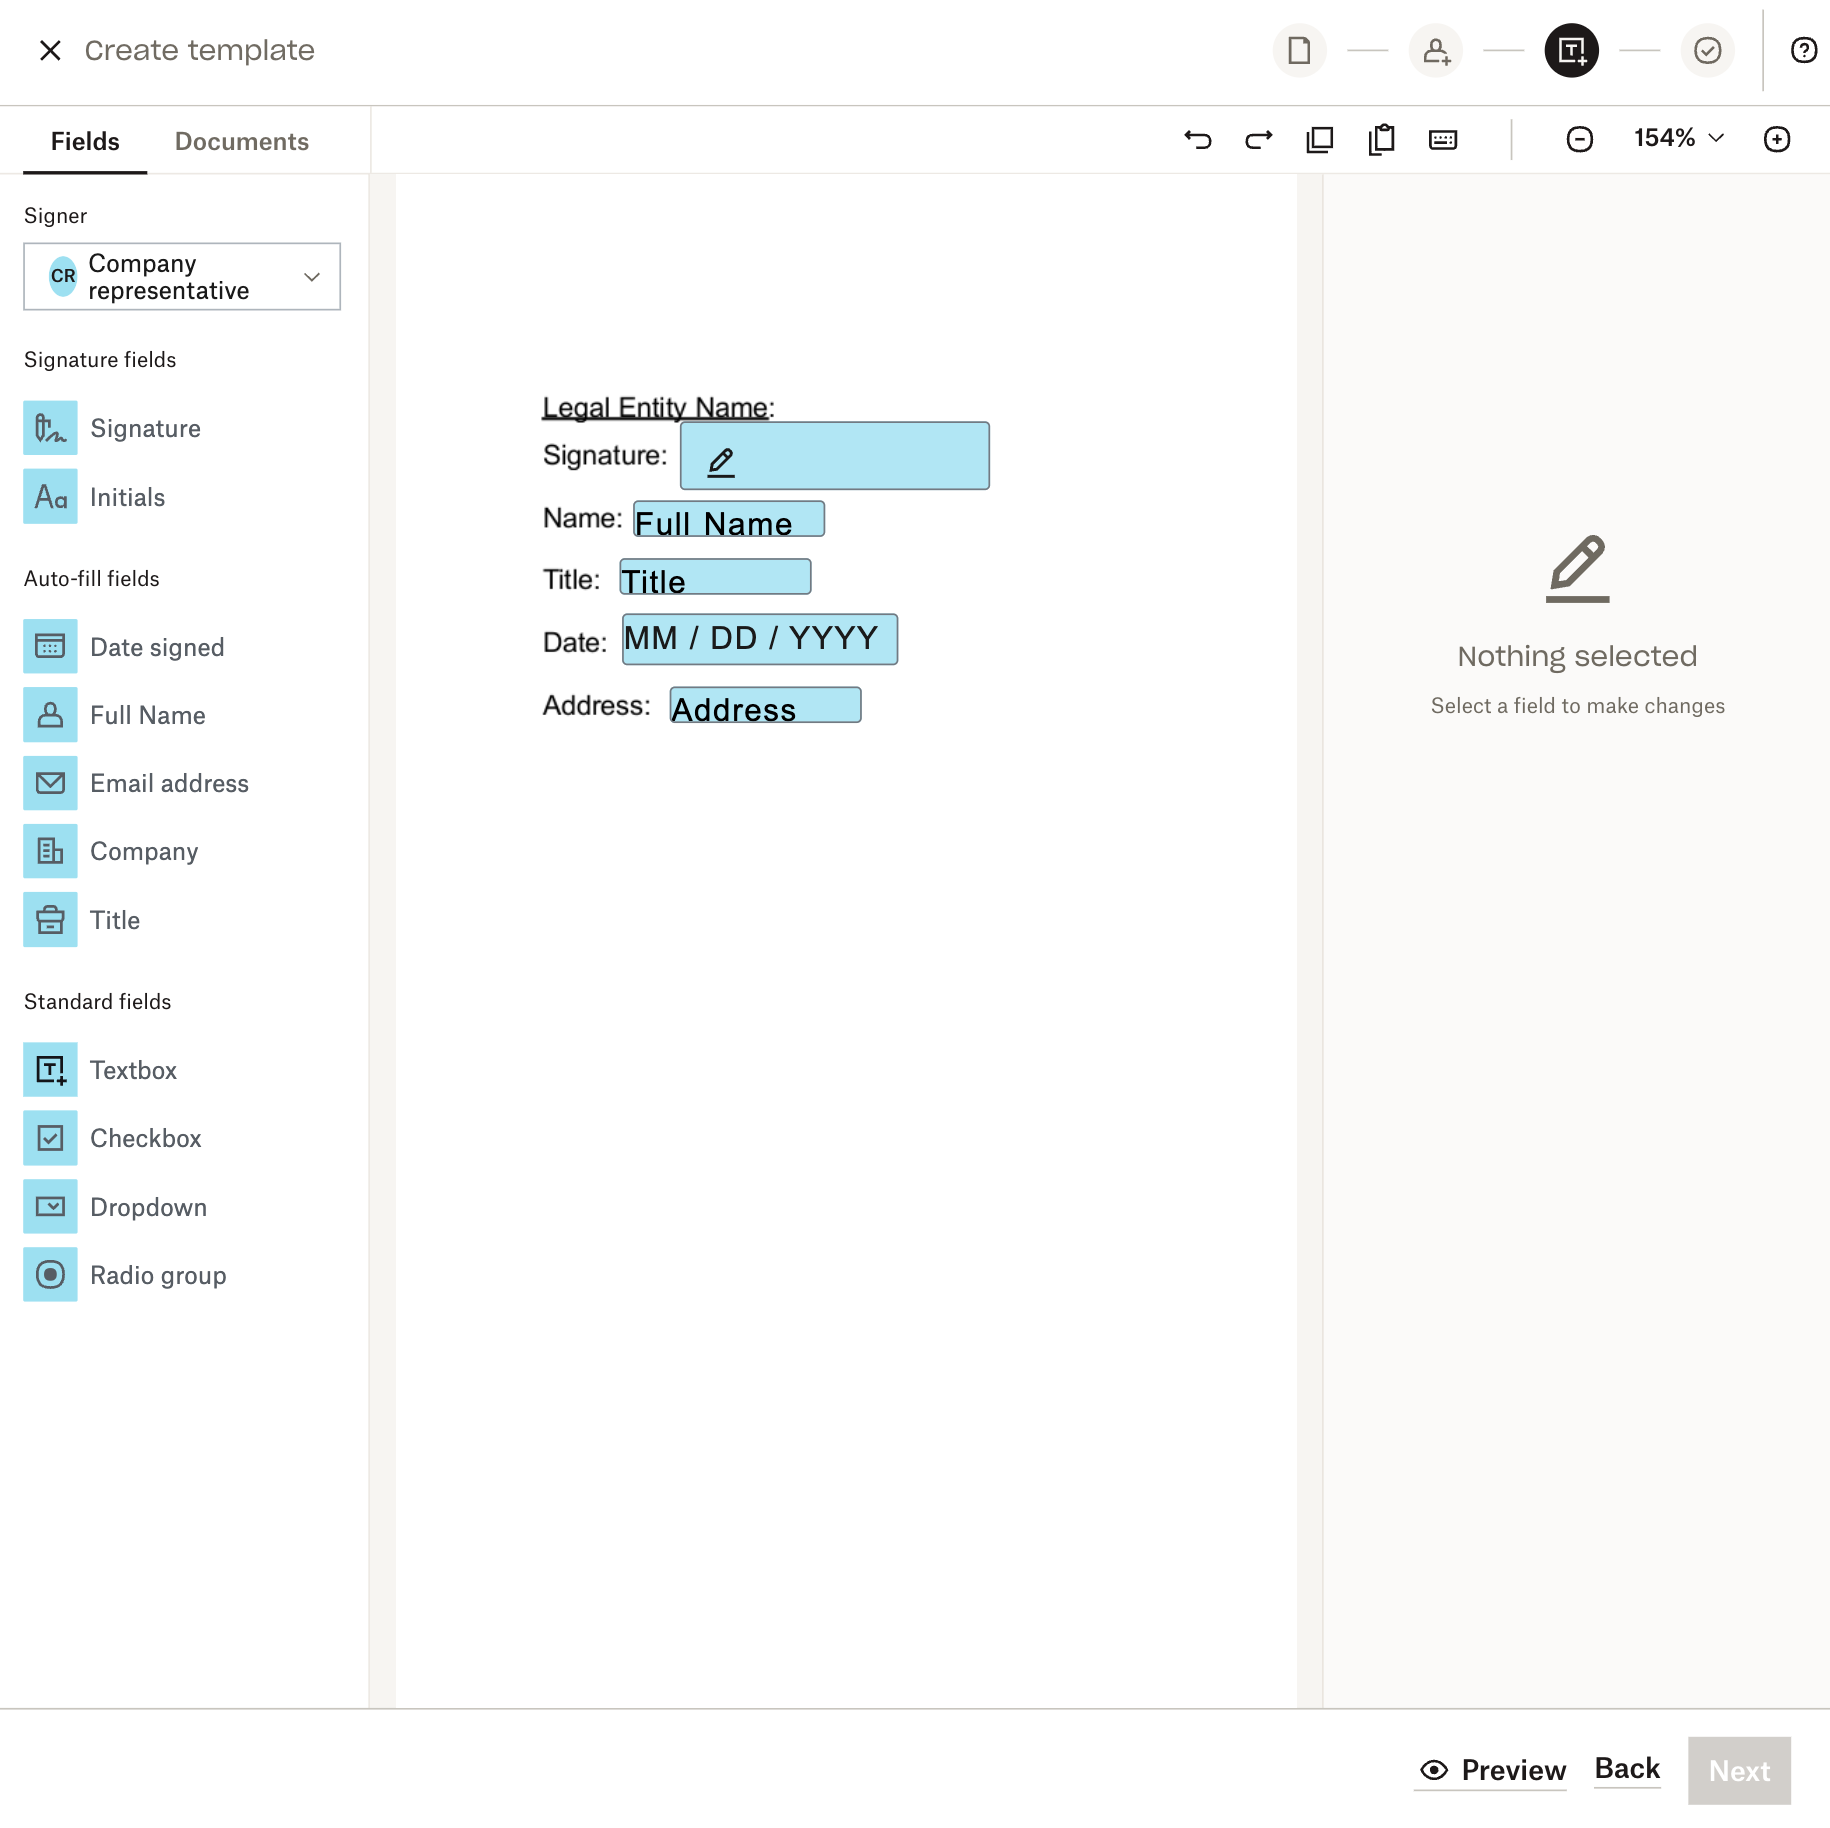
2. Start placing your fields by dragging and dropping them from the left-hand side.
- For example, if you want to generate your company’s name, you can drag-and-drop a text field onto the template, then on the right side of the editor, type in “Company Name” under Merge field.

3. Add at least one field assigned to each role that you’ve created for this template, including any signature. When you send this particular template, they’ll be prompted to fill out this information before returning.

4. Once you've placed all of your fields down, select Next.
Saving your template
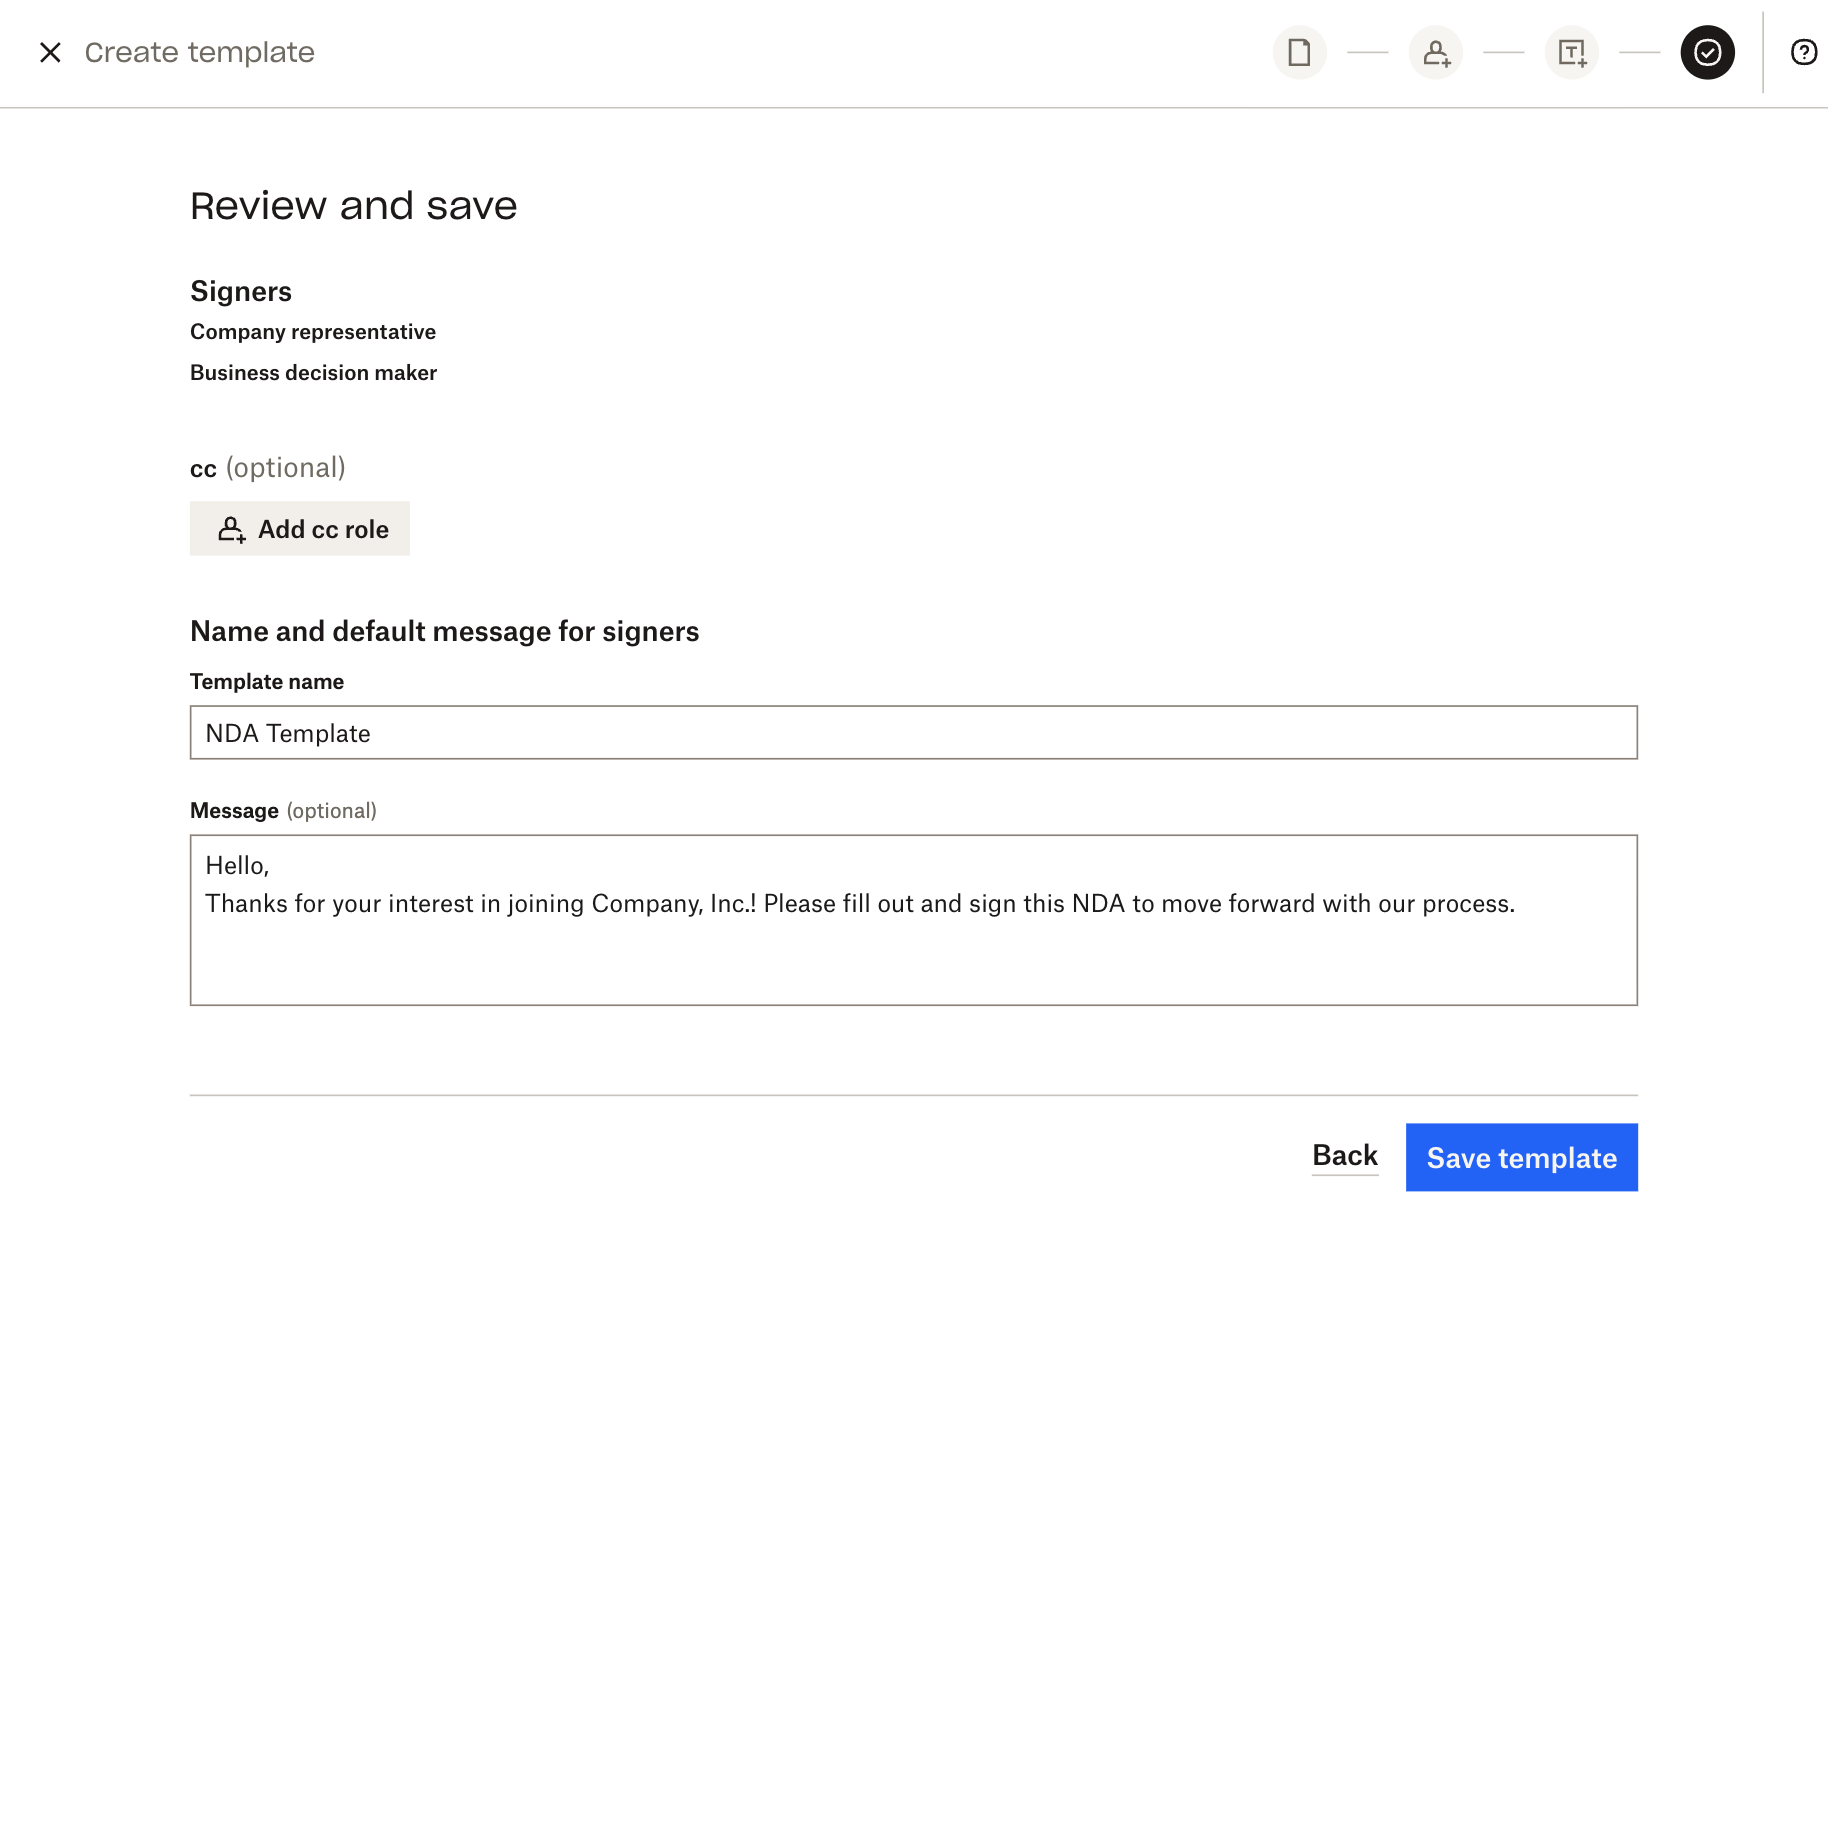
1. Review your information, including your signer roles, to make sure everything looks good.
2. Add a title for your template. You can add CC recipients and an additional message here, too. Note that both the template title and additional message can be updated by individual people who use the template to send signature requests.

3. Click Save Template, and you’re done!
Prepare, send, and sign documents in record time with Dropbox Sign Templates
You’ve heard about the impact that templates can have on improving your slow hiring process and you’ve seen how easy they are to implement with Dropbox Sign. So why not start saving time and try Templates for yourself?
Fique por dentro
Thank you!
Thank you for subscribing!


