If I walked into a store and they told me I had to access my email account, print out a sales contract, sign it, and figure out a way to return it to them before I could walk out with my product—you’d better believe I’d be hitting that Amazon 1-Click button before I even made it out of their automatic doors.
Yet every single day, salespeople in businesses both large and small are asking potential clients and customers to do just that. It’s time to empower your sales department to make money instead of spending it on old-school, manual sales practices that suck up tons of their time, cause friction for leads, and clog up your cash flow.
Luckily sales contracts are surprisingly easy to complete, sign, and store online with Dropbox Sign.
This post will show you how to create an online contract with Dropbox Sign app, but keep in mind that Dropbox Sign integrates with several Sales solutions (Dropbox Sign for Salesforce, Dropbox Sign for Salesforce CPQ, Dropbox Sign for Oracle CPQ, and Dropbox Sign for HubSpot CRM – just to name a few).
Ready to learn? Let's get to it.
Is an Online Sales Contract Legal and Secure?
In a word—absolutely.
Thanks to the E-SIGN Act, documents signed electronically have the same legal protections as those signed with a physical pen. So, as long as you’re using an eSignature and digital document management tool with strong legality and security features and your sales contract was drafted by a professional—online sales contracts are as legal and secure as physical ones.
Learn more about the legality of eSignatures here.
Step 1. Upload Your Sales Contract to Dropbox Sign
To begin, first pull up your sales contract file. Note: You can find simple sales contract templates online, but we strongly recommend having any contract drafted or at least reviewed by a professional.
Next, sign in to your Dropbox Sign account. (Don't have a Dropbox Sign account? You can create a free one in seconds.)
After signing in, you’ll see the "Who Needs to Sign?" menu. For a sales agreement, you’ll probably be choosing between “Me & others” or “Just others.” After selecting the best fit, it's time to upload your document. You can drag and drop, choose “Add File,” or use any of our integrations to upload your sales agreement.
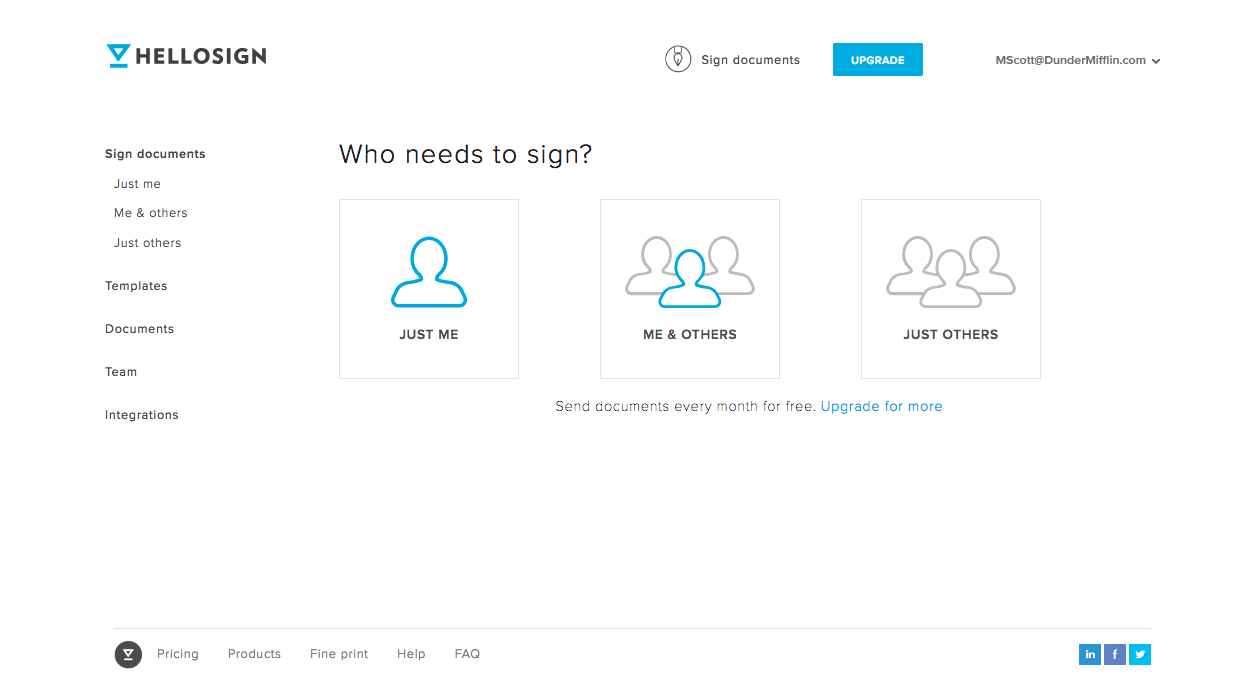
Step 2. Fill In Signer Information
After uploading your document, you can add signers, loop in other parties via our CC feature, and assign a signer order if needed. Once this preliminary information is filled out, It's time to “Prepare doc for signing."
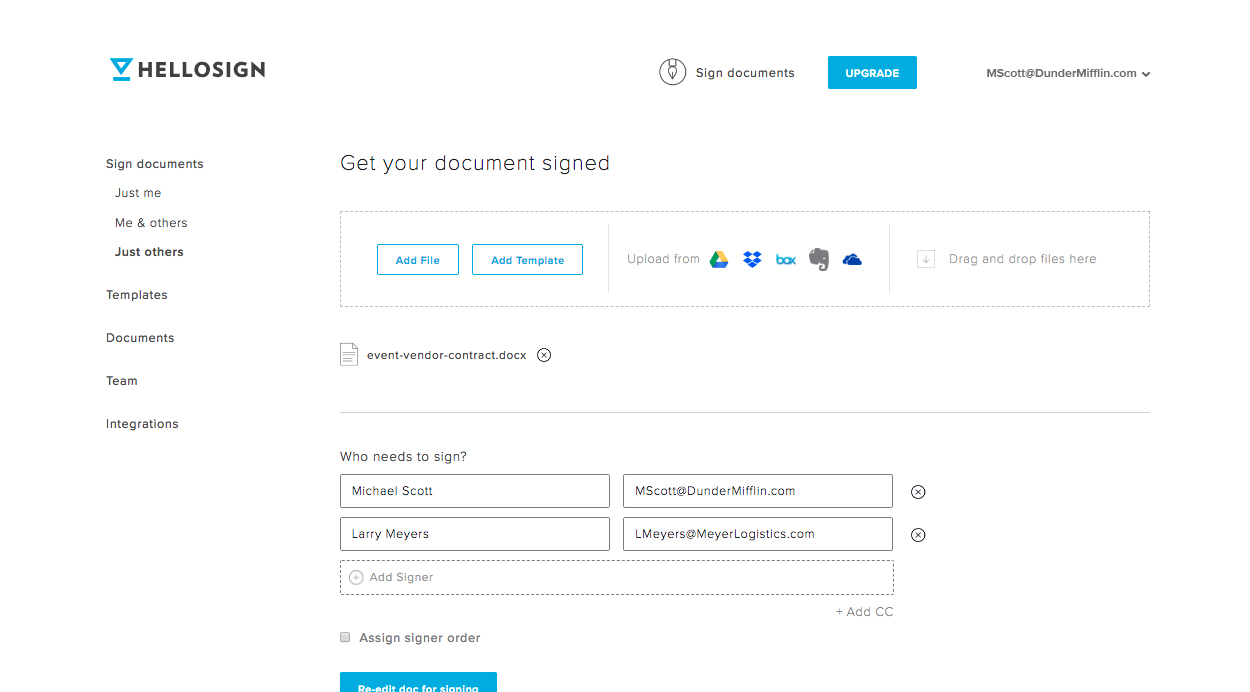
Step 3. Format and Send Your Sales Contract
With the sales contract you imported pulled up in front of you, you can click any of the fields across the top of the page and drag them to where you want to place them in the document. Most of the fields have advanced features and some even let you add a validation type (email address, numbers only, etc.) to help guide signers and reduce errors so you can close the sale more quickly.
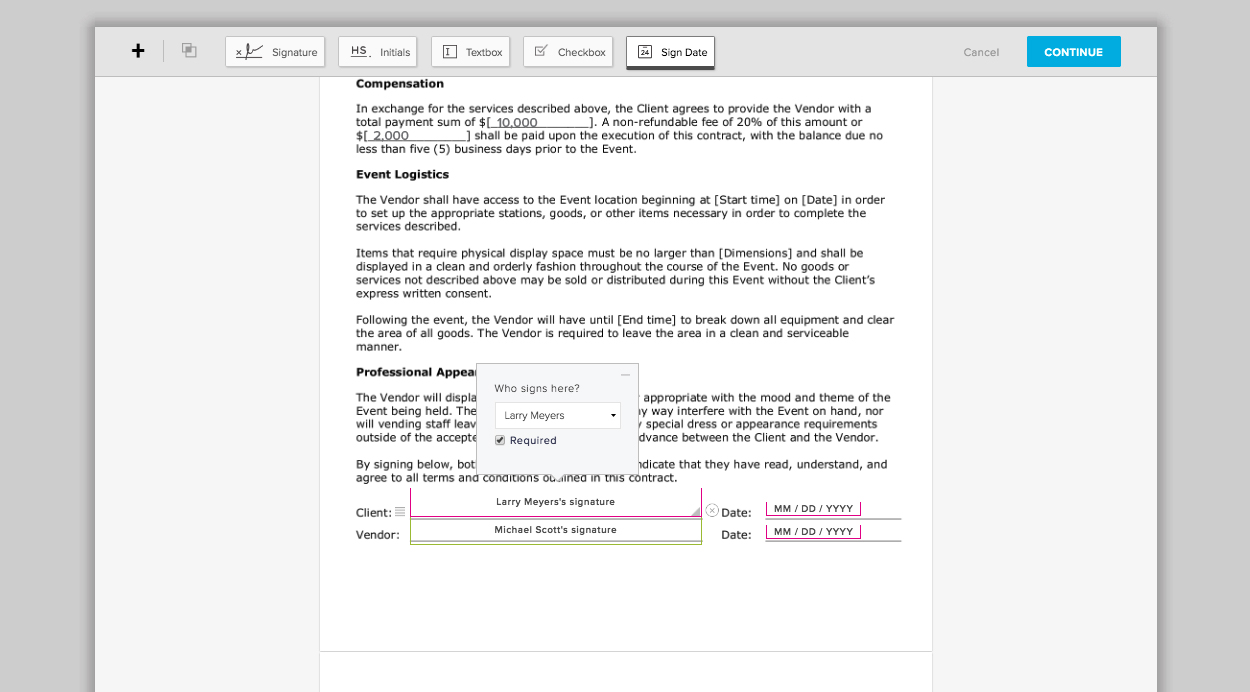
Once you get your formatting just right, hit Continue at the top of the page. Back on the “Get your document signed” page, you’ll add a title, an optional message, and send your sales agreement out for signatures.
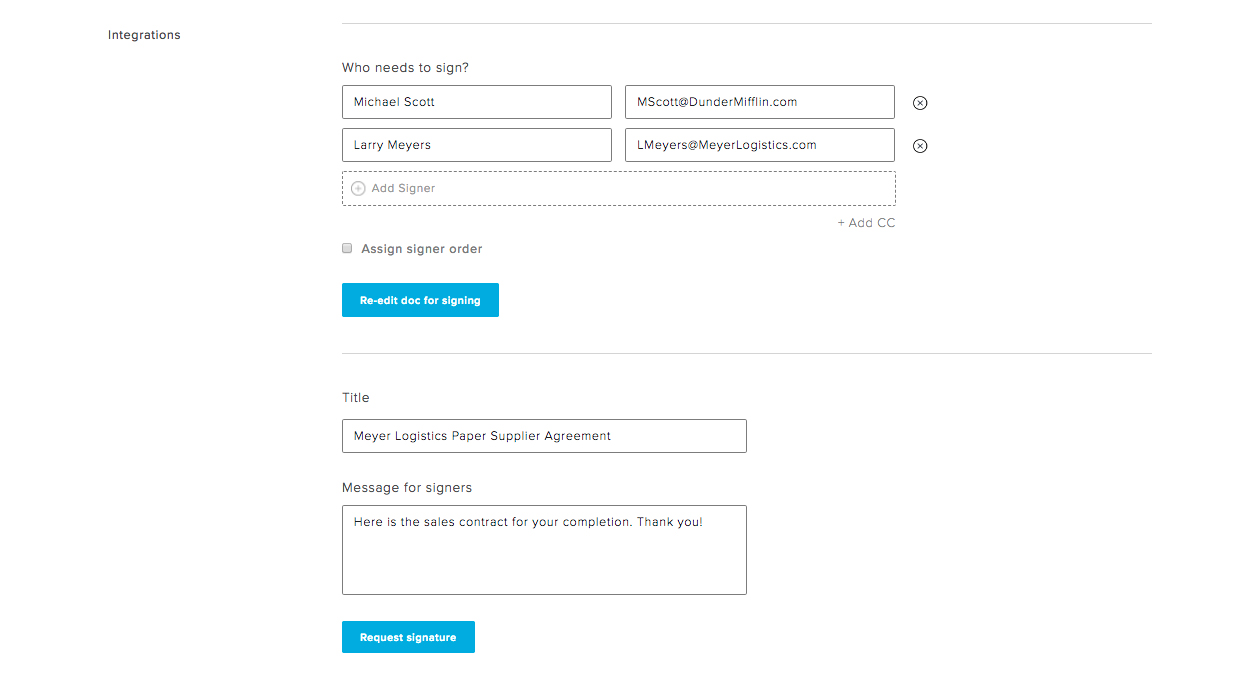
Step 4. Send Your Contract for Signature
An email will arrive in your participants' inbox as soon as you send it out for signatures. To sign, they'll simply click the “Review & Sign” button in the email to continue.
We provide a variety of ways to create your electronic signature:
- Draw your signature on a touch screen using your finger or a stylus
- Upload a photo of your signature
- Type in your signature and customize from a selection of font
- Take a picture of your signature using your smartphone’s camera
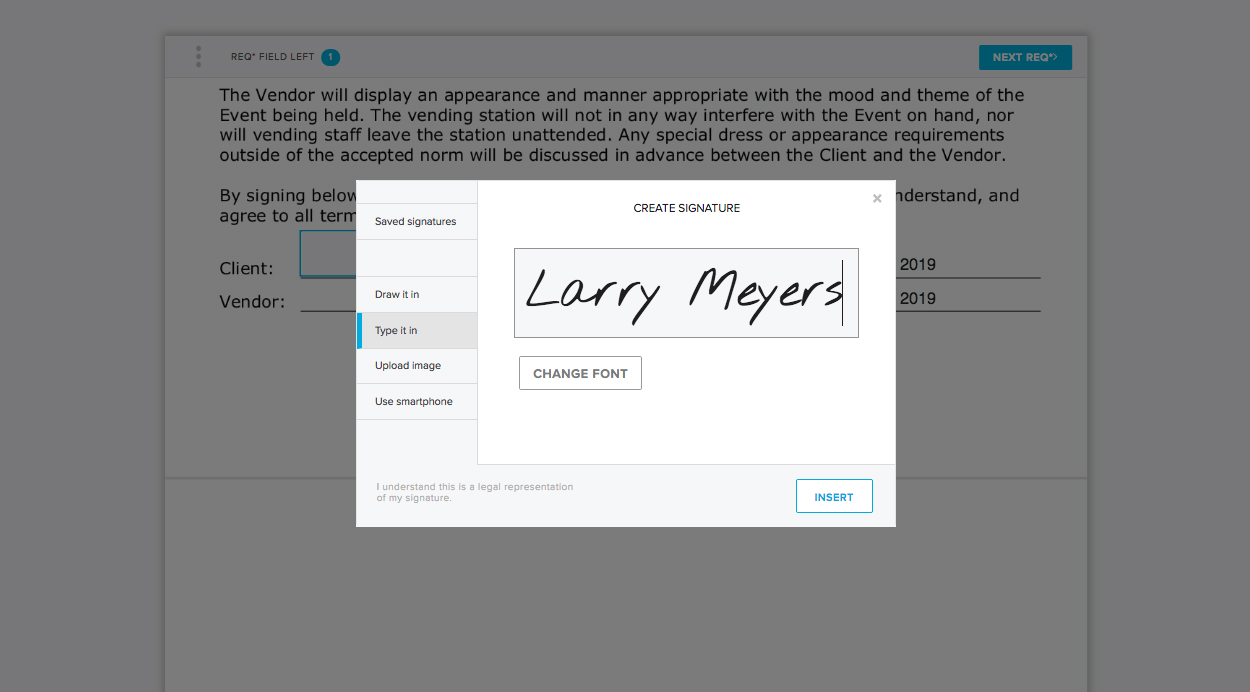
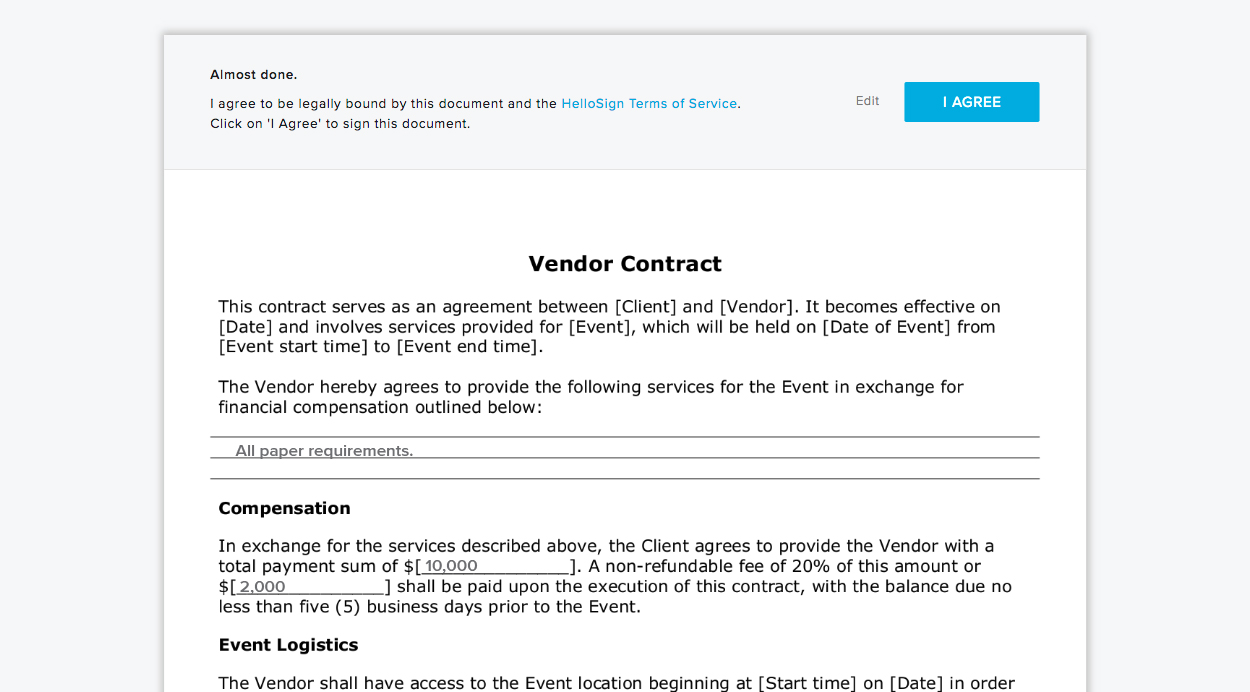
Dropbox Sign will automatically prompt each signer to complete all their required fields. Once you’ve filled out your portion of the sales contract, all you have to do is agree to one last legality measure and your job is done.
Step 5. Access Your Signed Digital Sales Agreements Any Time
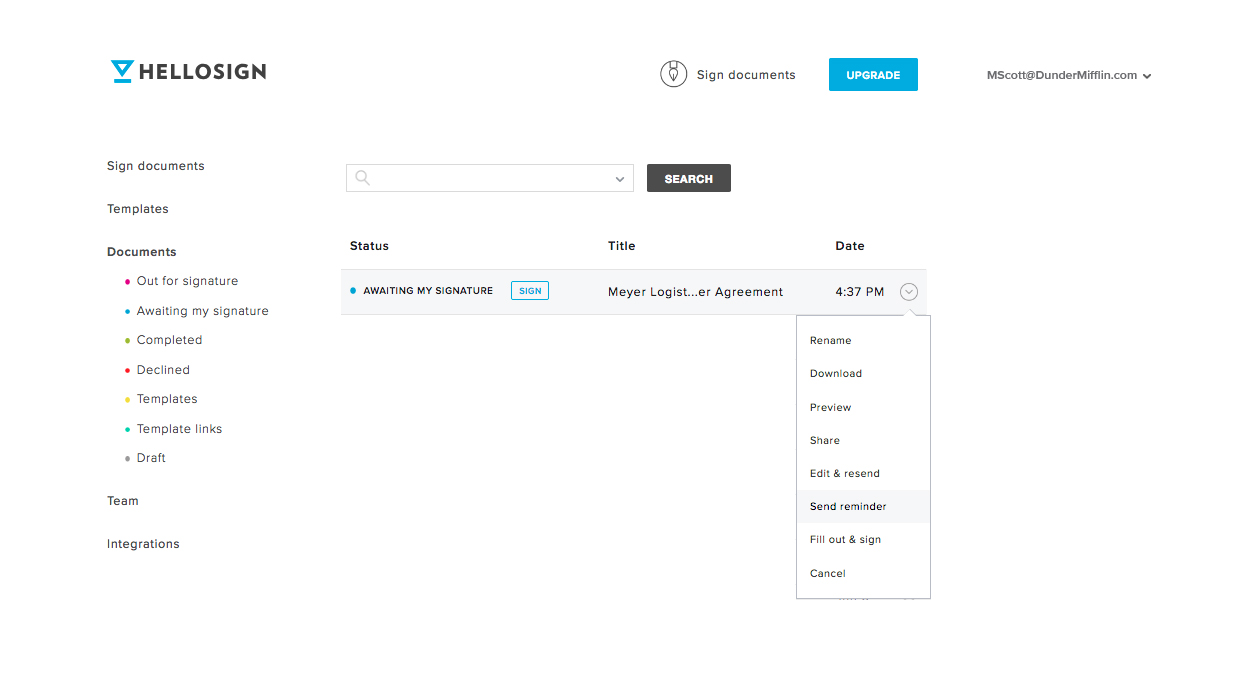
To check the status, edit, or even download a hard copy of your sales agreement, just visit the "Documents" section of your Dropbox Sign dashboard any time. You'll also have access to the time-stamped audit trail that is attached to every document signed with Dropbox Sign.
It’s Time to Make All Your Business Paperwork This Simple
Sales contracts only scratch the surface when it comes to all the paperwork and processes you can streamline with eSignature software like Dropbox Sign. But you don’t just have to take our word for it—sign up for a free Dropbox Sign account. Upgrade to a Pro plan for unlimited document signing.
Want to make closing a sale even more seamless with your workflows? Of course you do! Dropbox Sign API empowers you to embed this sales contract workflow right into your applications and processes. And you’ll even be able to use our white-labeling features to top off the seamless, on-brand signing experience.
And of course, you can use Dropbox Sign in existing Sales platforms via our easy-to-implement and easy-to-use integrations:
- Dropbox Sign for Salesforce
- Dropbox Sign for Salesforce CPQ
- Dropbox Sign for Oracle CPQ
- Dropbox Sign for HubSpot CRM
Happy signing!
진행 상태 확인
Thank you!
Thank you for subscribing!


