.svg)


新しい名前でも変わらぬ高品質!HelloSign の名称が Dropbox Sign になりました。
Ground-breaking intellectual property, winning marketing strategies, vendor and customer lists, and all the other “secret sauce” that keeps your business competitive and profitable—what would you do if it all became public?
Luckily, companies can take the protection of their confidential assets into their own hands with NDAs.
A non-disclosure agreement (NDA), or confidentiality agreement, is a legally-binding document that prohibits one party from sharing certain information about the other party.
Many companies ask full-time employees to sign NDAs, but they can also be useful when working with freelancers and consultants, negotiating licensing, meeting with investors, discussing mergers and acquisitions, and any other time a business may need to reveal confidential information.
Why Use an Online NDA?
If you’re already using a website, web app, or API to digitize paperwork and collect eSignatures at your workplace—taking your NDA online is no different.
But if you aren’t, let’s get straight to what you need to know: Thanks to the E-SIGN Act, documents signed electronically have the same legal protections as those signed with a physical pen.
So, as long as you’re 1.) using an eSignature solution that’s committed to upholding strong legality and security measures that protect your most valuable information and 2.) your NDA is drafted by a professional, you absolutely can trust NDAs shared, signed, and stored online.
Here’s how to do just that.
Step 1: Get Your NDA Form Ready
First, you'll need to have your NDA handy. You can find templates online, but we recommend seeking out a legal professional to create one that’s right for your needs.
Step 2. Upload the Document and Add Your Signers
Next, sign in to your Dropbox Sign account so you can begin filling out your NDA online. If you don’t have a Dropbox Sign account yet, create a free account now.
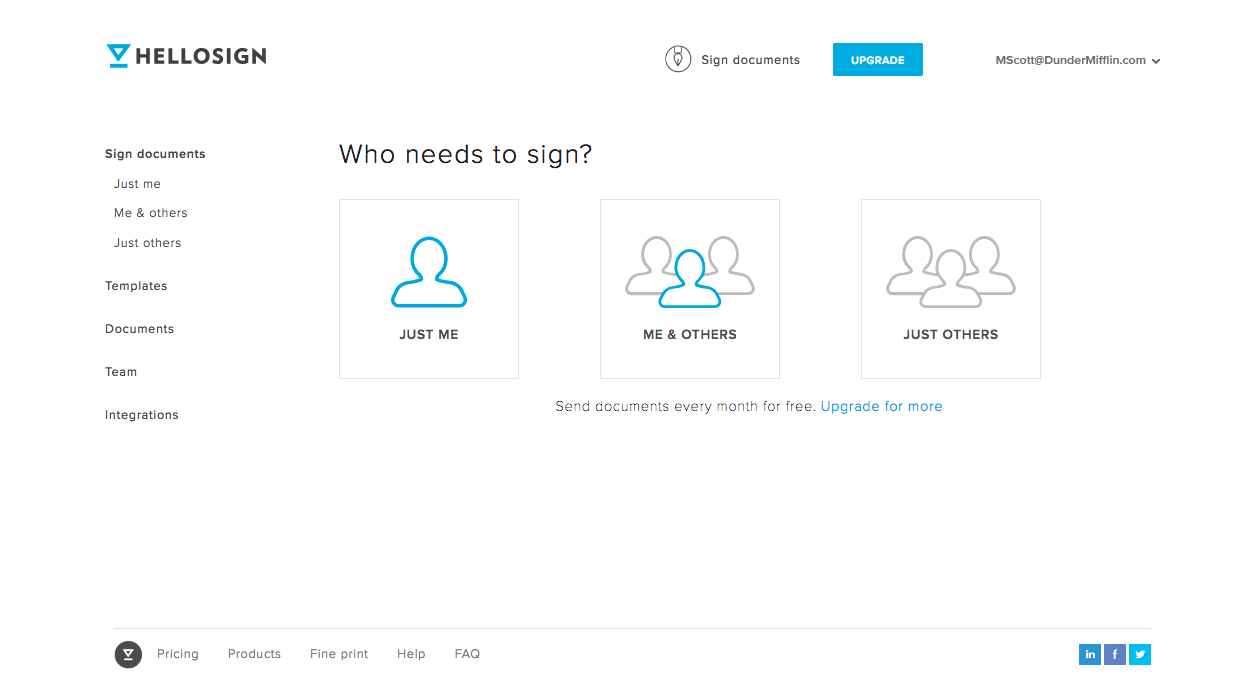
After signing in, you’ll see the "Who needs to sign?" menu. For a confidentiality agreement, you’ll probably want to choose between “Me & others” or “Just others.” After selecting one, you’ll be able to drag and drop, choose “Add File,” or use any of our integrations to upload your non-disclosure agreement.
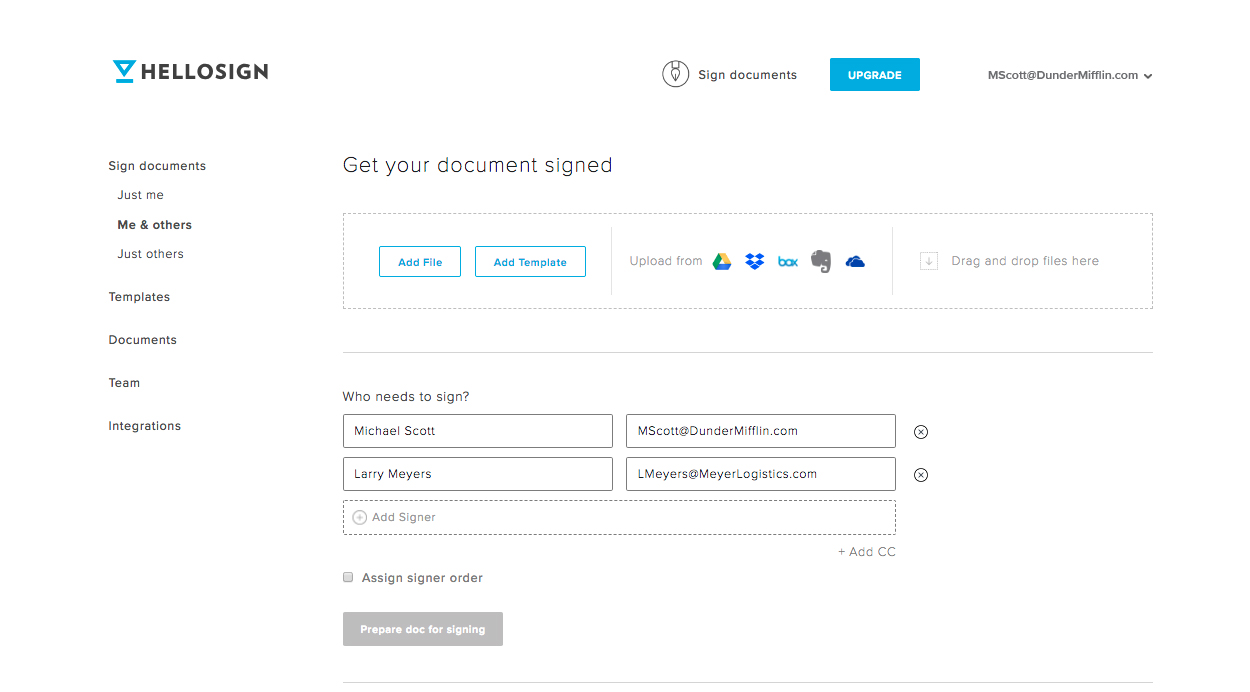
Now you can add signers, loop in other parties via our CC feature, and assign a signer order if needed. Select “Prepare doc for signing” to move on to the really cool part!
Step 3. Format the NDA and Fill in Your Information
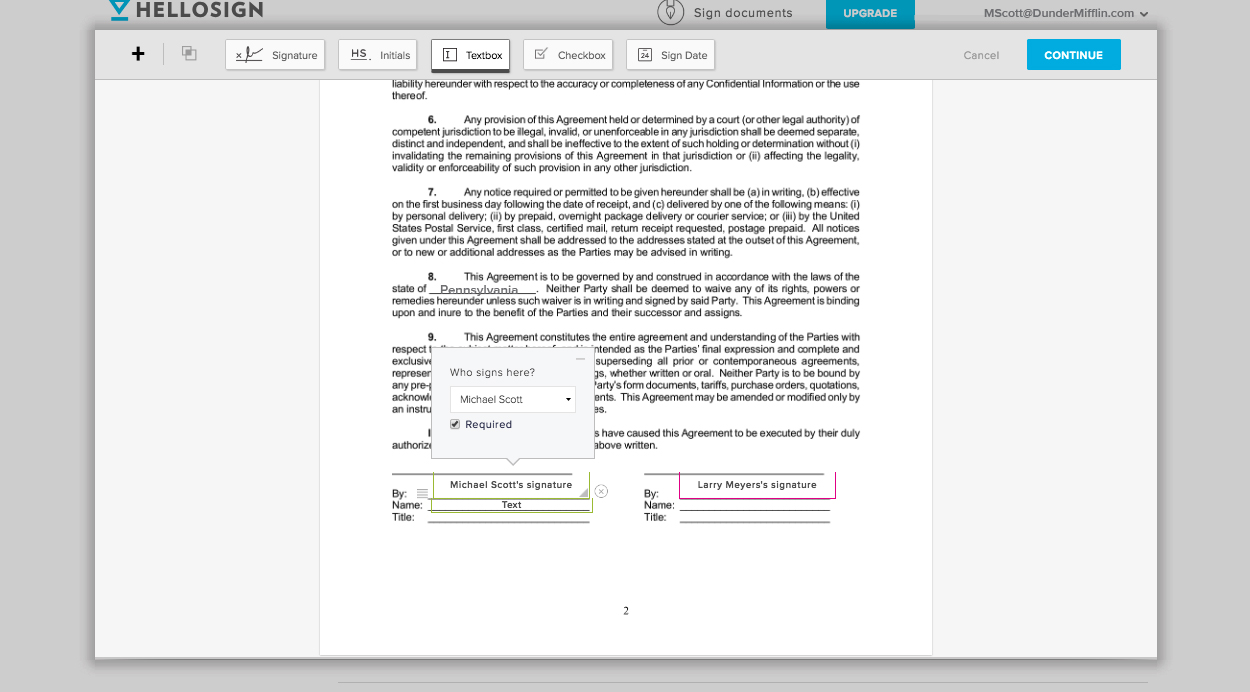
With the NDA you imported pulled up in front of you, click any of the fields across the top of the page and drag it to where you want to place it in the document. Most of the fields have advanced features and some even let you add a validation type (email address, numbers only, etc.) to help guide signers and reduce errors. Take some time to click around to get your NDA dialed in.
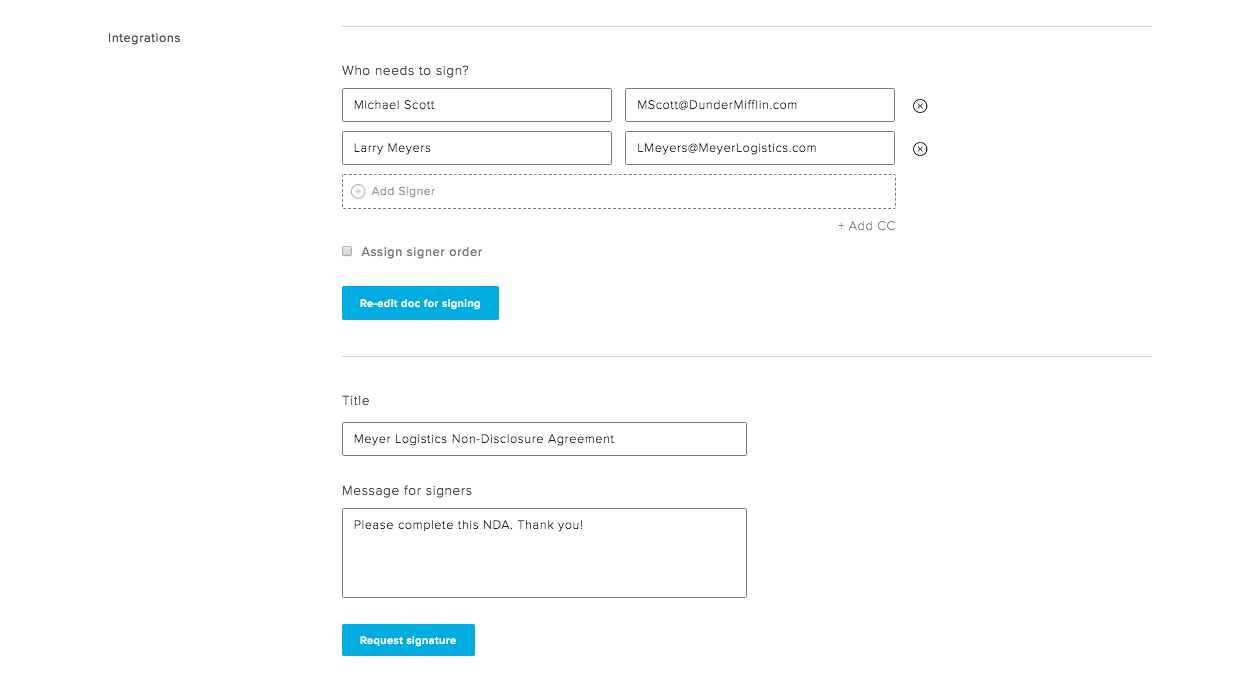
Once you get your formatting just right, hit Continue at the top of the page. Back on the “Get your document signed” page, you’ll add a title, an optional message, and send your online NDA out for signature.
Step 4. Sign Your NDA Online or Send for Signature
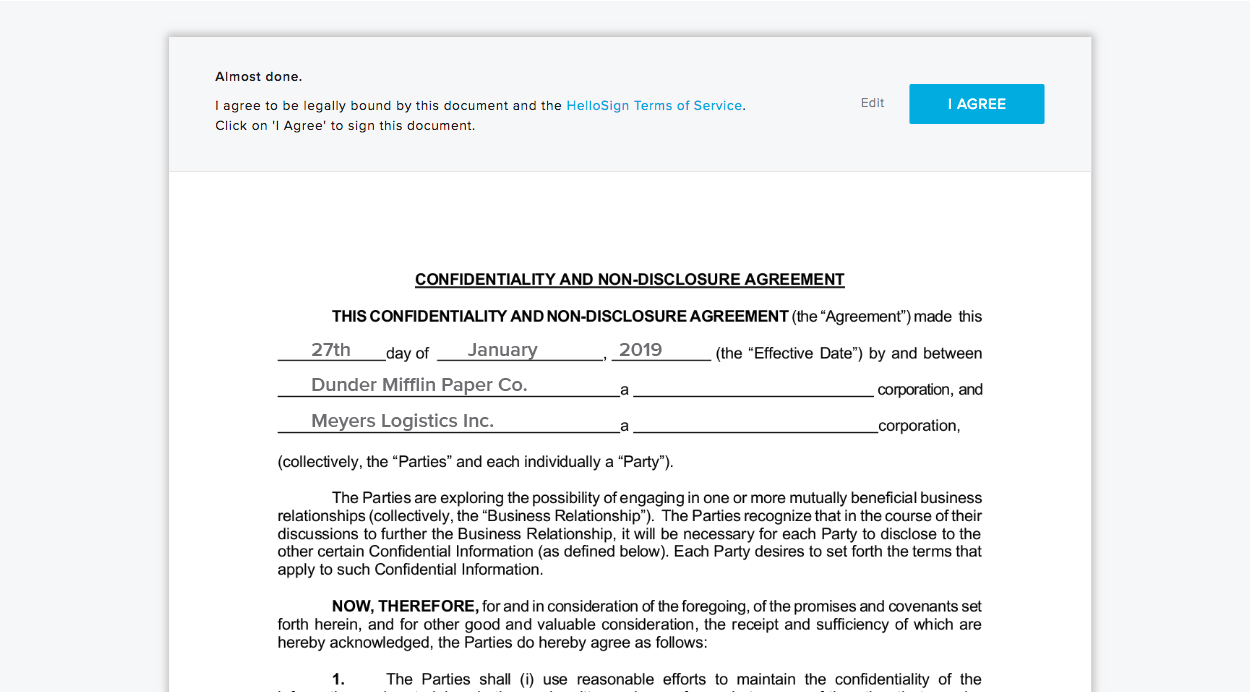
If you’re one of the signers, a prompt to sign the non-disclosure agreement will hit your (and other signers’) email inbox as soon as you send it out for signatures. Just click the “Review & Sign” button in the email to continue.
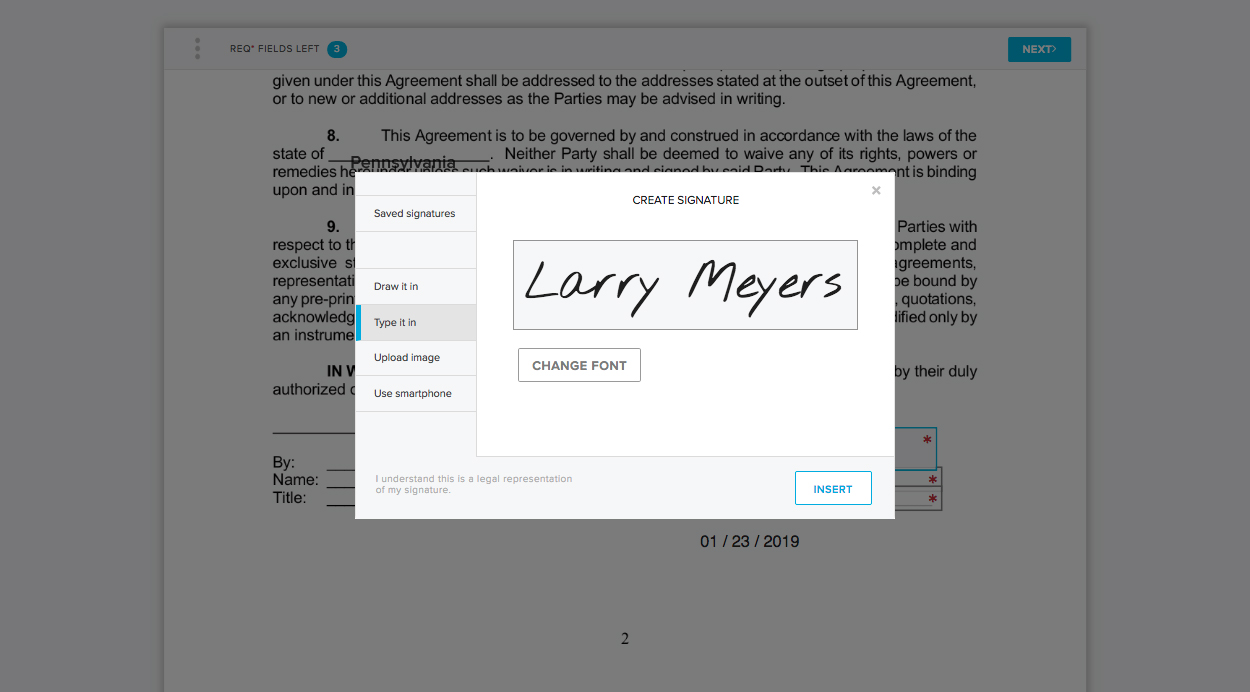
We provide a variety of ways to create your electronic signature:
- Draw your signature on a touch screen using your finger or a stylus
- Upload a photo of your signature
- Type in your signature and customize from a selection of font
- Take a picture of your signature using your smartphone’s camera
Dropbox Sign will automatically prompt each signer to complete all their required fields. Once you’ve filled out your portion of the NDA, all you have to do is agree to one last legality measure and your job is done!
Step 5. Access Your Online NDA Any Time
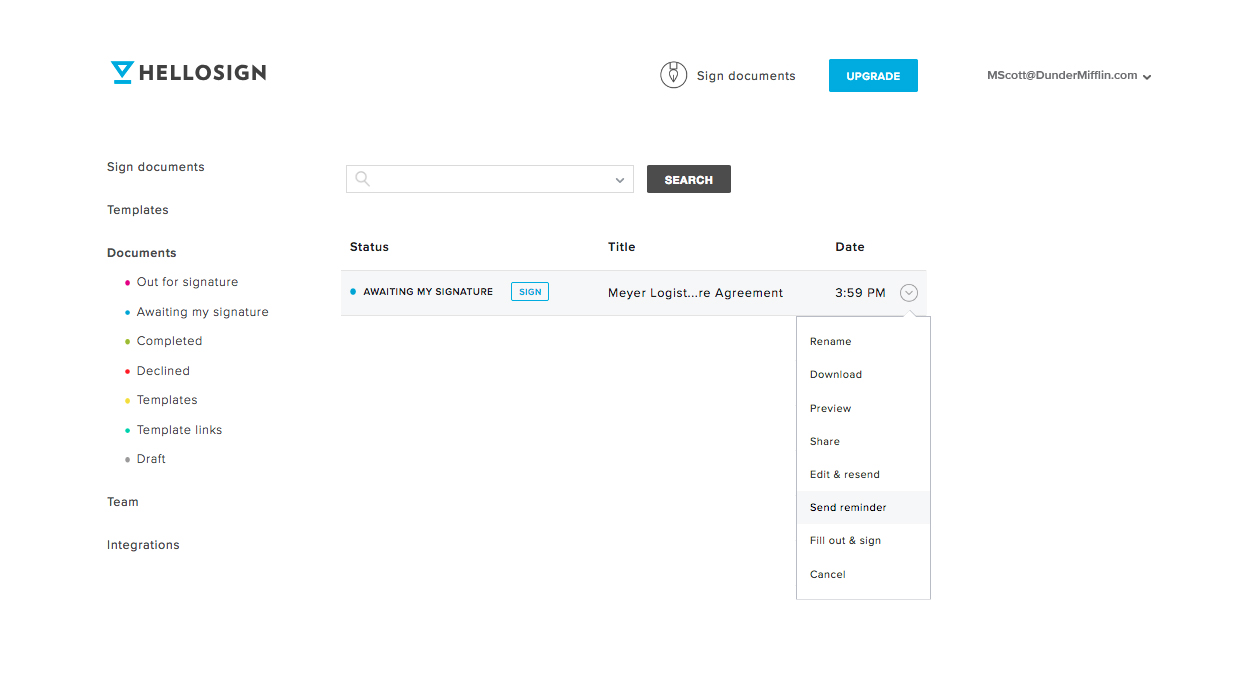
To check the status, edit, or even download a hard copy of your confidentiality agreement; just visit the Documents section of your Dropbox Sign dashboard any time.
Want All Your Business Paperwork to Be That Easy?
Great news—it can be! Sign up for a free Dropbox Sign trial and get 30-day access to Pro Plan features like unlimited documents.
Need to get online NDA signing integrated into website or application? We’ve got you there, too. Dropbox Sign API empowers you to embed NDAs into your applications and workflows. You can even use our white-labeling features to give signers a seamless, on-brand signing experience.
You can also use Dropbox Forms to automate your NDA workflow even further, and turn it into a fast and mobile-first flow. Learn more about Dropbox Forms here.
Happy signing!
効率を維持
ありがとうございます。
ご登録いただきありがとうございます。


