.svg)


新しい名前でも変わらぬ高品質!HelloSign の名称が Dropbox Sign になりました。
Creating and sending price quotes is a necessary part of business, but it can also be a laborious process, especially if the sales team sends out multiple quotes daily. You can make things easier on yourself and your sales team by automating your sales quote generation. An excellent way to do that is by using the Dropbox Sign API.
Dropbox Sign allows you to create and send bulk templates, as well as generate dynamic documents such as sales quotes. In this tutorial, you’ll create a command line utility for generating sales quote documents using the Dropbox Sign API. You’ll pass input data as command line arguments, creating emailed sales quote documents that customers can sign digitally.
What Is Dropbox Sign?
Dropbox Sign is an eSignature solution that offers one of the fastest ways to send and receive legally valid electronic signatures. Individuals and companies can use it to quickly and securely complete online employment contracts, insurance documents, and other paperwork, while developers can use the API to create custom workflows. Dropbox Sign integrates with Salesforce, Slack, and Dropbox, among other apps.
Using Dropbox Sign, you can create a template that can be used to create new signature requests as needed. If you decide to update the template, you can change the UI without making any changes to your code. Dropbox Sign has a dedicated developer support team that can assist you with any questions you encounter while building your integration.
Prerequisites
Here is what you’ll need for this tutorial:
- Node.js (this tutorial uses Node v14.18.2)
- A Dropbox Sign account
How to prepare to create dynamic sales quotes with Dropbox Sign
Creating the template
First, create a sales quote template. This tutorial uses Google Docs, but use any tool you’re comfortable with. You can also copy this sales quote template, modify it according to your needs, and download it as a PDF.
Setting up Dropbox Sign
Next, set up your template in Dropbox Sign and get your Dropbox Sign API key.
Adding a template in Dropbox Sign
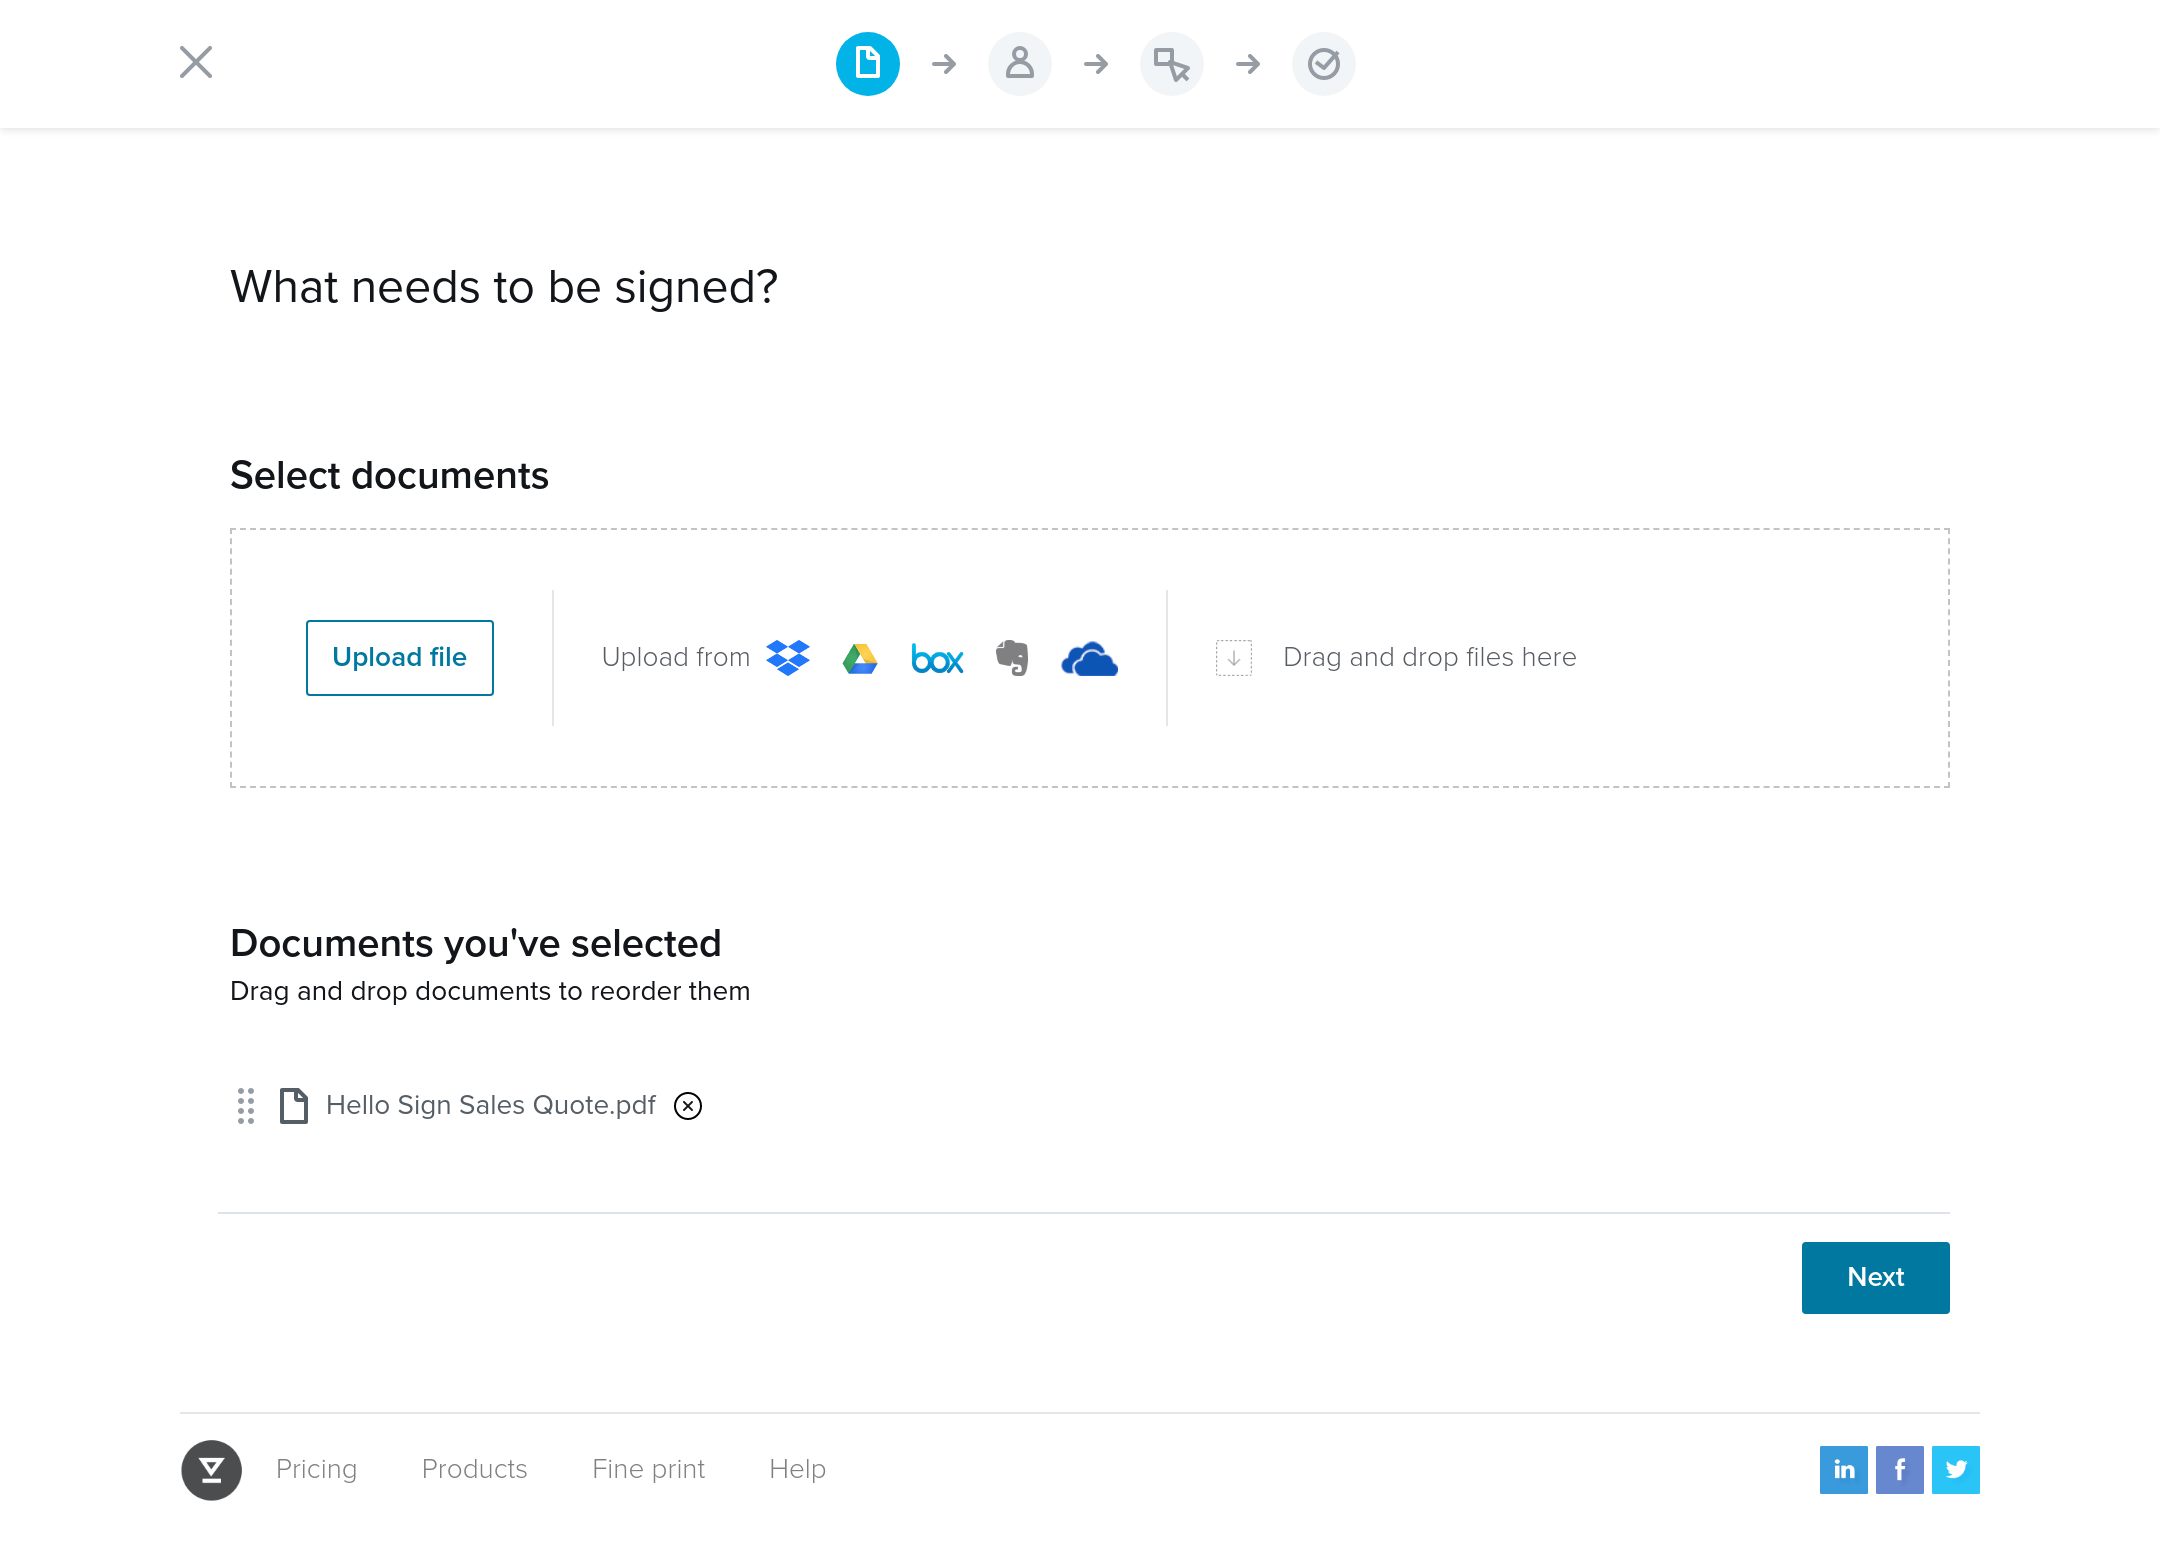
Log in to your Dropbox Sign account. On the Dropbox Sign homepage, click Create a Template.

Upload the PDF of your template and click Next.
Add a Signer role and give it a Role title of `Client`. Click Next.

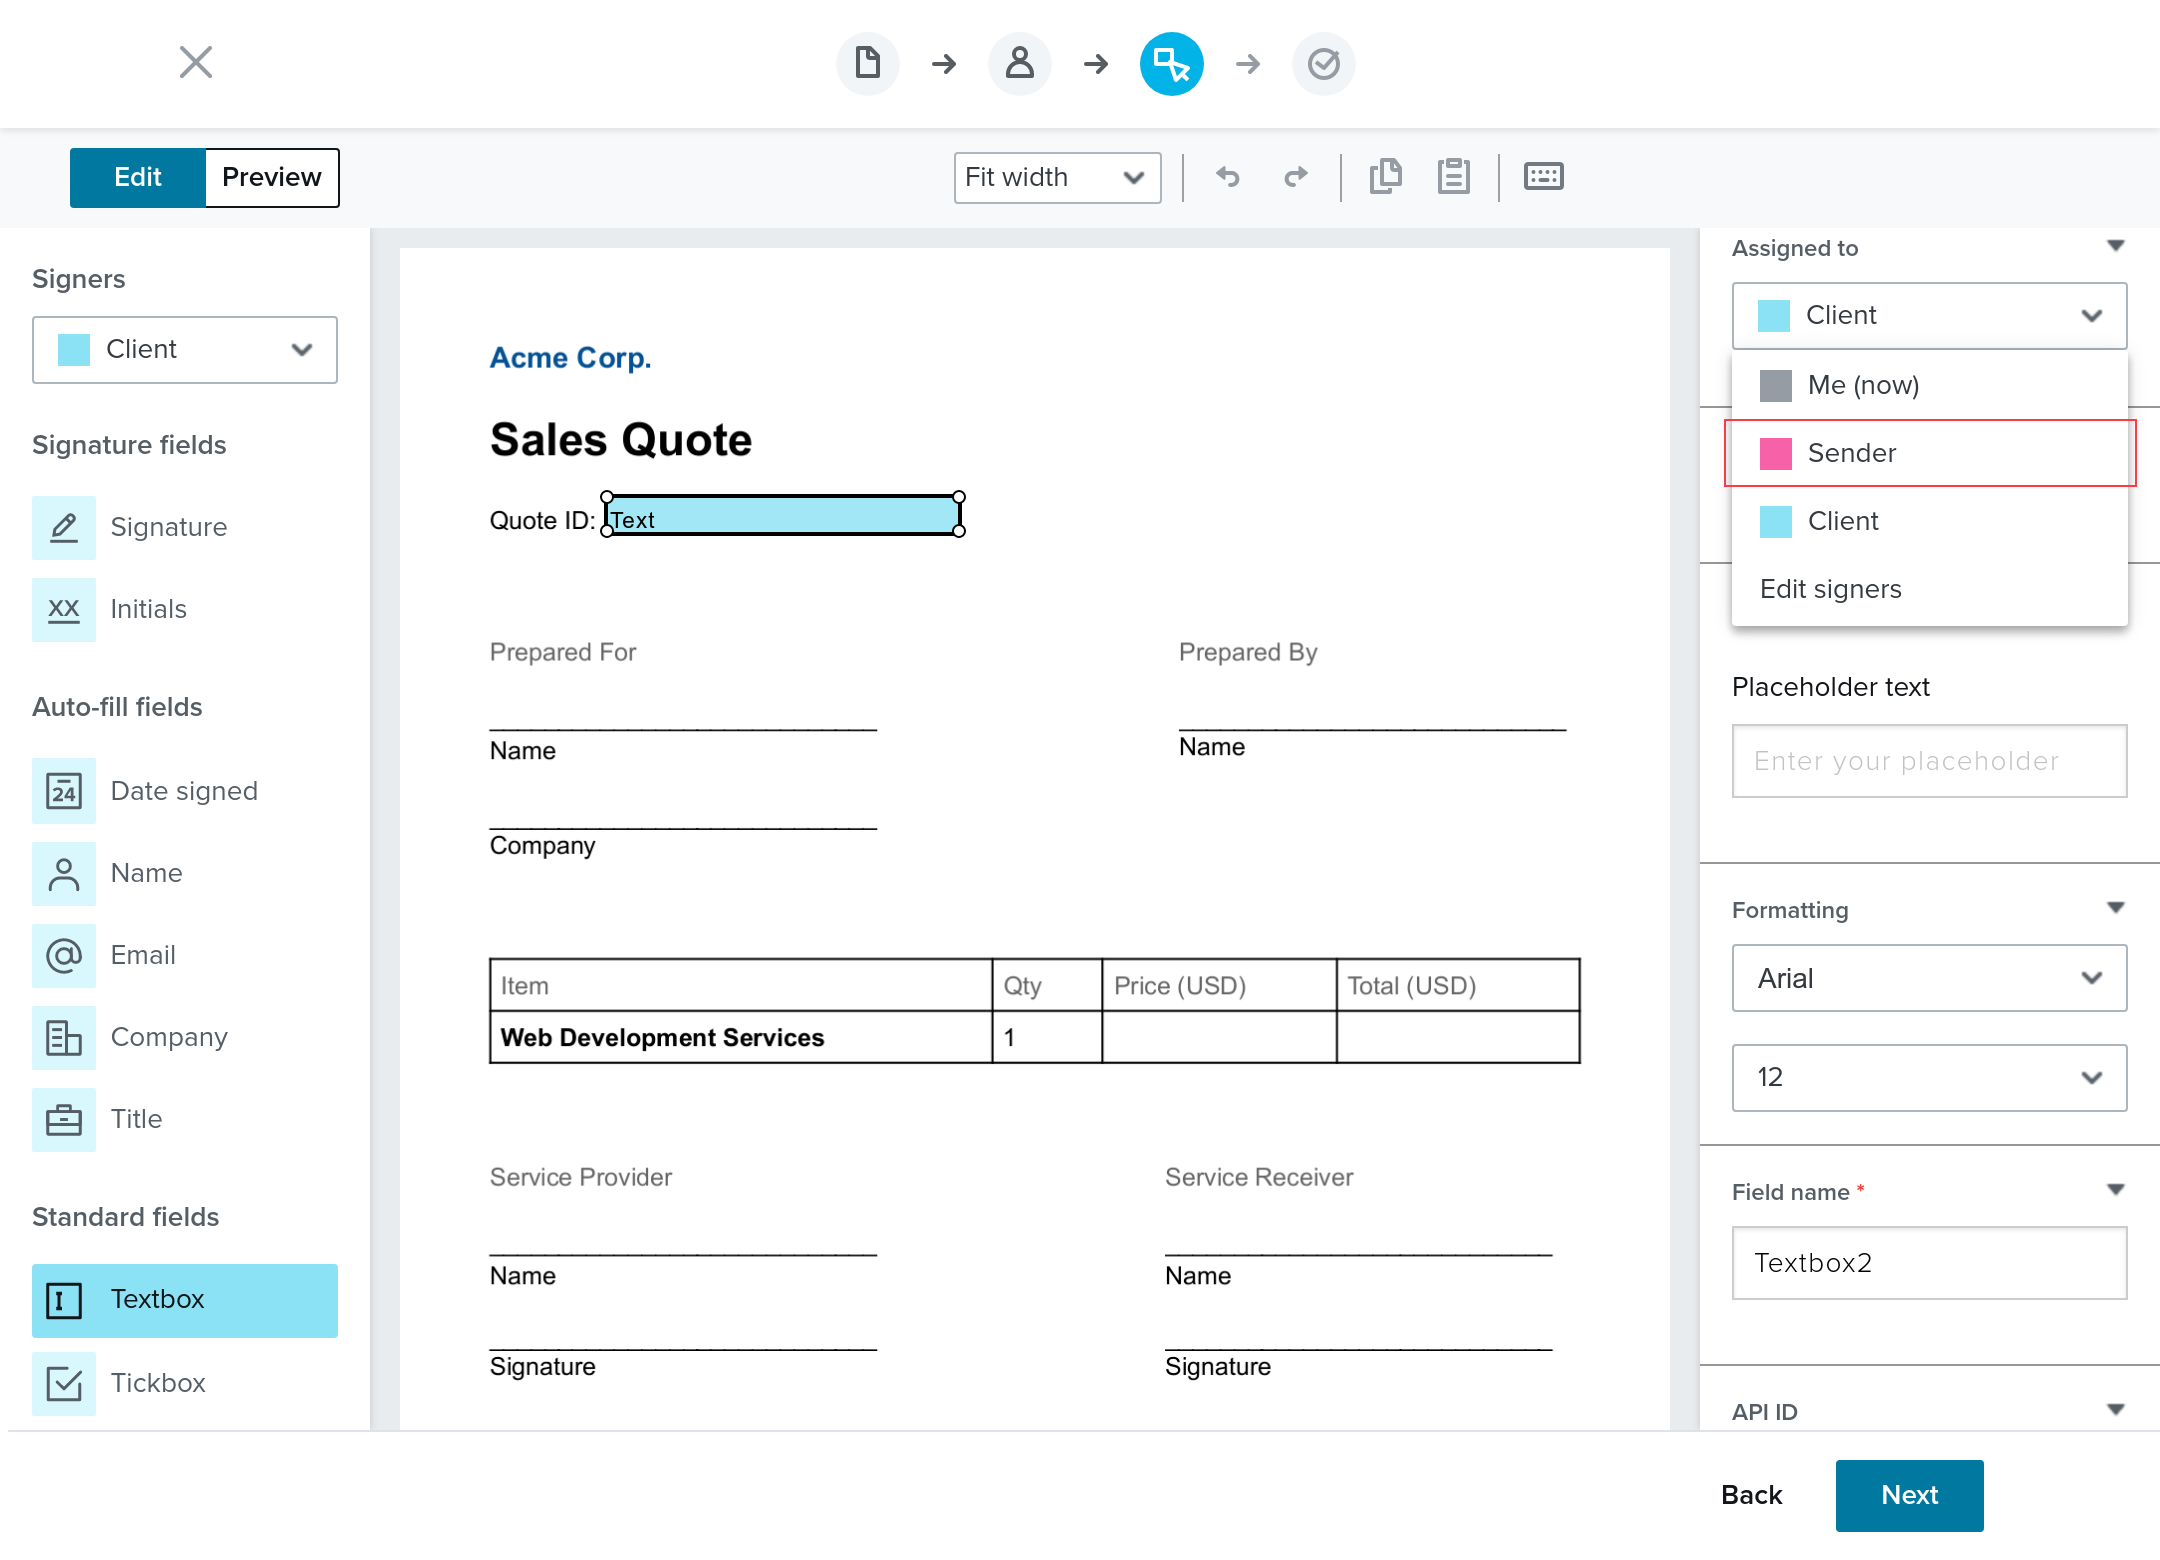
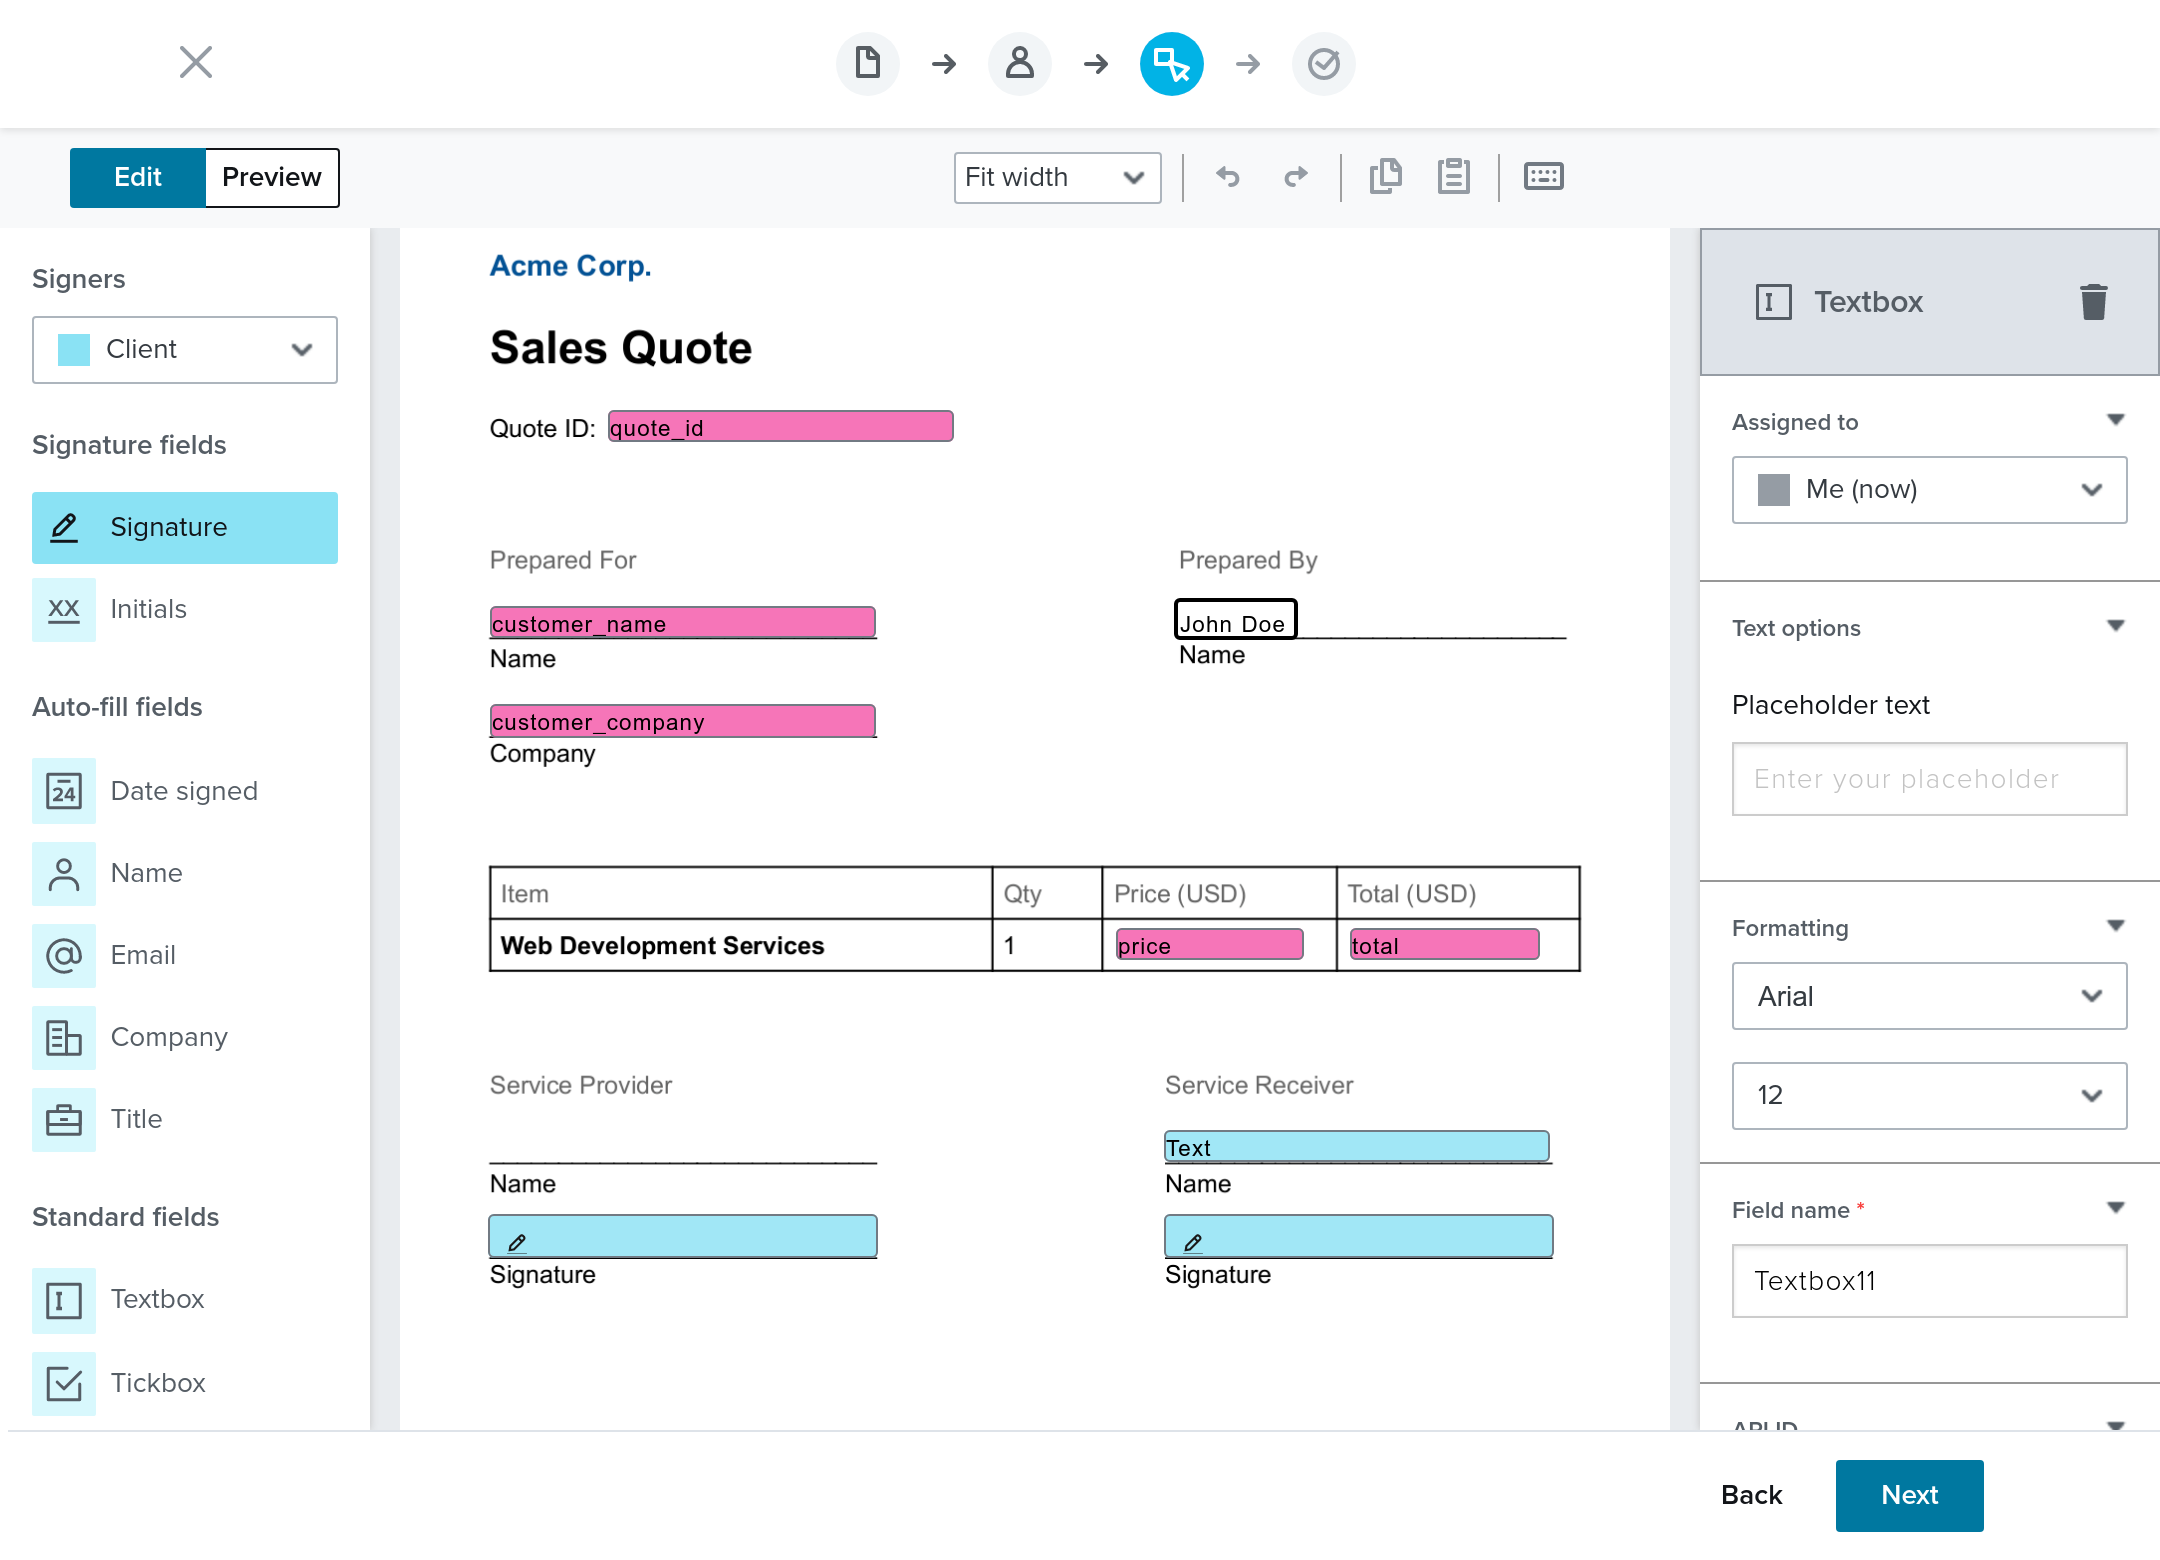
From the Standard fields, drag and drop a Textbox and add it in front of the Quote ID. From the right sidebar, set Assigned to to `Sender`.
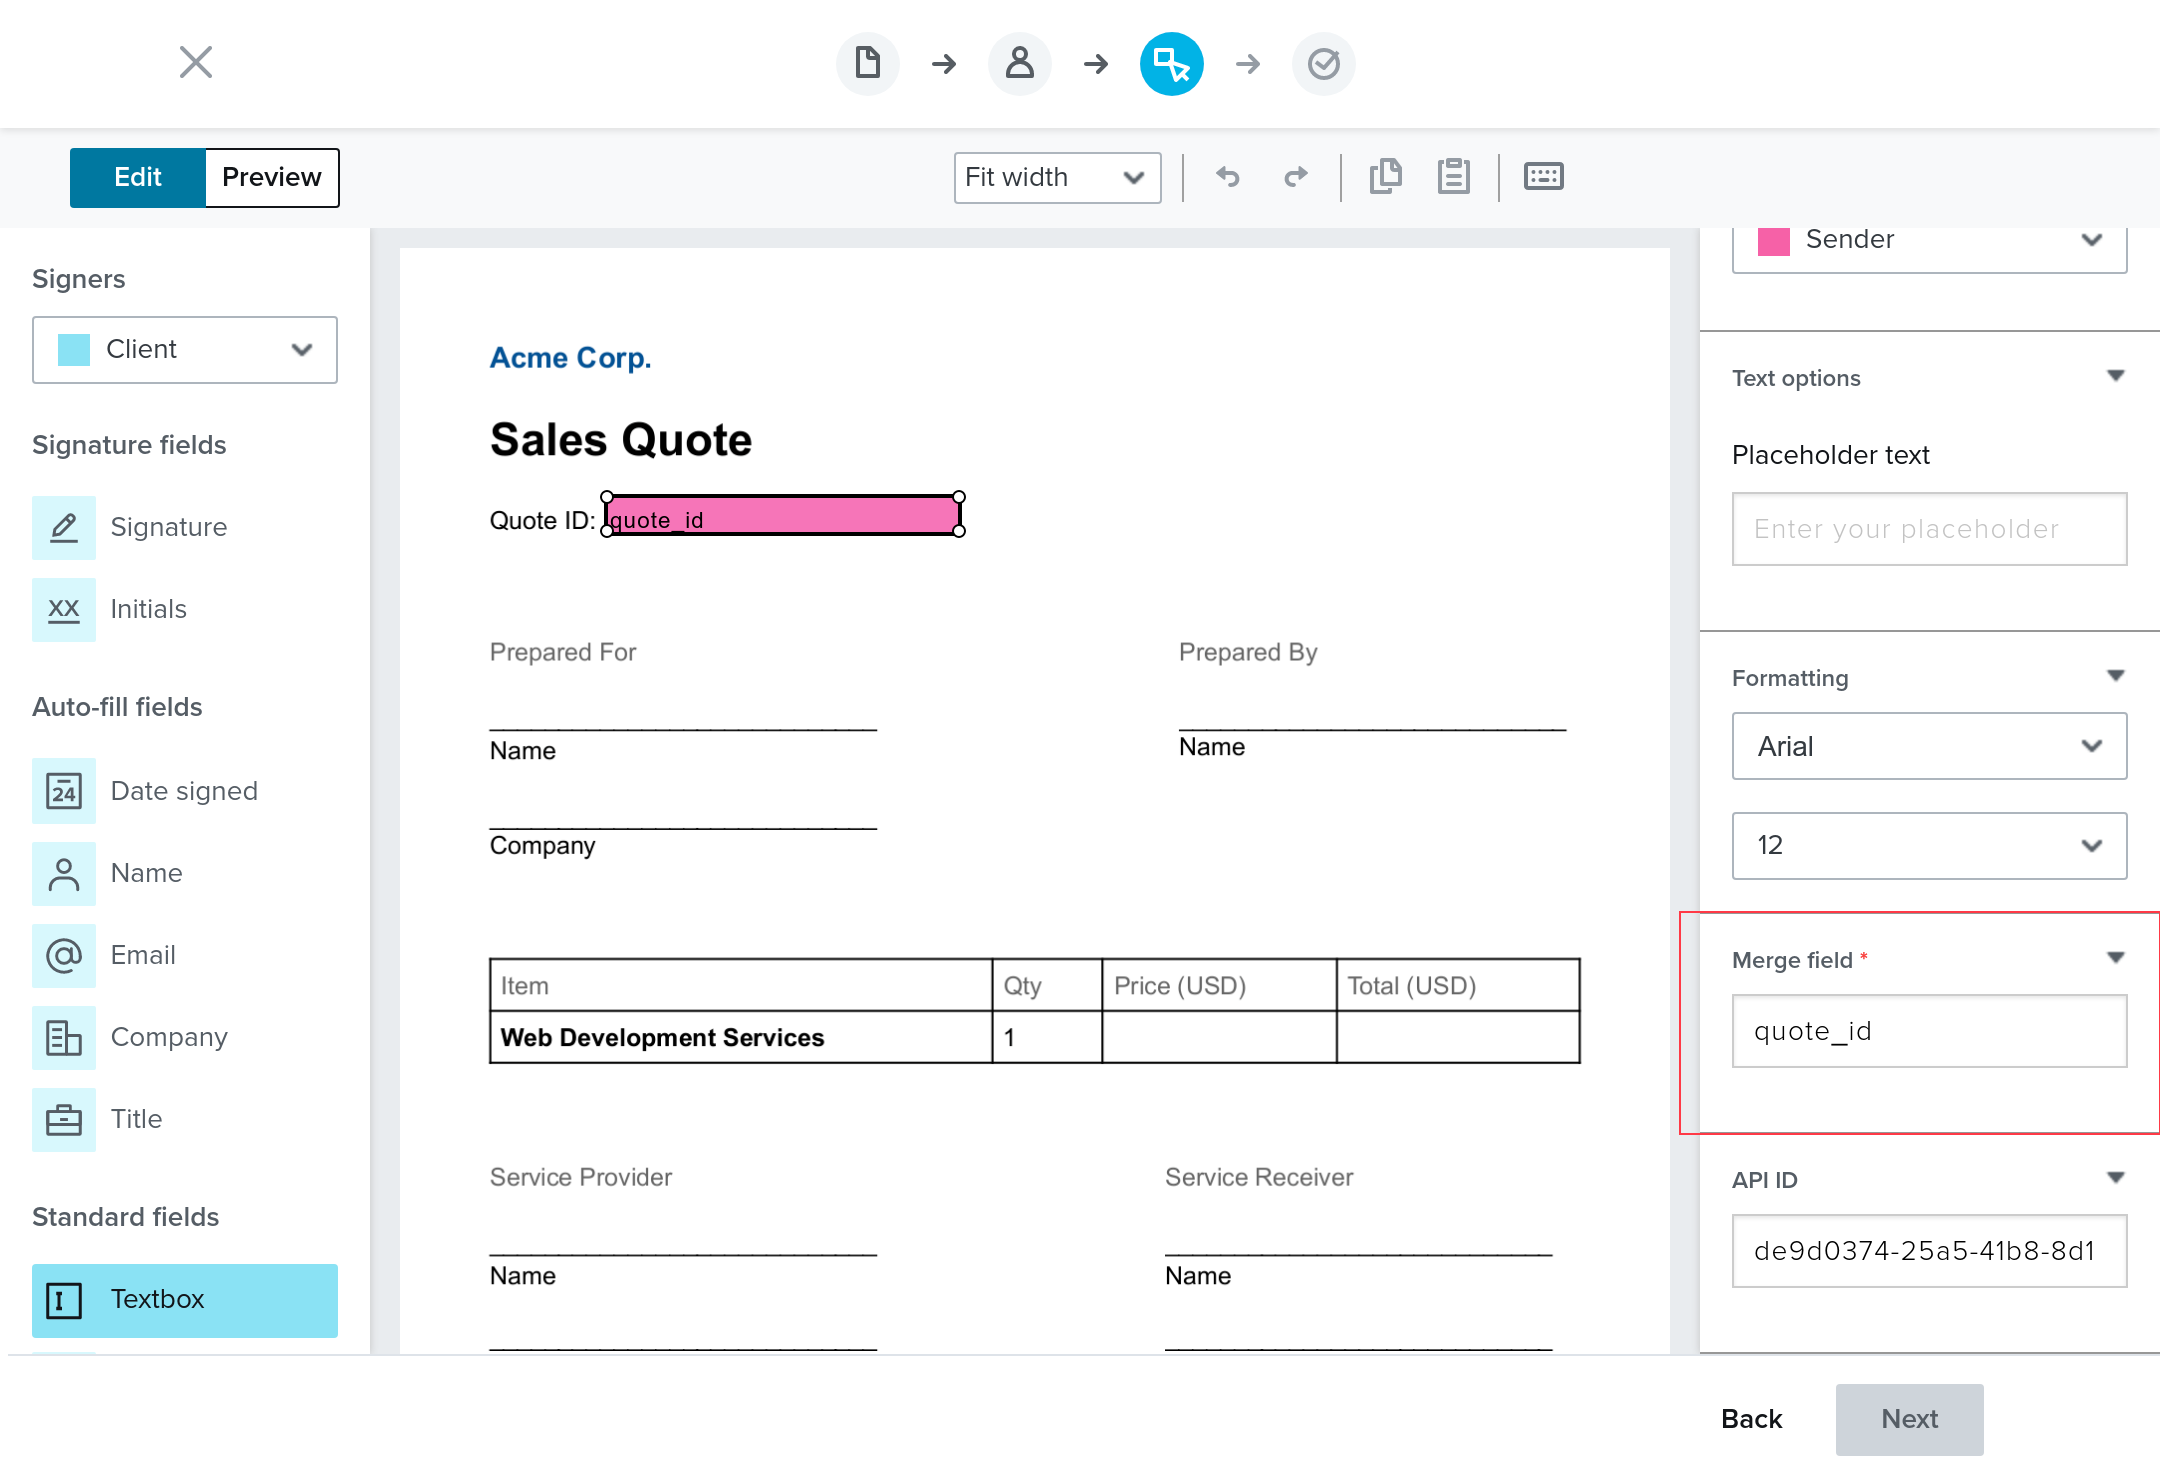
Set the Merge field to `quote_id` so that you can refer to this field when using the API.
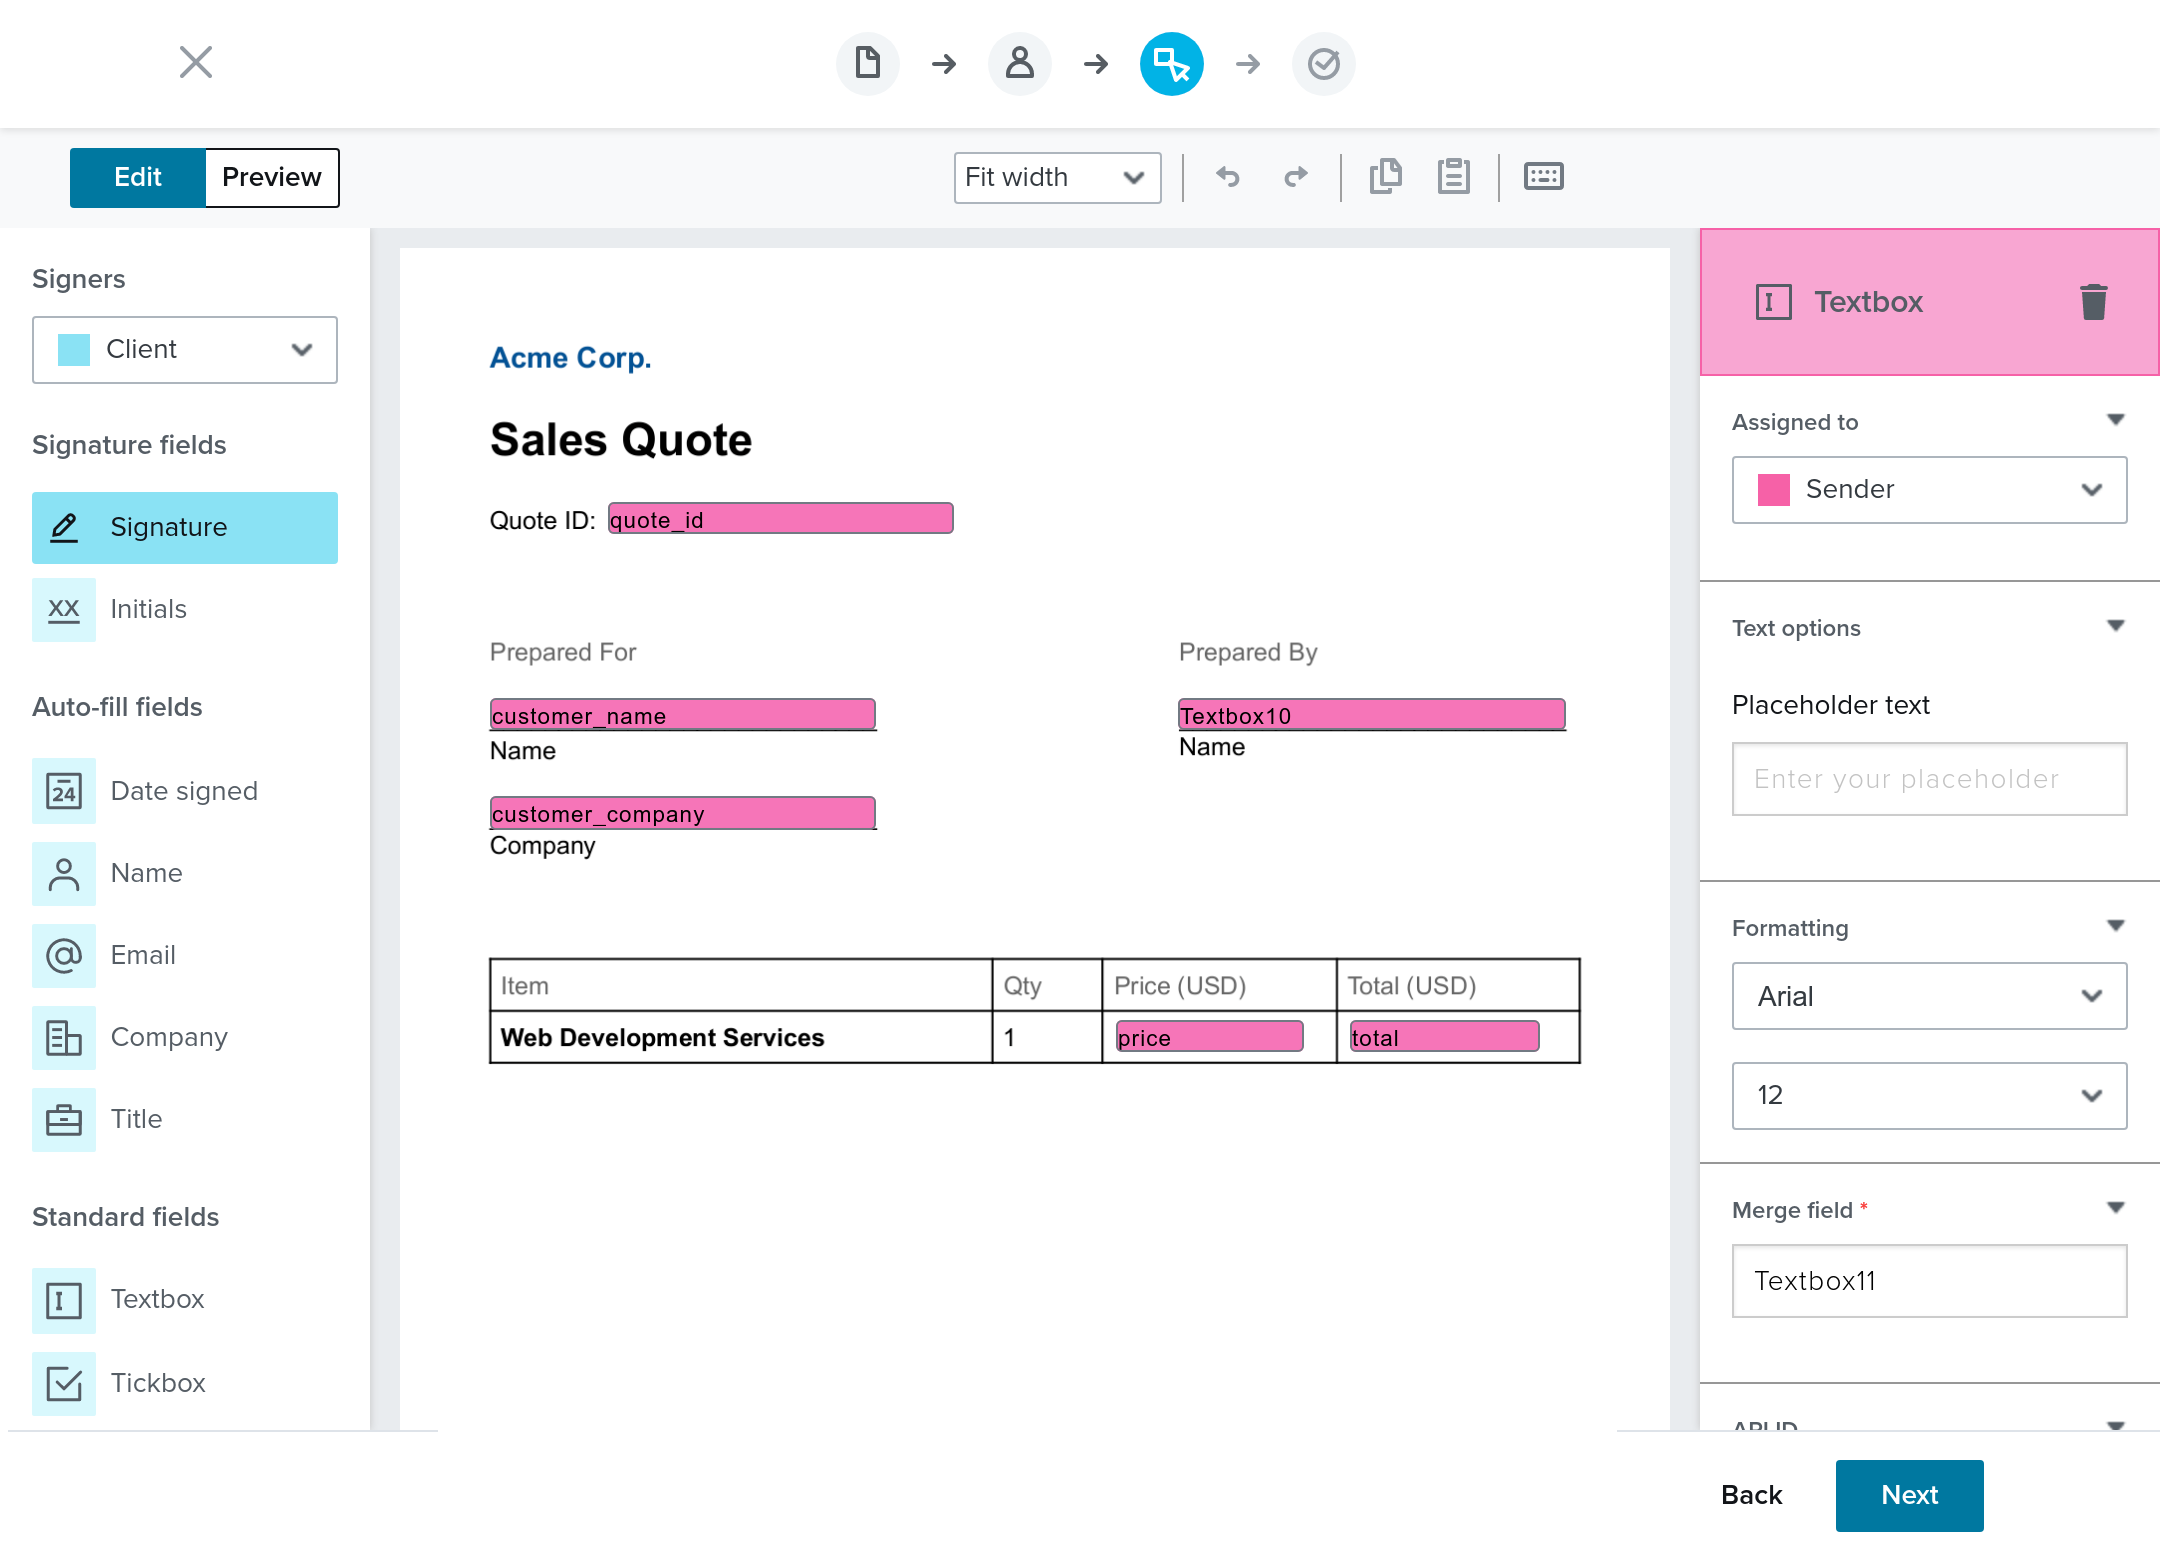
Add the other fields and set their corresponding Assigned to and Merge field names as shown below:
For the textbox under the Prepared By field, set the Assigned to to `Me (now)` and set its value to any name—in this case “John Doe”. The value provided here will remain on the document as is, and will be shown on any signature requests created using this template. This value is non-editable via the API, but can be changed by editing the template via the UI. Please note that editing this value will not update the value shown on signature requests created with this template prior to the change being made.
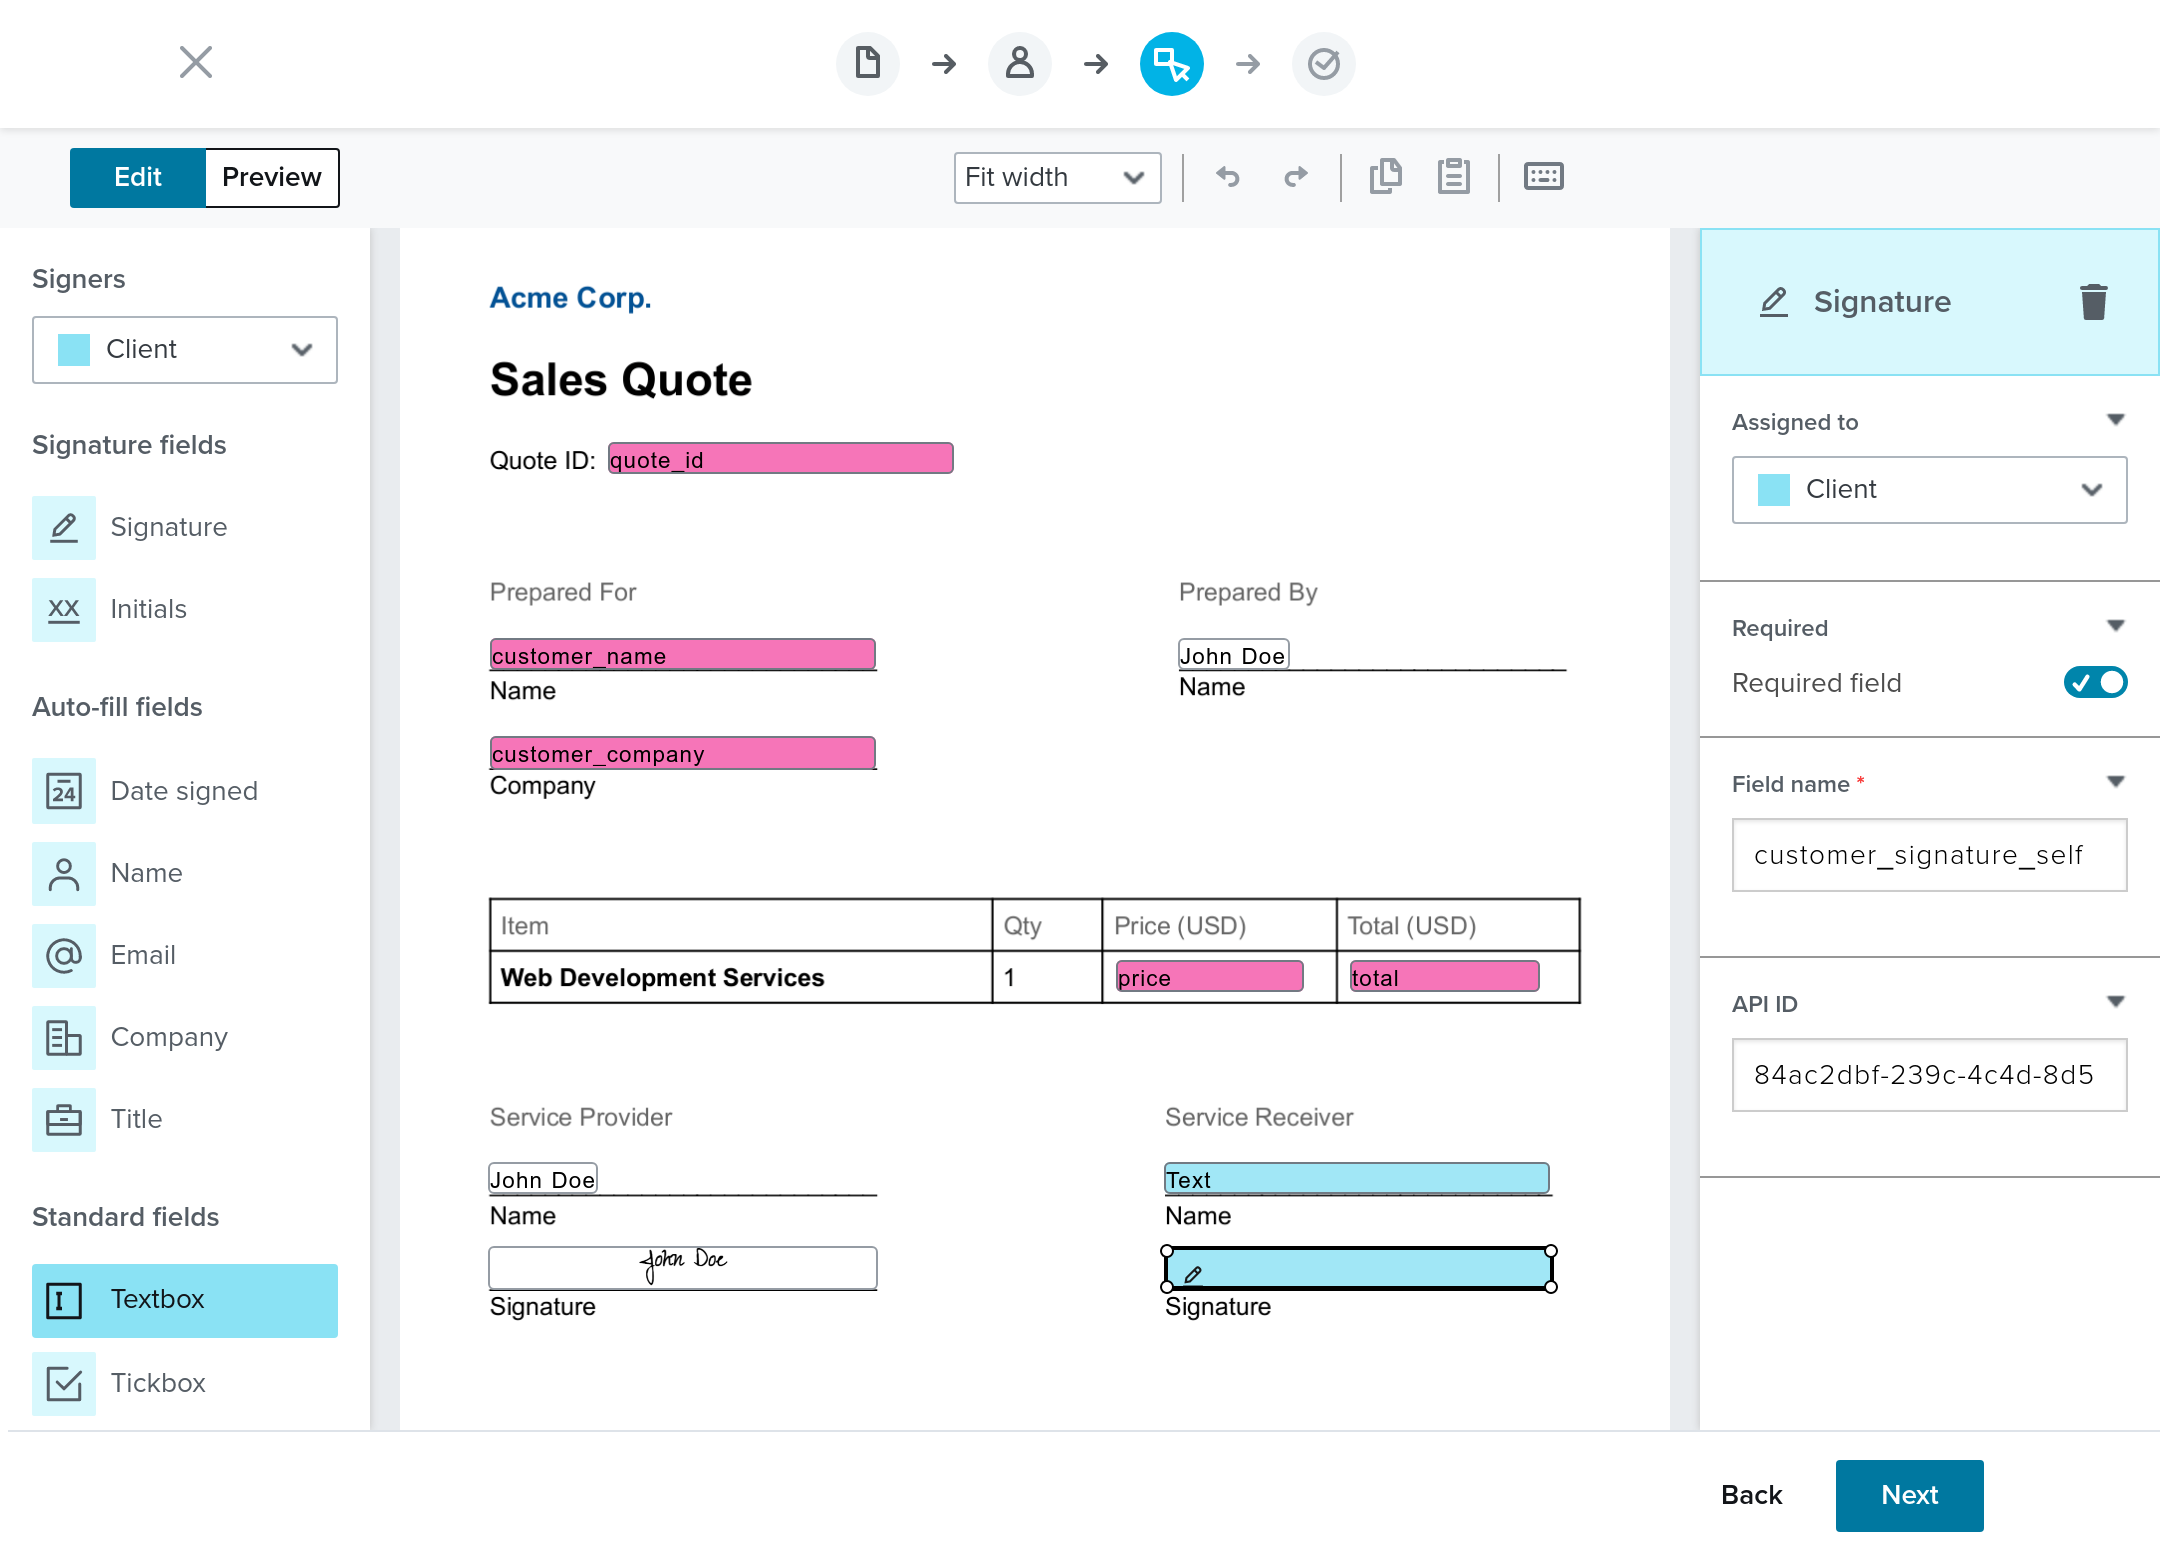
Your Dropbox Sign template should look like the example below. The pink fields are merge fields, and you can set their values using the API. The blue fields must be filled in by the customer.
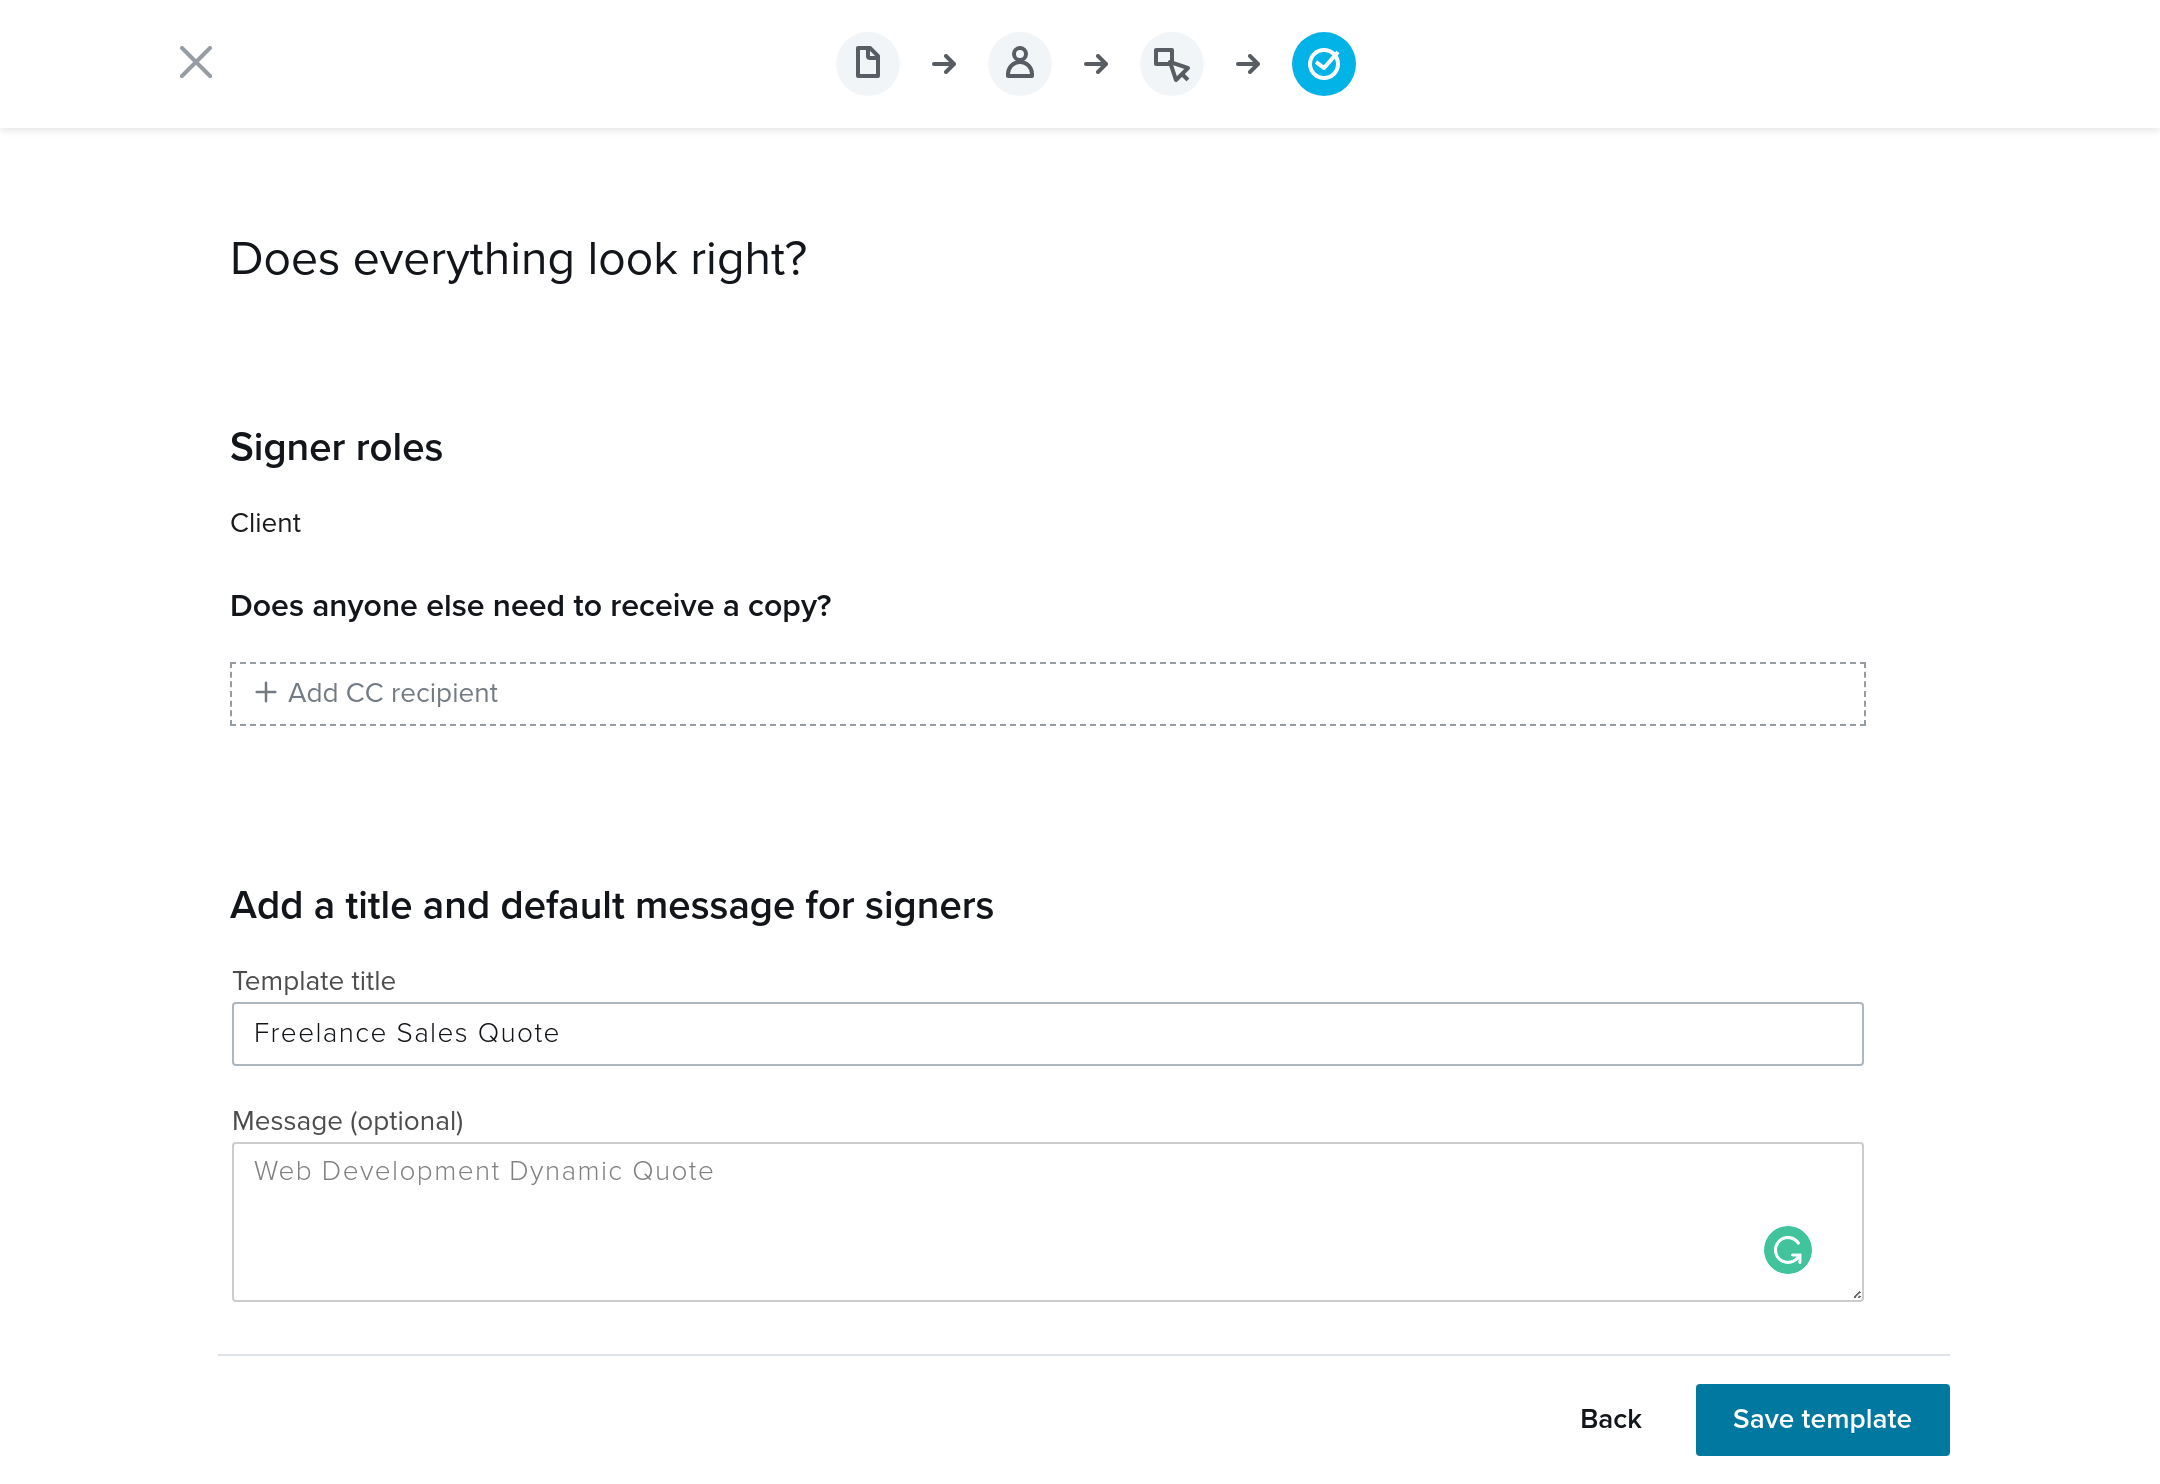
Review your template, then give it a Template title and an optional Message.
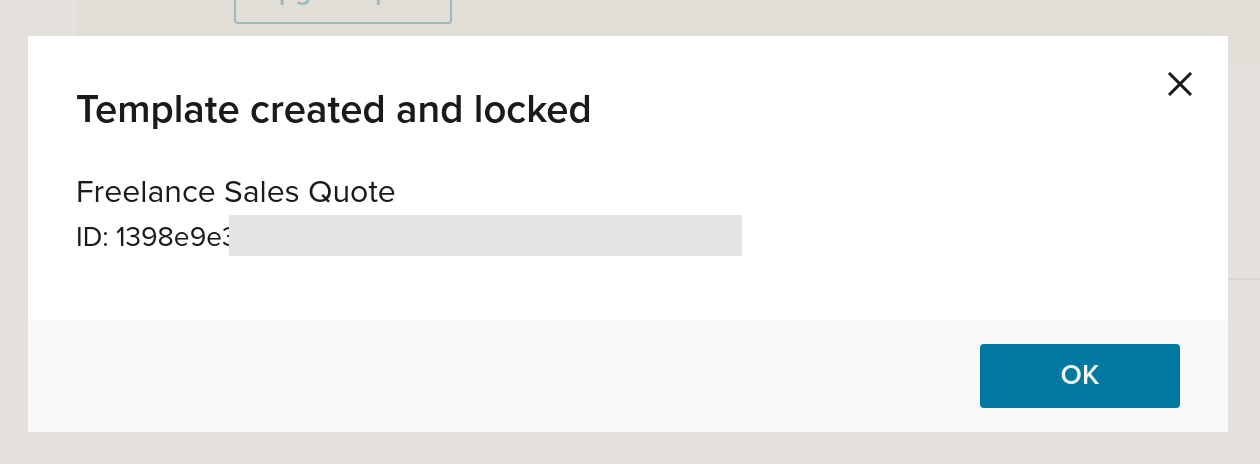
Your template is now created. You’ll get a template ID in the confirmation dialog box, which you’ll need for your Node.js application.
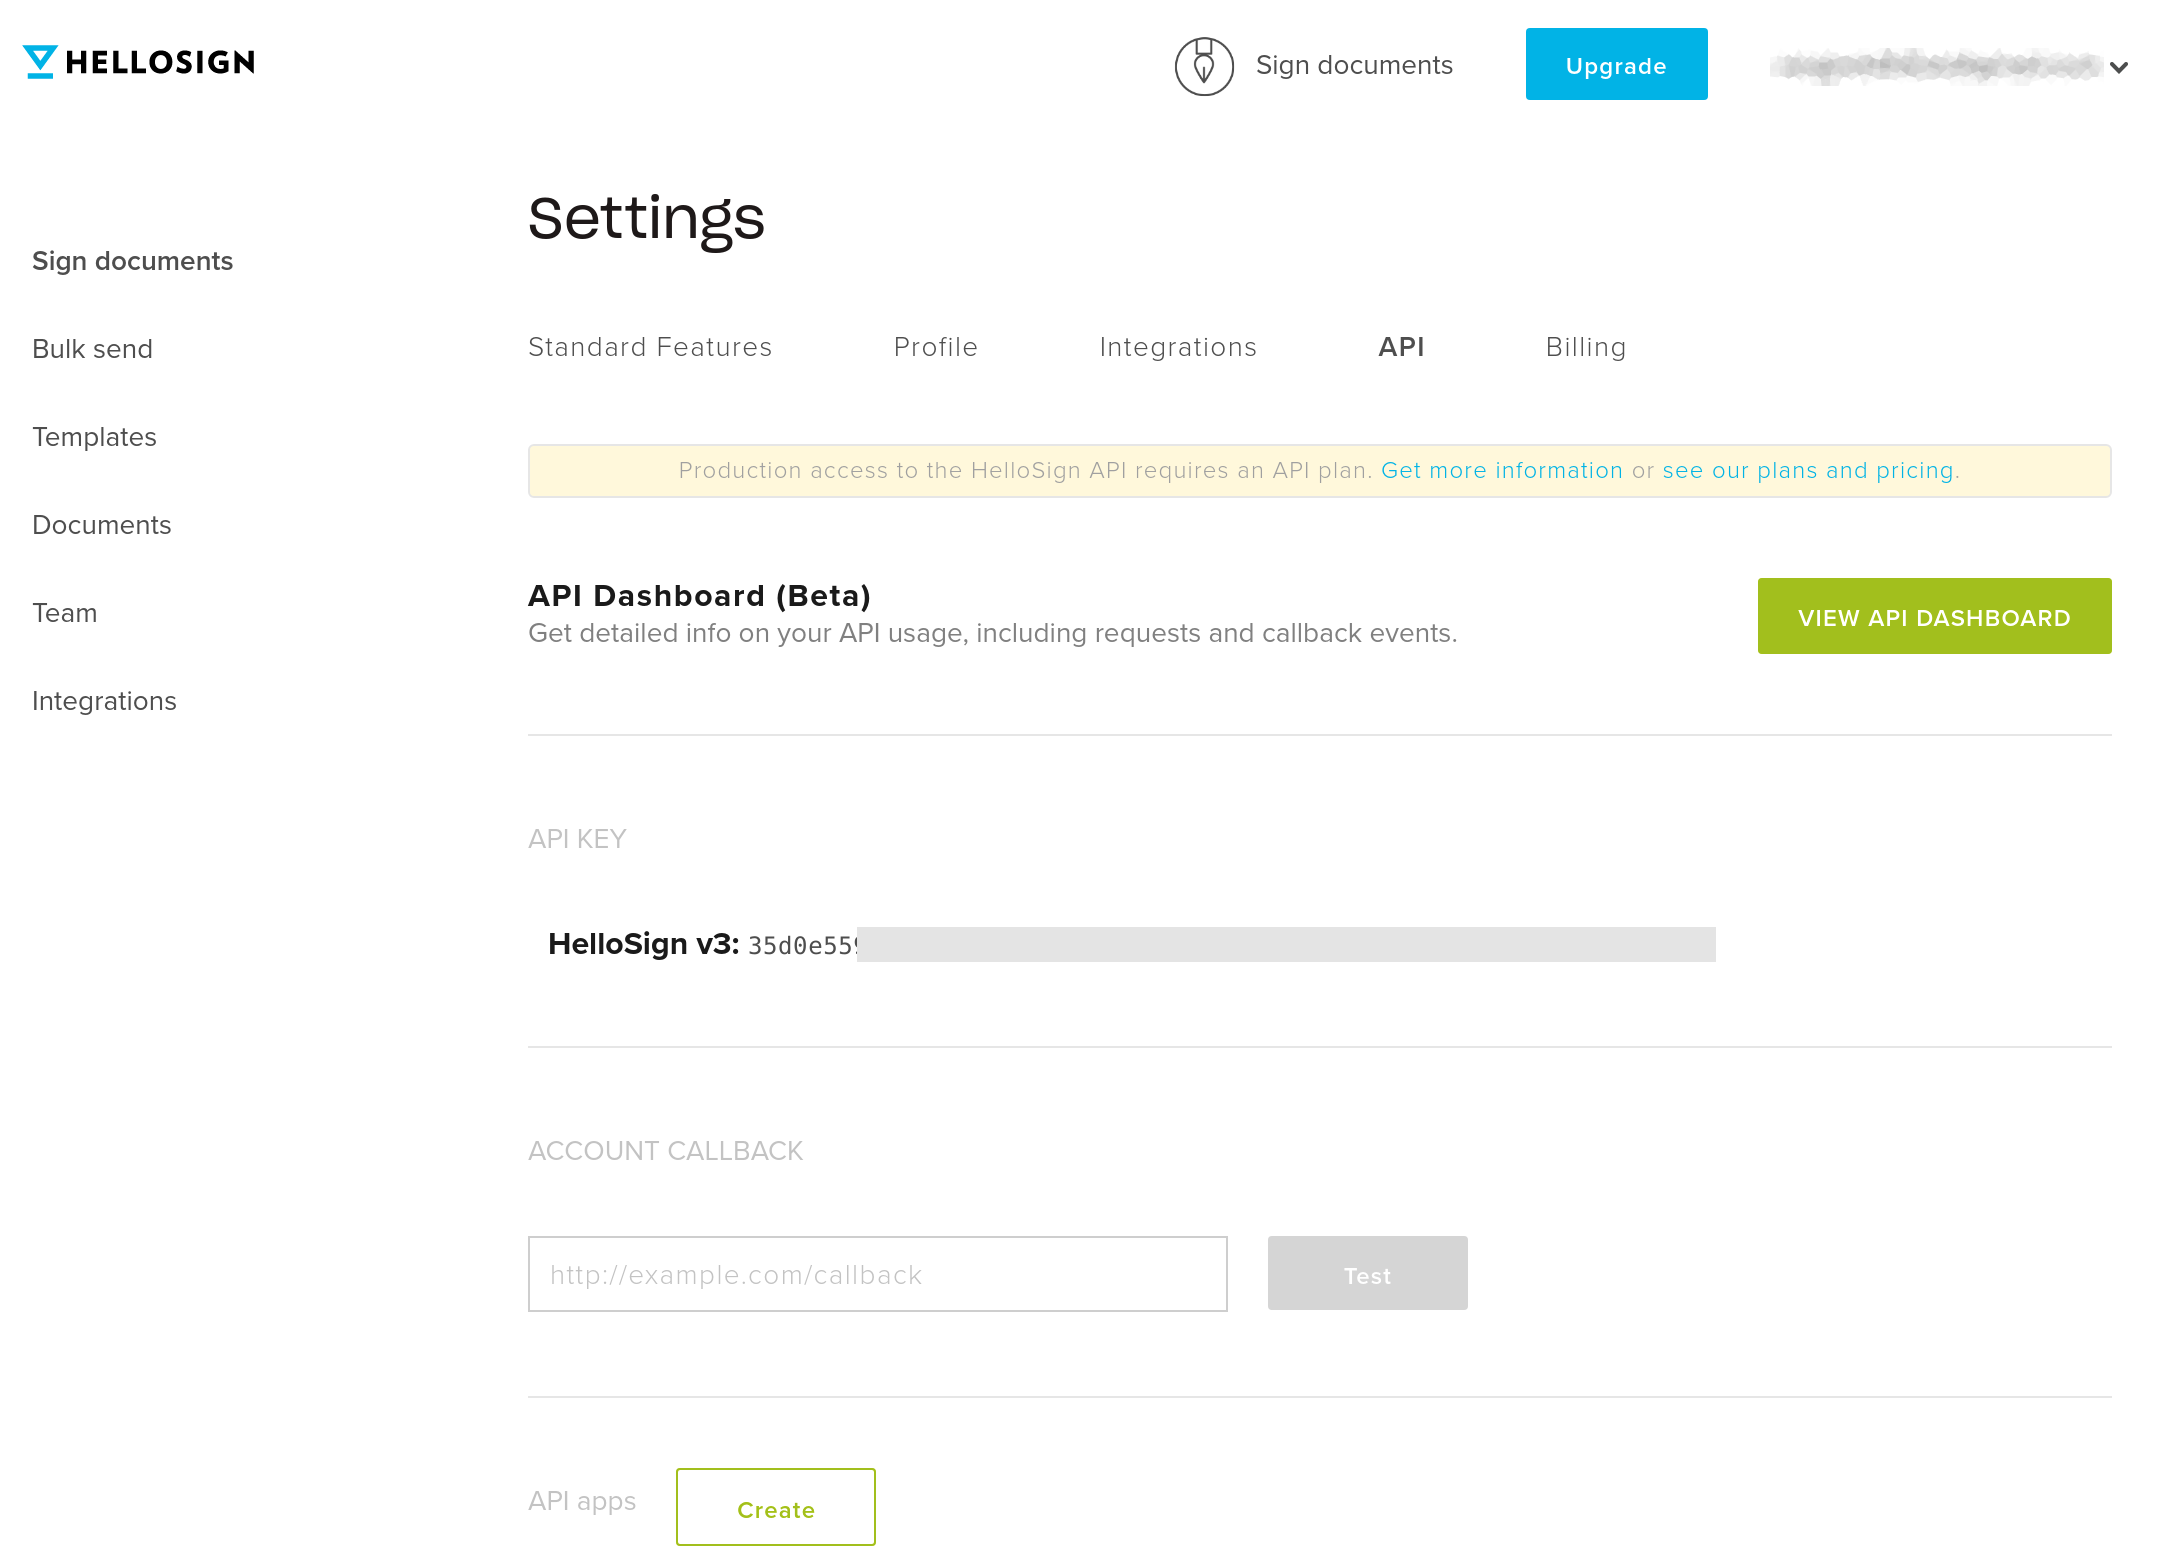
Getting a Dropbox Sign API key
To connect with the Dropbox Sign API, you need an API key. Go to Settings and select the API tab.
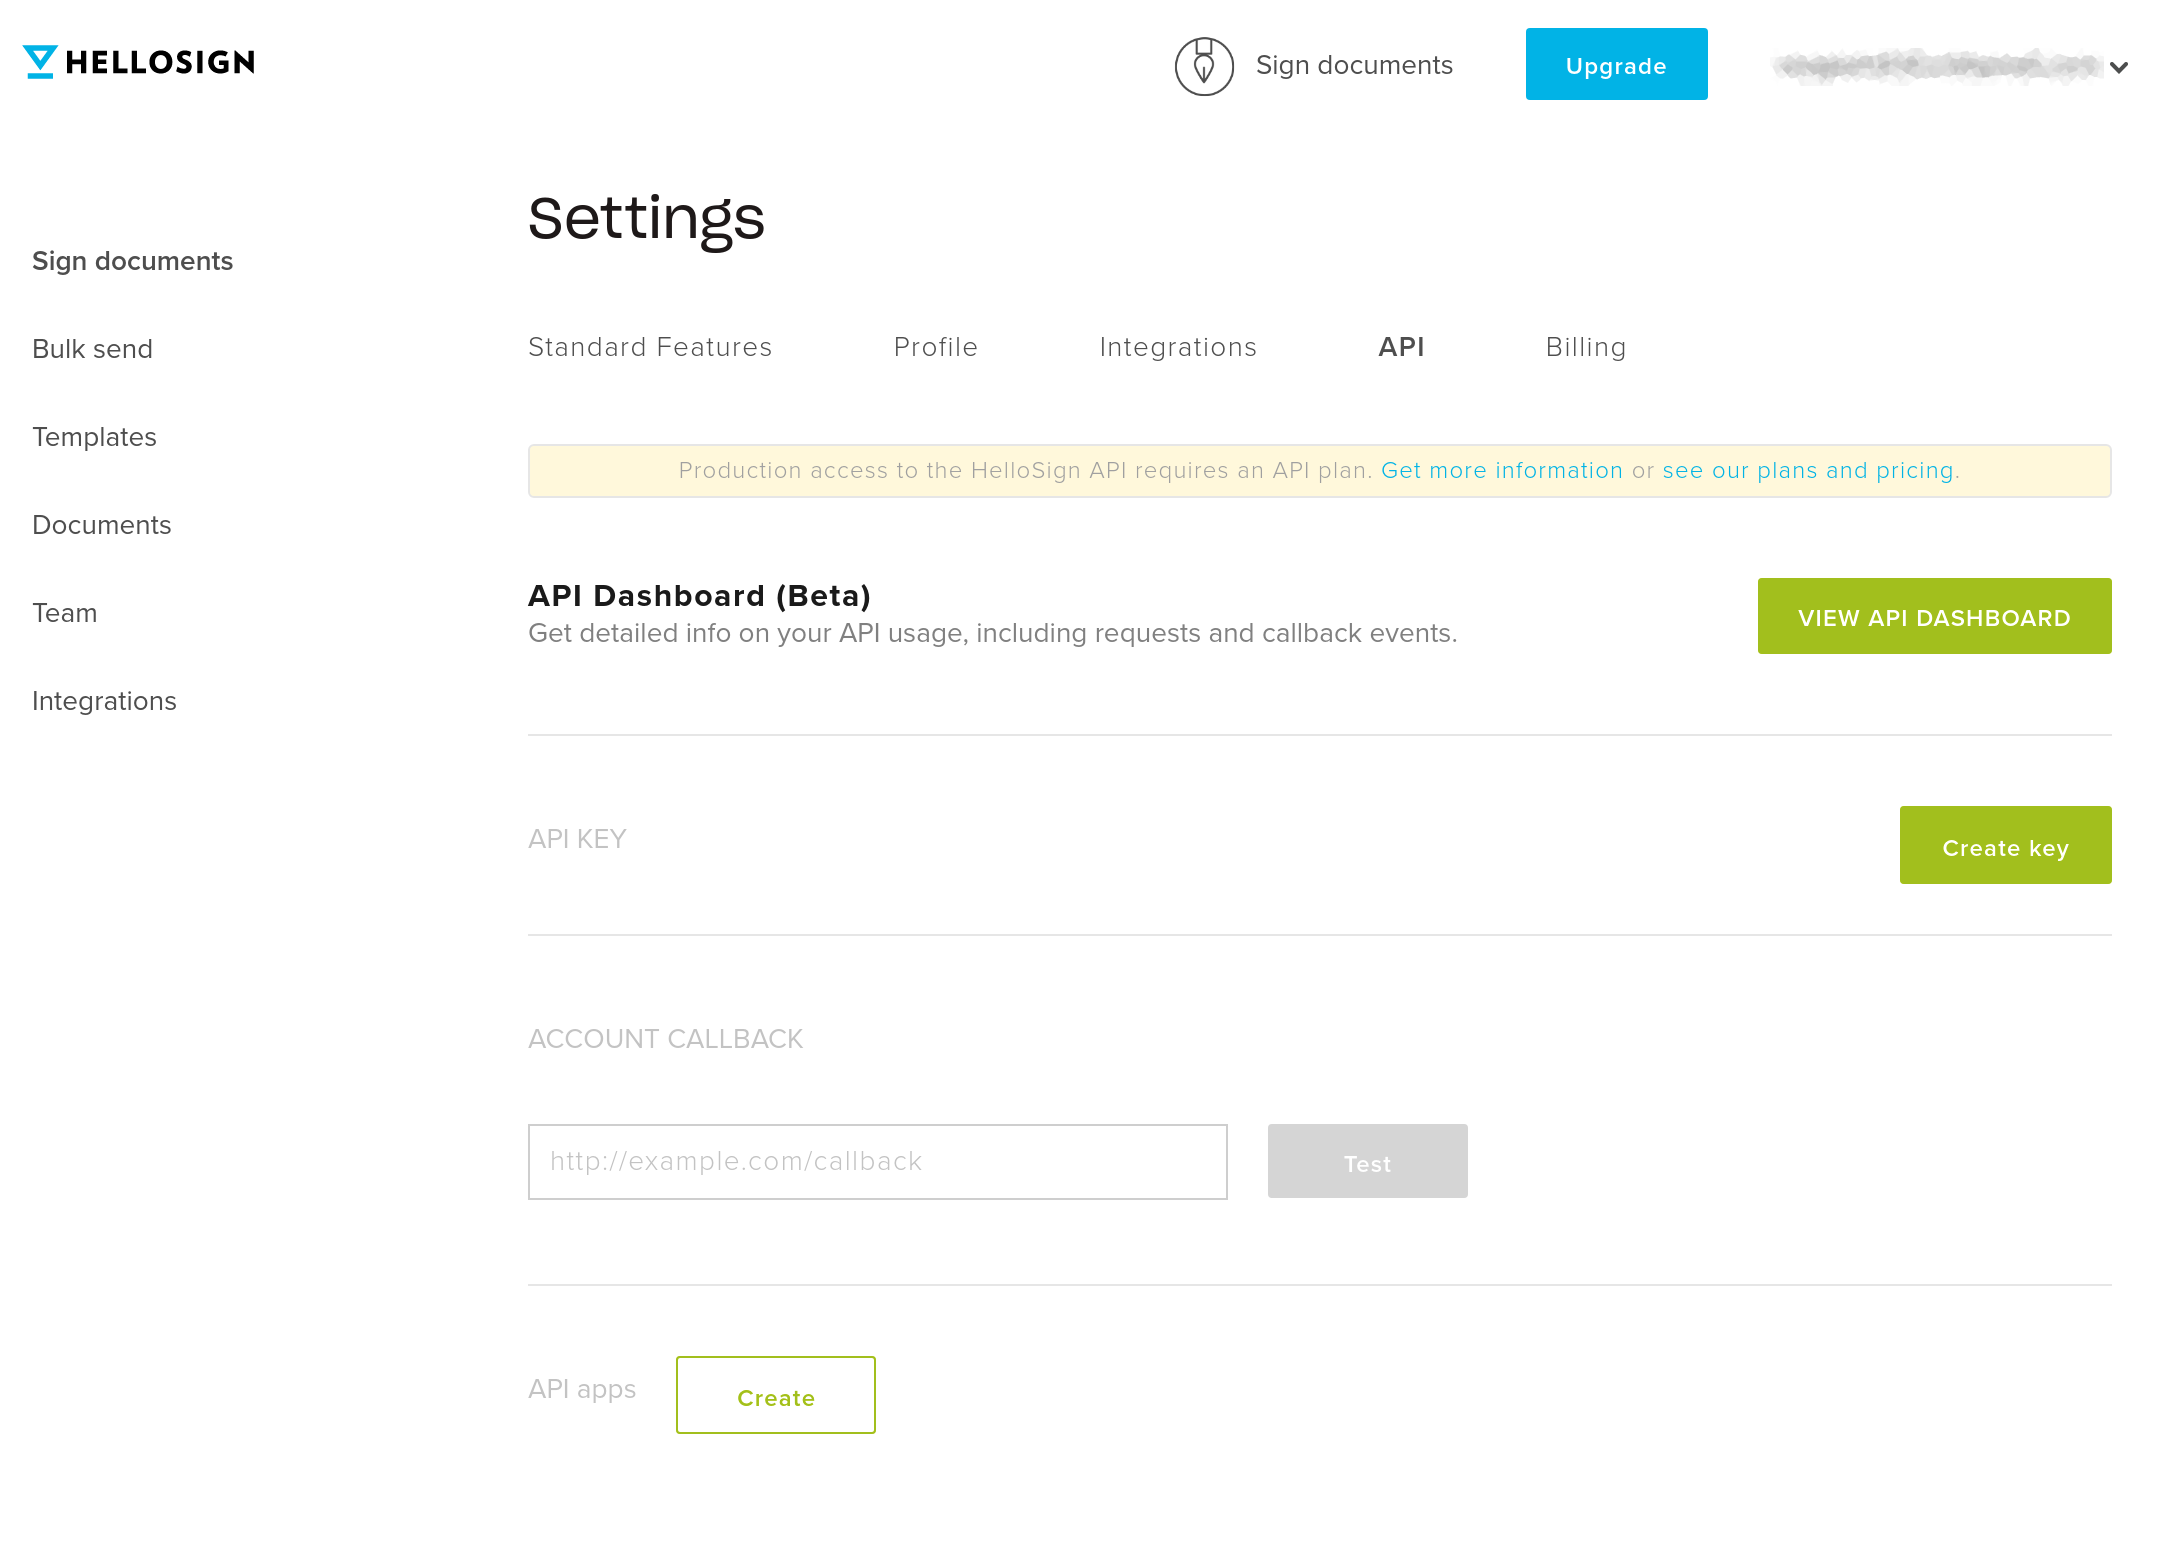
Click the Create key button to create your API key.
Setting up a Node app
Next, you’ll set up your Node application. Open your terminal and navigate to a path of your choice. Run the following command to create a project directory (`dynamic-sales-quote`):
You’ll need to install the following npm packages for this application:
- hellosign-sdk allows you to work with Dropbox Sign APIs programmatically.
- dotenv allows you to read environment variables from the .env file.
- minimist allows you to parse arguments passed via the command line to Node.js.
- uuid allows you to create universally unique IDs.
To install these packages, run the following command in your terminal:
Next create a `.env` file at the root of your project and add the following environment variables:
Replace `<YOUR_HELLOSIGN_API_KEY>` and `<YOUR_HELLOSIGN_TEMPLATE_ID>` with the appropriate values.
Creating dynamic sales quotes using the Dropbox Sign API
In your project’s root directory, create a `src` directory. In that directory, create an `index.js` file. In the `index.js` file, add the following code:
This will import the required npm packages `dotenv`, `hellosign`, `argv`, and `uuid`.
Next, add the following code to the `index.js` file:
In the above code:
- You destructure the command line arguments.
- You use the null coalescing operator (`??`) to provide a default value for each of the variables in case they are undefined.
Add the following code to the `index.js` file:
In the above code:
- You specify the options for making a signature request using the Dropbox Sign SDK.
- You specify the `test_mode` value based on whether the application is running in production.
- You specify the `template_id` by reading its value from the environment variables (`process.env.HELLOSIGN_TEMPLATE_ID`).
- You specify the values for each of the merge fields (`custom_fields`) that you defined in the template. The `custom_fields` specified in your request will be used to map values of custom fields to the merge fields on your document with identical names.
- You specify the signers with the Client role to whom you want to send the signature request.
Finally, add the following code in the `index.js` file:
In the above code:
- You define the main function (`index`) of the application.
- You create a templated signature request (`signatureRequest.sendWithTemplate`) using the Dropbox Sign SDK (`hellosign`) and pass the options to it.
Your code is complete and ready to be tested.
Testing the App
To test your Node.js application, run the following command in your terminal and pass the arguments according to your needs:
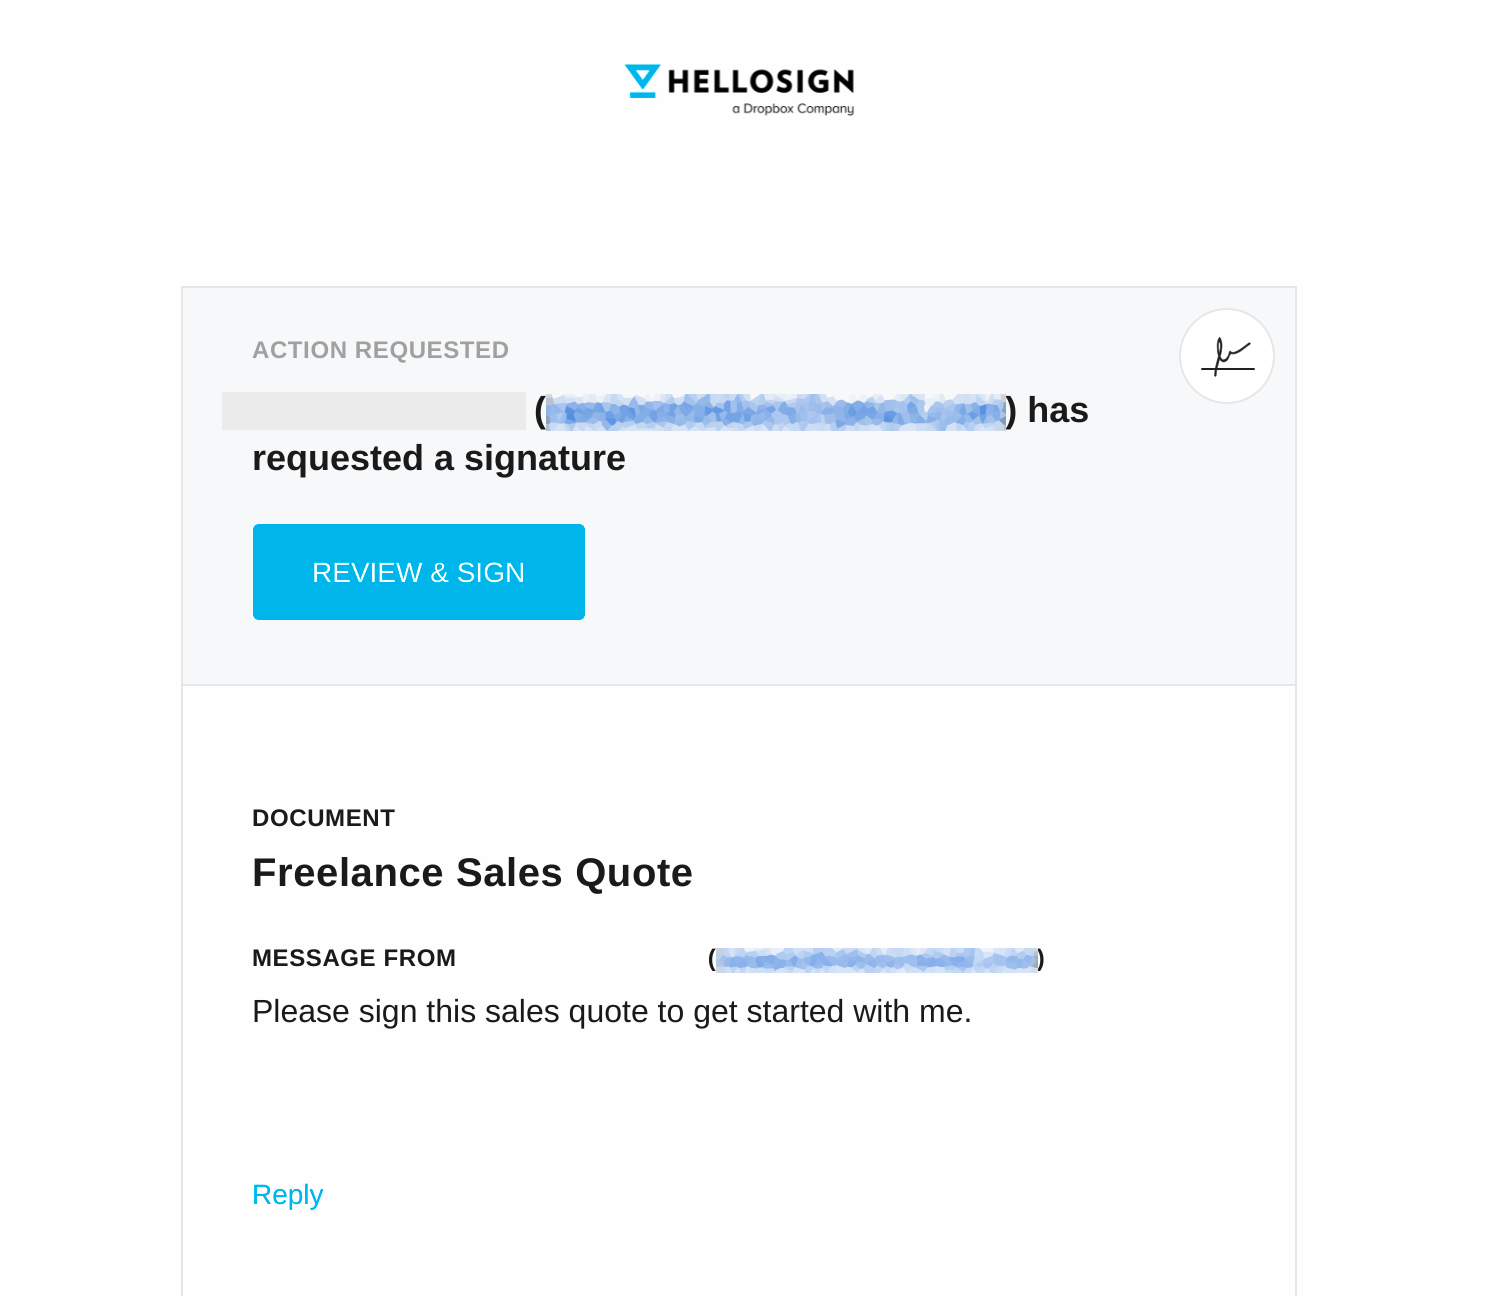
You should see a signature request in the signer’s email account:

Open the email and click REVIEW & SIGN.
You’ll see a dynamically generated sales quote and two fields to complete: Name and Signature under the Service Receiver column.
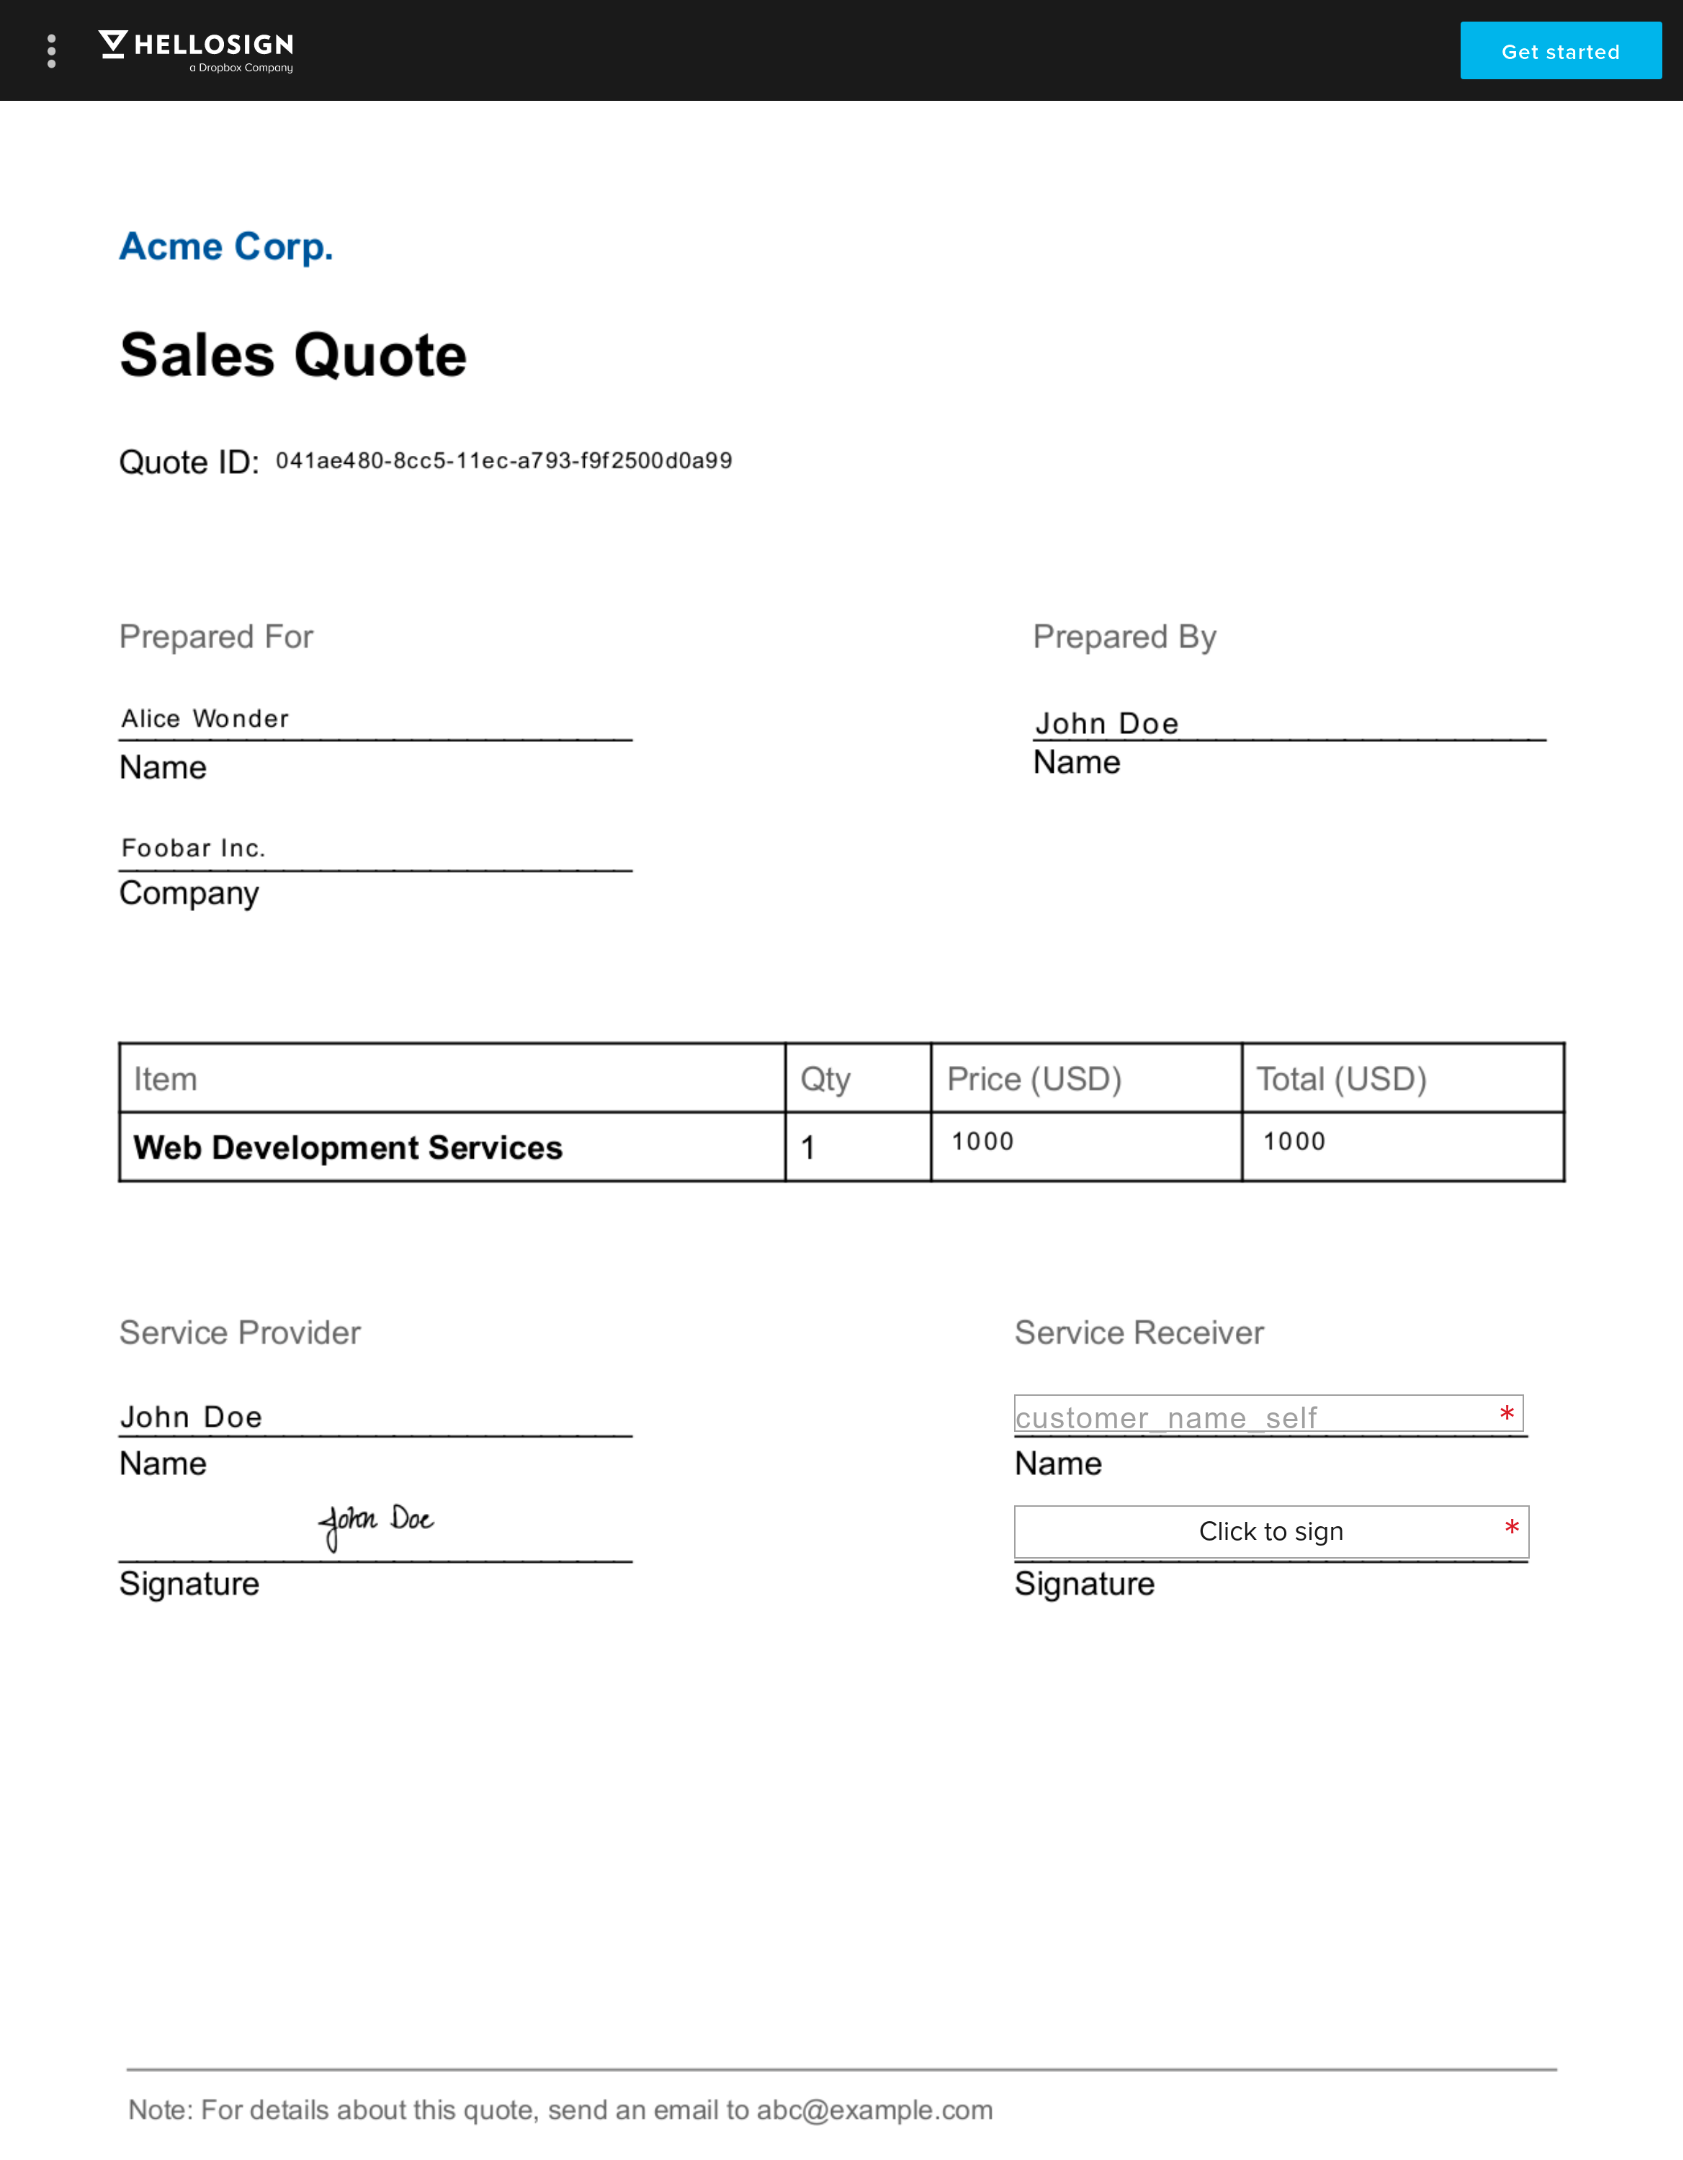
After filling in the required details, click Submit. Your document is now signed.
Conclusion
As you’ve seen in this tutorial, the Dropbox Sign API and Node.js can help you automatically generate sales quote documents for your sales team. By creating a command line utility, you can pass input data as command line arguments. You can use this utility with your CI/CD service or automation tools, or even link up with Google Sheets to send your company’s signature request to multiple customers at once. You should be able to complete the tutorial in under ten minutes.
Dropbox Sign has a lot to offer your company, from its multiple features to its exceptional developer support. You can start building custom document generation workflows by testing the Dropbox Sign API for free.
効率を維持
ありがとうございます。
ご登録いただきありがとうございます。


