.svg)


Lo stesso prodotto con un nuovo aspetto! HelloSign è diventato Dropbox Sign!
Thanks to eSignature tools like Dropbox Sign, you don’t need to align schedules in order to put ink to paper. With a couple lines of Python, you can automate your eSignature workflow, allowing users to obtain legally binding eSignatures on their important documents with just a few clicks while saving them time, money and frustration. To get started, you can visit the Dropbox Sign Developer Portal and start testing for free (no credit card required).
The Dropbox Sign API gives you a powerful arsenal of tools for managing electronic signatures. We'll show you how, in just a few steps, you can begin using Dropbox Sign with Python. This guide will walk you through getting connected to the API and explore one of its most integral features: sending signature requests.
Along the way, you'll build the foundational knowledge needed to begin building out your own Dropbox Sign API workflows. Let's begin!
Get Set Up With Dropbox Sign
Before we dive into making actual API calls, you'll want to get a few things set up.
First, you'll need to create an account. (Note: Dropbox Sign, a Dropbox company, enables Dropbox users to use their existing account to log in)
With your account created, you can grab the credentials to access the API. From the Dropbox Sign web app, click on your username in the top right corner. From the responding dropdown menu, click "My Settings." Then, navigate to the "API" tab. Here you can generate an API key.
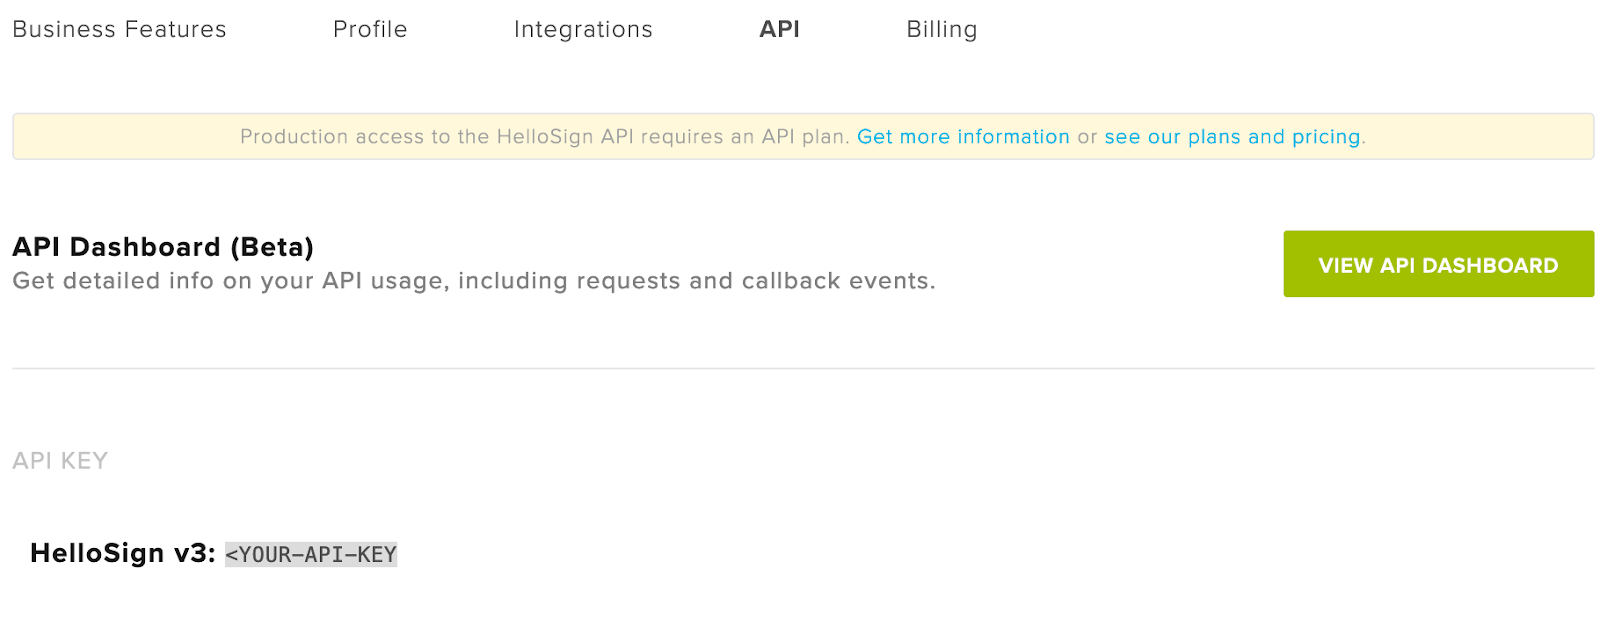
You'll notice a banner that says, "Production access to the Dropbox Sign API requires an API plan." That's why, for this guide, we'll take advantage of the free test mode Dropbox Sign provides.
Prepare Your Python Environment
Now let's set up an environment for making calls with that Dropbox Sign account. For readability, we'll be using the Dropbox Sign Python SDK, but Dropbox Sign supports many other languages. The concepts found within this guide apply to all of them.
First, check to make sure you're using Python 3. Open up a terminal and run the following command:
If it's a version of Python 3, great! If not, you'll need to install Python from the official website. Do so, then run the previous command to ensure it's running on your system.
Now let's install the Dropbox Sign Python SDK. There are a few ways to do so; one way is via pip. From the terminal, run the following command:
If successful, you'll see output that ends in the following line:
You have now installed everything you need to make calls to the Dropbox Sign API. With that, we can get to work in a Python environment.
Open up a text editor (such as VS Code), and insert the following line to import the Dropbox Sign Python SDK:
You’ll need your Dropbox Sign API key in order to instantiate the client. Grab it from your settings page, and insert it within the following line:
If a Dropbox Sign Account object is returned, then you're ready to begin sending signature requests with the API.
Protip: Look for the code snippets on each API method in the Dropbox Sign API Reference documentation

Send Signature Requests
Sending signature requests with the Dropbox Sign API is done with the Send Signature Request endpoint. Check out the documentation for a full list of optional parameters, but note that the following are required:
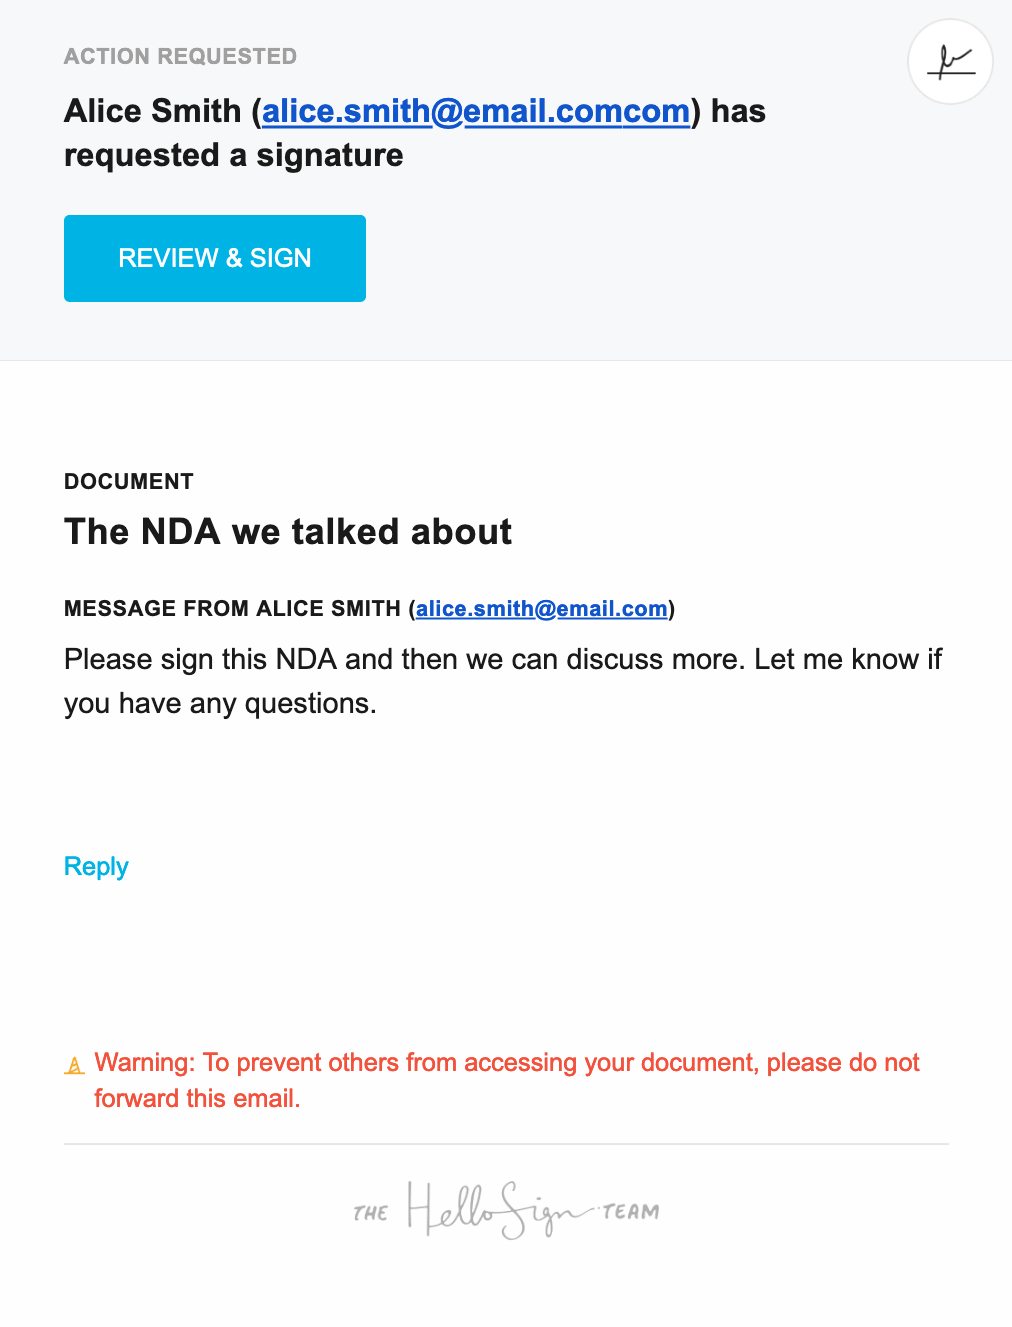
Meanwhile, all signers of the file will receive an email that looks like this:
Go through and sign the document.
You can then use those IDs to see the status of the signature request. Do so with the Get Signature Request endpoint. You can also use the Dropbox Sign API Dashboard to see API requests and responses. You even have the option of receiving the status of requests via callbacks.
Finally, you can use the API to download the signed copy:
Remember to include the Signature Request ID of your signature request.
Build Your E-signature Workflow
There you have it! In just a few steps, you've sent out a signature request to an email address and then downloaded the signed copy.
So what's next? You can do so much more with the Dropbox Sign API.
First, you might be interested in checking out the Dropbox Sign API public Postman Collection. For further honing your signature requests, there’s a more in-depth Signature Request Walkthrough that introduces you to concepts such as templates and form fields. Of course, to see what else you can do with the API, be sure to check the Developer Portal.
Rimani sempre aggiornato!
Thank you!
Thank you for subscribing!


