Verzamel ondertekende ontheffingen digitaal met de Dropbox Sign API
Many organizations require participants to sign waivers or contracts before engaging in activities. For instance, gyms often ask new members to sign liability waivers. However, this traditional paper-based approach is inefficient and prone to errors.
Digitally collecting signatures on forms solves several key problems. It provides higher security, as digital copies can be encrypted and stored digitally, reducing the risk of loss or theft. Additionally, digital signatures are more difficult to forge or alter without detection due to the metrics collected when they're initially signed.
Digital signatures are also more efficient. Participants can sign from anywhere, and staff don't have to organize or file any paper. Moreover, digital documents are easier to access since they can be quickly searched, referenced, and shared electronically.
In this article, you'll learn how to enable your clients to digitally sign waivers using Dropbox Sign and then effortlessly store the signed documents within your own application via webhooks.
Implementing digitally signed waivers
The goal of this article is to show you how you can use templates in Dropbox Sign and distribute them to multiple clients. In order to use templates, you'll need a paid Dropbox Sign account. The paid plans have free trials available, which you can use to test the functionality.
You'll also need an account on FormSwift, a platform for creating a variety of documents for legal, tax, business, and personal needs. You'll use FormSwift to generate a release of liability template PDF file that your clients can sign. Like Dropbox Sign, you get a trial subscription you can use to test the platform before purchasing a full subscription.
Once you've set up the template, you'll collect and save signed documents using the Dropbox Sign API. This article uses Node.js and the Express package to develop a web application capable of receiving webhook requests. To follow along, you'll need the following software:
- Node.js to create, compile, and run your Express web app. This article uses Node.js 18.17.1, the latest LTS release at the time of writing.
- Visual Studio Code (or similar editor) to develop your web app in.
- ngrok to expose your local web app over the internet so Dropbox can send webhook requests to it.
- curl (or any other HTTP client) to send requests to your API.
Even though Node.js and Express are used in this article, you can implement the same functionality in any other programming language or framework.
Create the Express web application
To begin this tutorial, you need to create a REST API for a gym management system using Express. The API will have an endpoint to send a new document signature request and a webhook endpoint to download the form once it's signed.
Create the project
Open a new terminal window in the directory where you want to develop the application. Run the following commands to create a new folder for the project and navigate into it:
mkdir gym-management-system
cd gym-management-system
Then initialize a Node.js project in your current directory, accepting the default configuration:
npm init -y
Set up Express
Once the project is initialized, install the Express framework. The web app will also need the multer package for processing multipart form data (used for the Dropbox Sign webhooks), the dotenv package for loading environment variables, and @dropbox/sign to access the Dropbox Sign API. You can install the exact package versions used in this article with the following terminal command:
npm i express@4.18.2 multer@1.4.5-lts.1 dotenv@16.3.1 @dropbox/sign@1.1.3
Create a new file called server.js in the same directory as your package.json file and copy in the following code:
const express = require("express");
const multer = require("multer");

// Load your environment variables from your .env
// file
require("dotenv").config();

const app = express();
// Use the JSON parser to parse incoming JSON data
app.use(express.json());
// Use multer to parse incoming multipart form data
// requests (used for Dropbox Sign Events)
app.use(multer().none());

app.get("/", (req, res) => {
  res.send({
    message: "Welcome to Gym Management System API",
  });
});

const port = process.env.PORT ?? 3000;
app.listen(port, () =>
  console.log(`Example app is listening on port ${port}.`)
);
Then run your application using the following command:
node server.js
If you navigate to http://localhost:3000, you should see a JSON response like this:
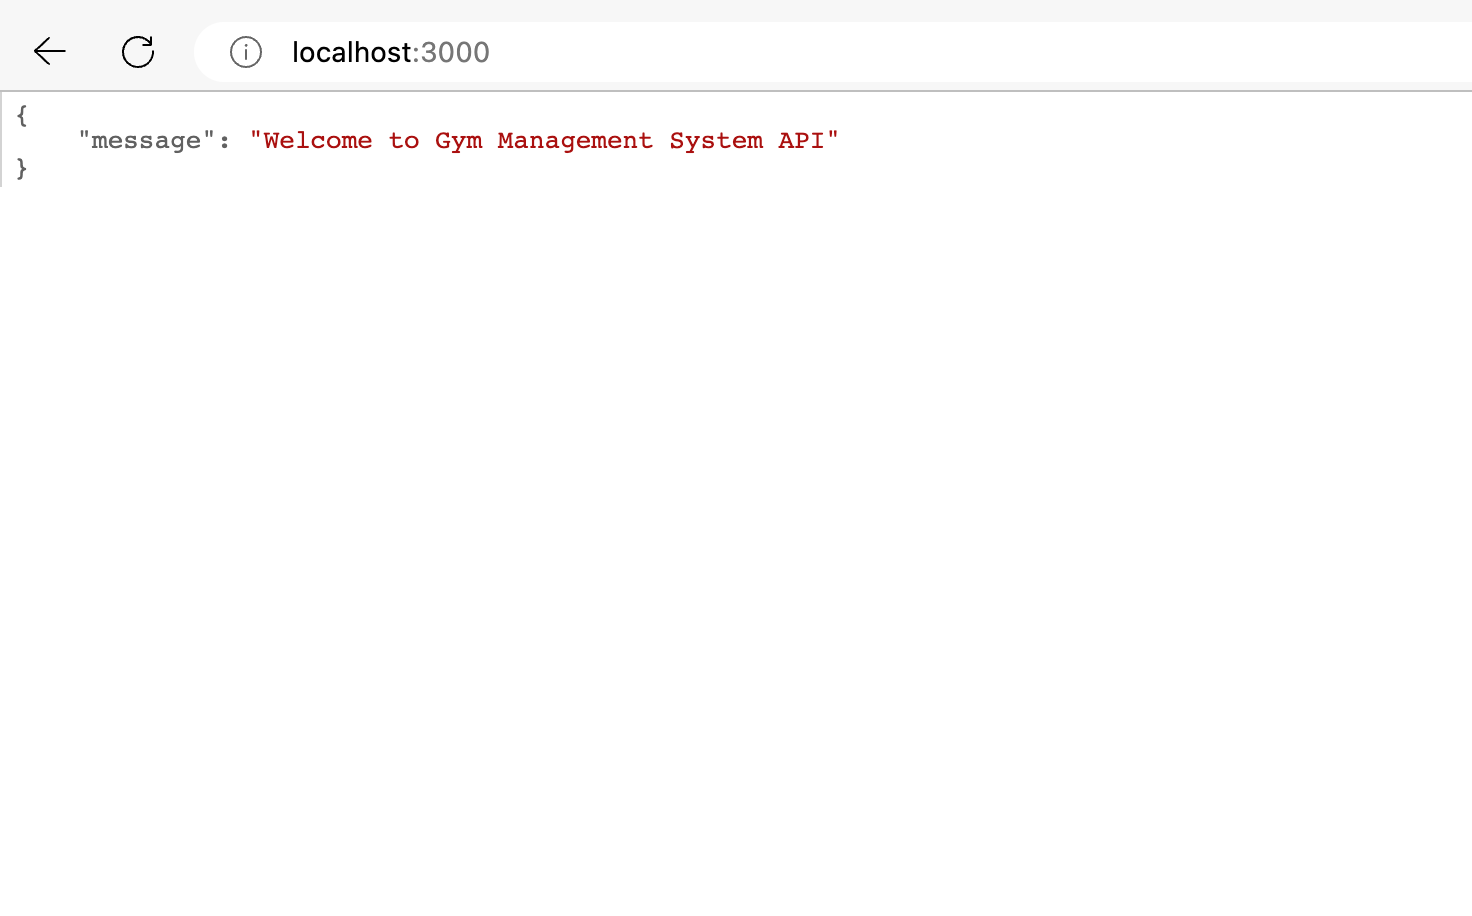
Every time you change the server.js file, make sure you run this terminal command again so that Node.js runs the latest version of the file.
Use ngrok
When developing your web application, you'll run it locally. However, in order for Dropbox Sign to send webhook requests to your application, it needs to be exposed to the internet. ngrok is a command line tool that simplifies forwarding local ports to a URL accessible over the internet.
Run the following command in your terminal to expose port 3000 over the internet:
ngrok http 3000
When you run the command, you should see a forwarding URL appear with the following format: https://[random].ngrok-free.app. Open the URL in your browser, and you should see the same JSON object as when you accessed your application using http://localhost:3000:
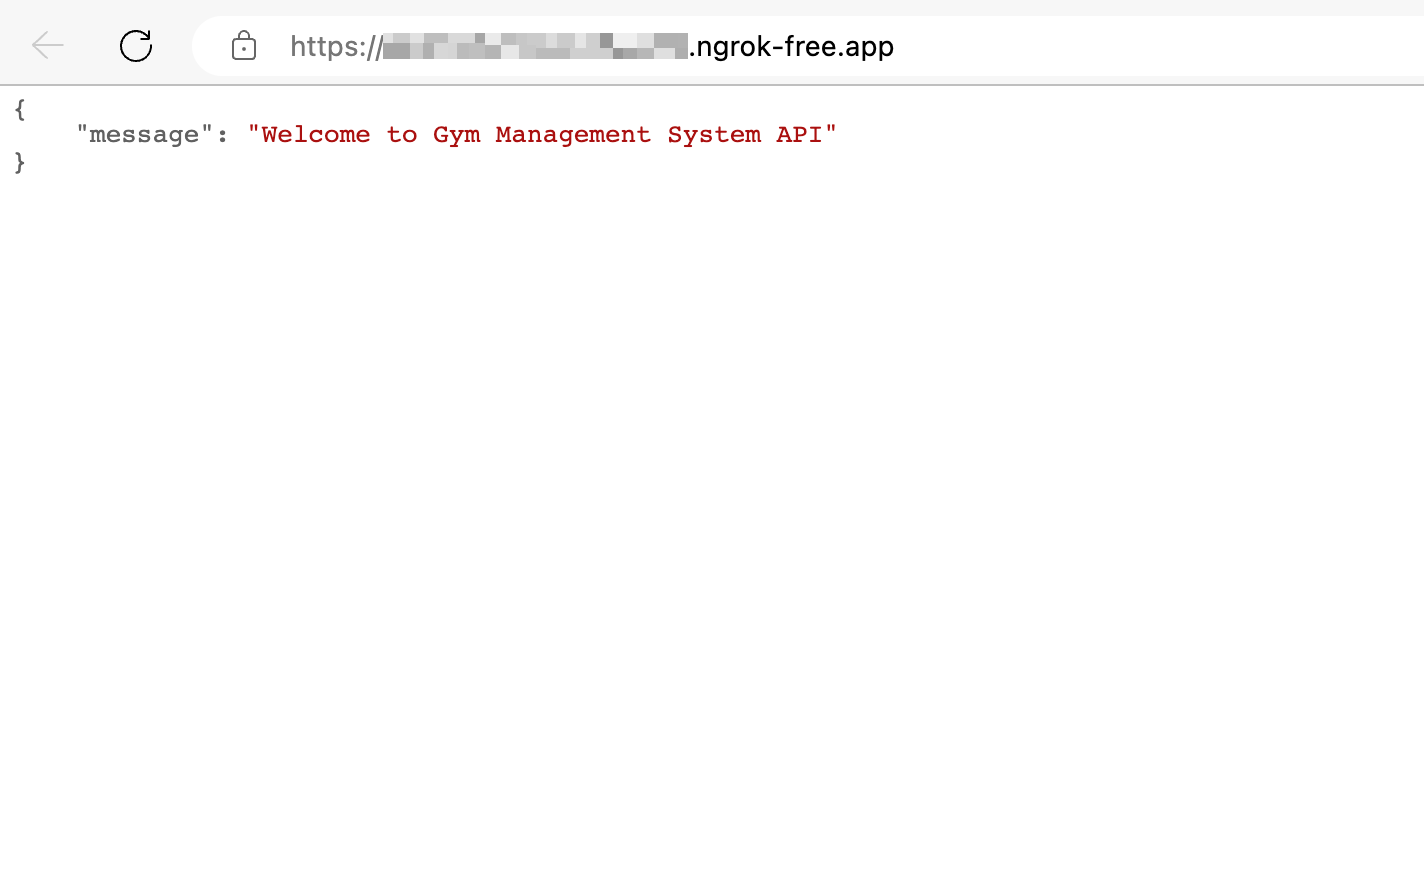
Congratulations! Your Express web application is now accessible over the internet and ready to use with the Dropbox Sign API. Before integrating with the API, you'll need to create and upload a template to sign.
Create a release of liability template
FormSwift makes it easy to generate documents for a variety of purposes. The service provides templates that you can then customize and download.
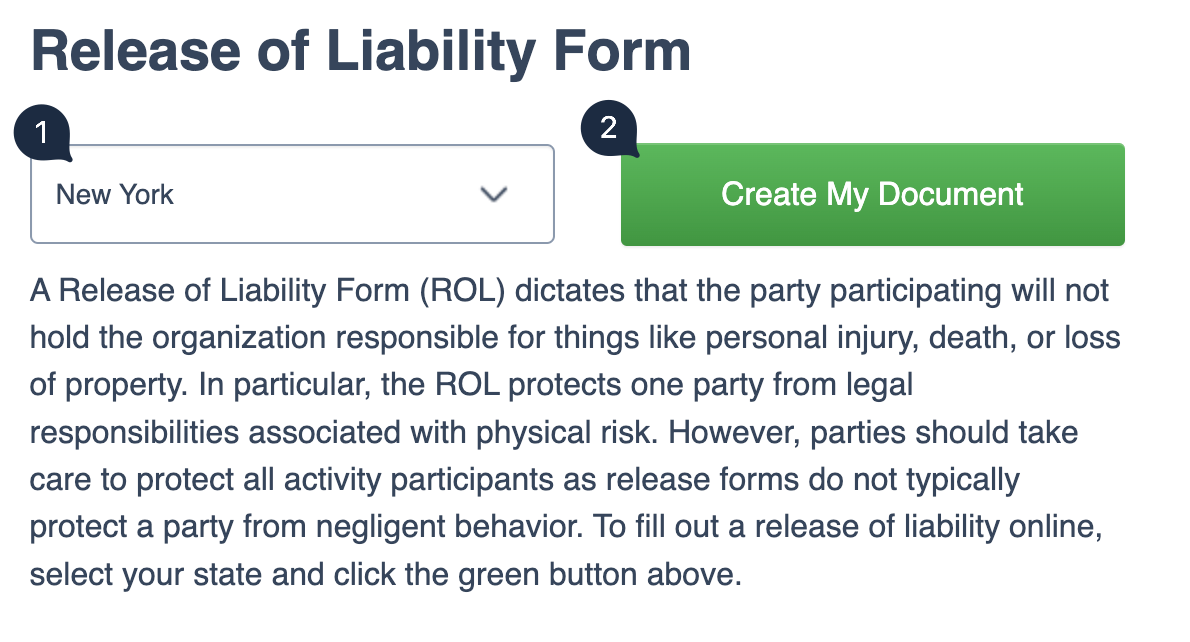
Open the Release of Liability Form. Select the state for your waiver and then click Create My Document:
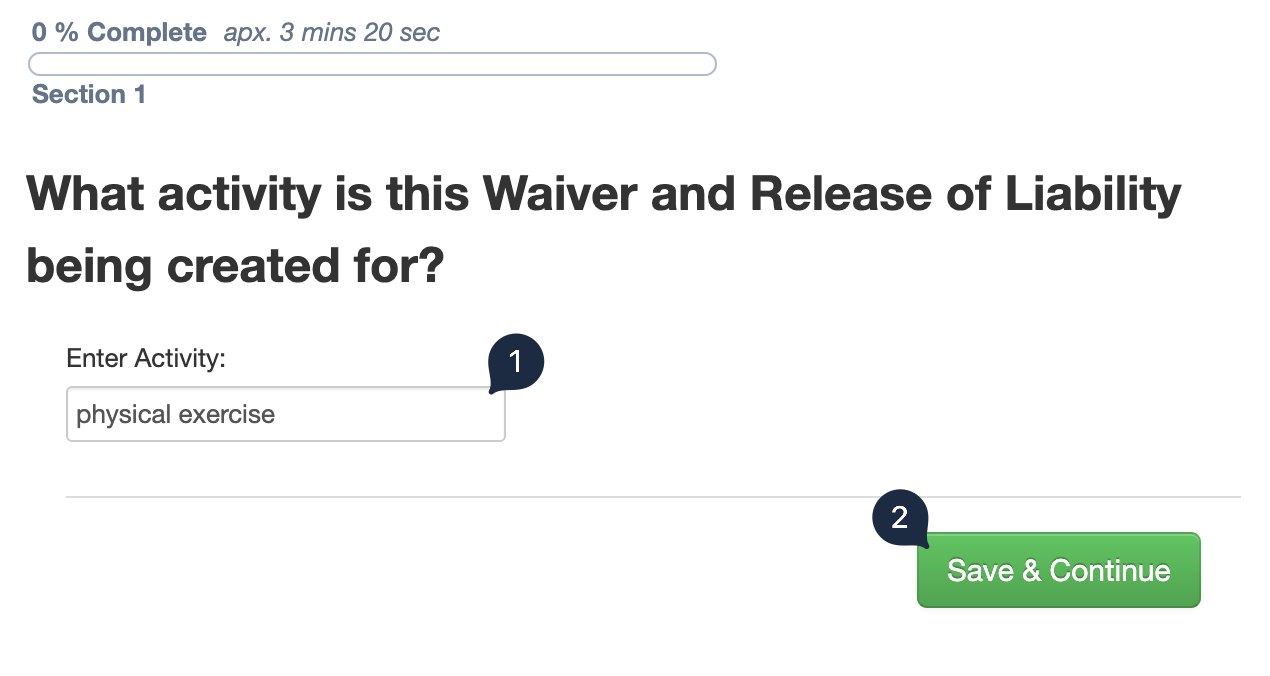
On the next page, you'll be prompted to specify what activity your Release of Liability Form is for. In this case, you'll specify "physical exercise" since the form is for a gym. Click Save & Continue:
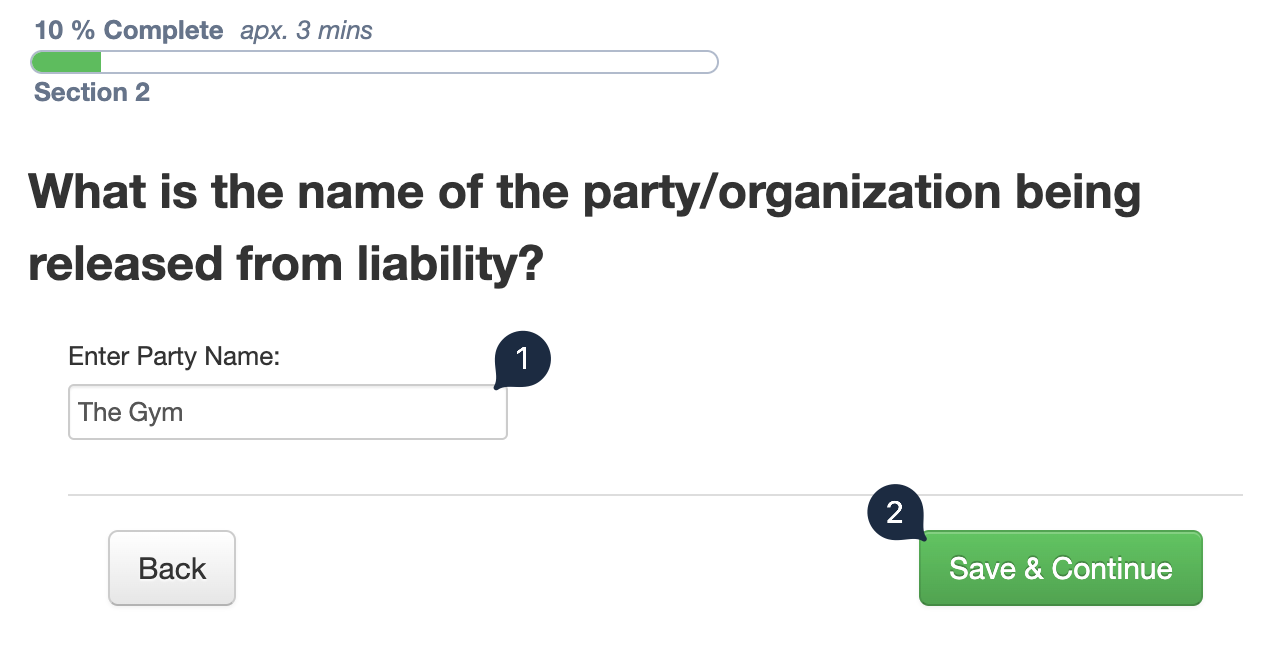
On the next page, specify "The Gym" as the party name and click Save & Continue to go to the next page:
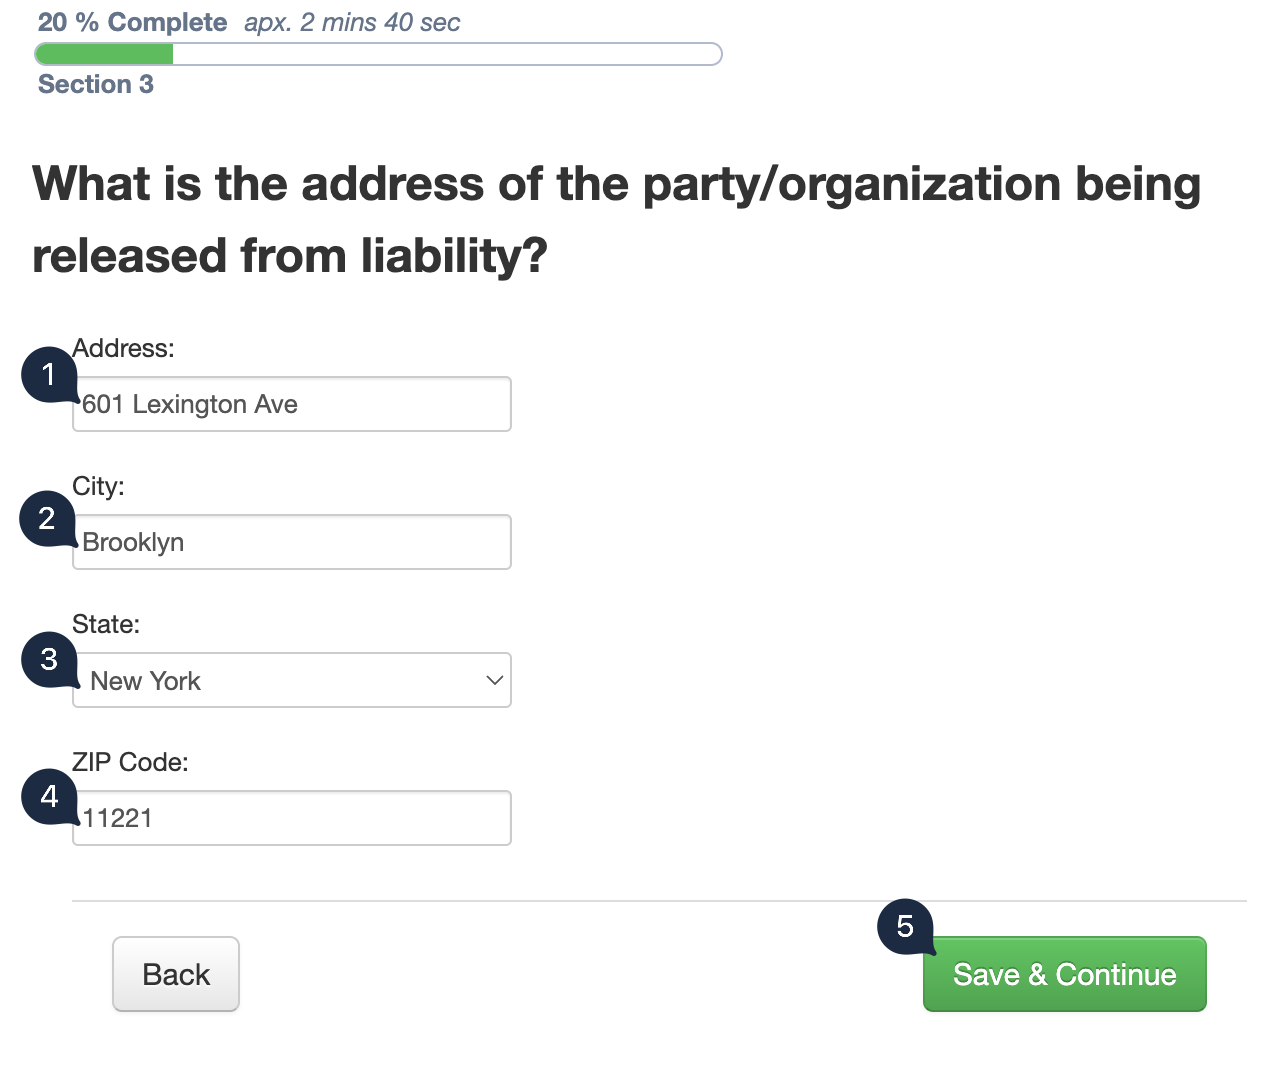
You'll then be prompted to specify the organization's address. For this demonstration, enter any address you'd like to show on the form. Click Save & Continue to go to the next page:
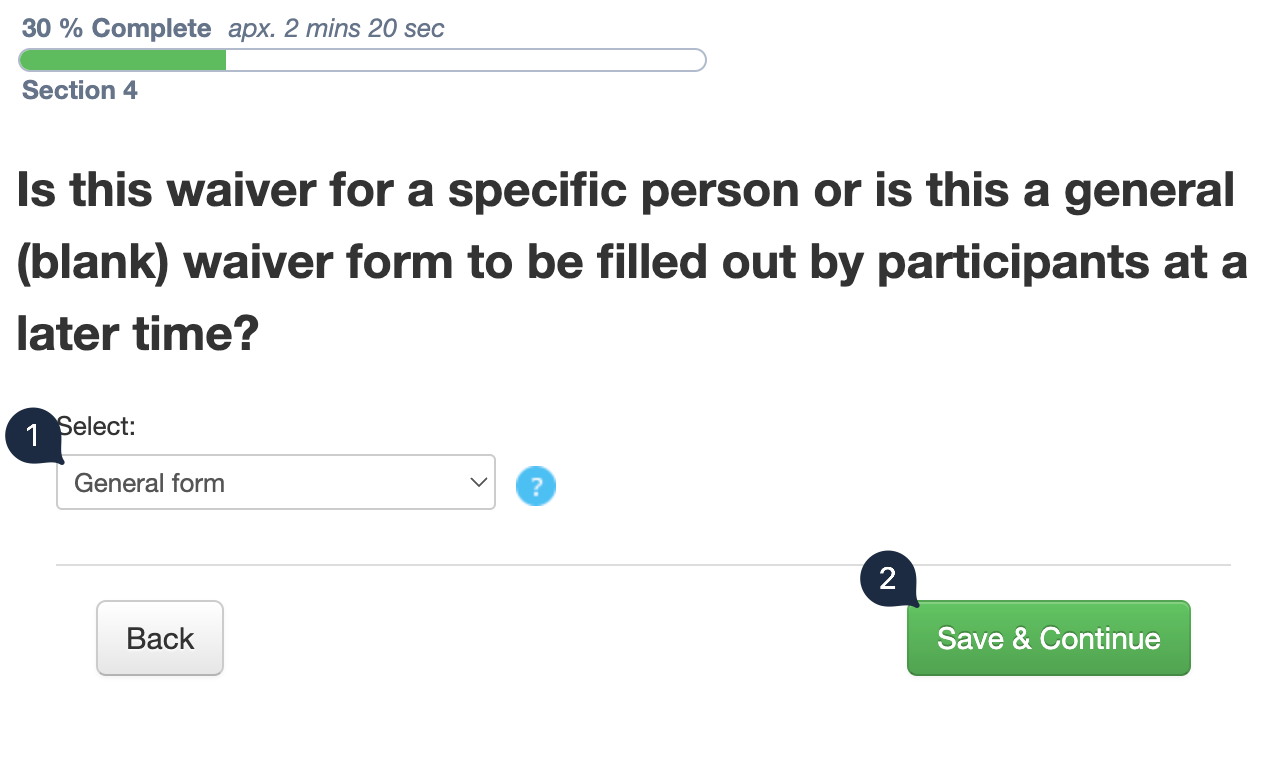
Here, you're creating a general (blank) waiver that will be used as a template that is sent to several clients. To generate a blank waiver in FormSwift, select General form in the drop-down that appears and click Save & Continue:
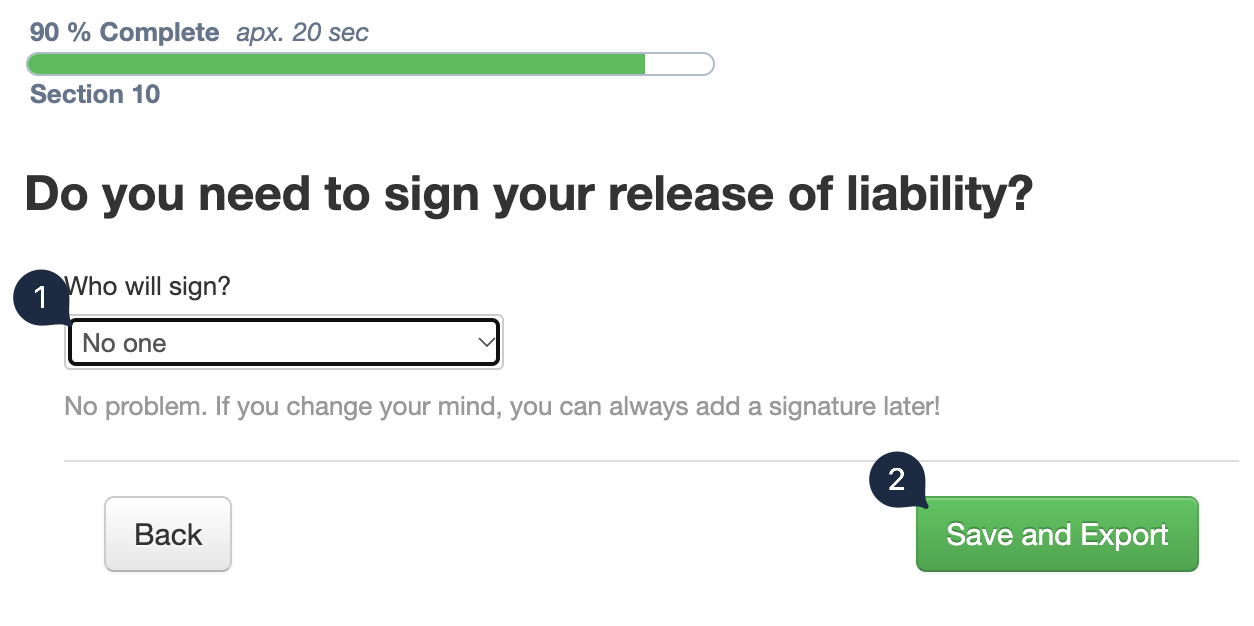
When asked who is going to sign the waiver, select No one. This is important so that you can export the PDF and upload it to Dropbox Sign as a template. Click Save and Export to save the waiver as a PDF file. If you haven't created an account yet, you'll first have to sign up for a free trial before continuing:
Set up the template in Dropbox Sign
Now that you have a PDF waiver template, you'll upload it to Dropbox Sign as a template to distribute. Navigate to the Dropbox Sign Dashboard:
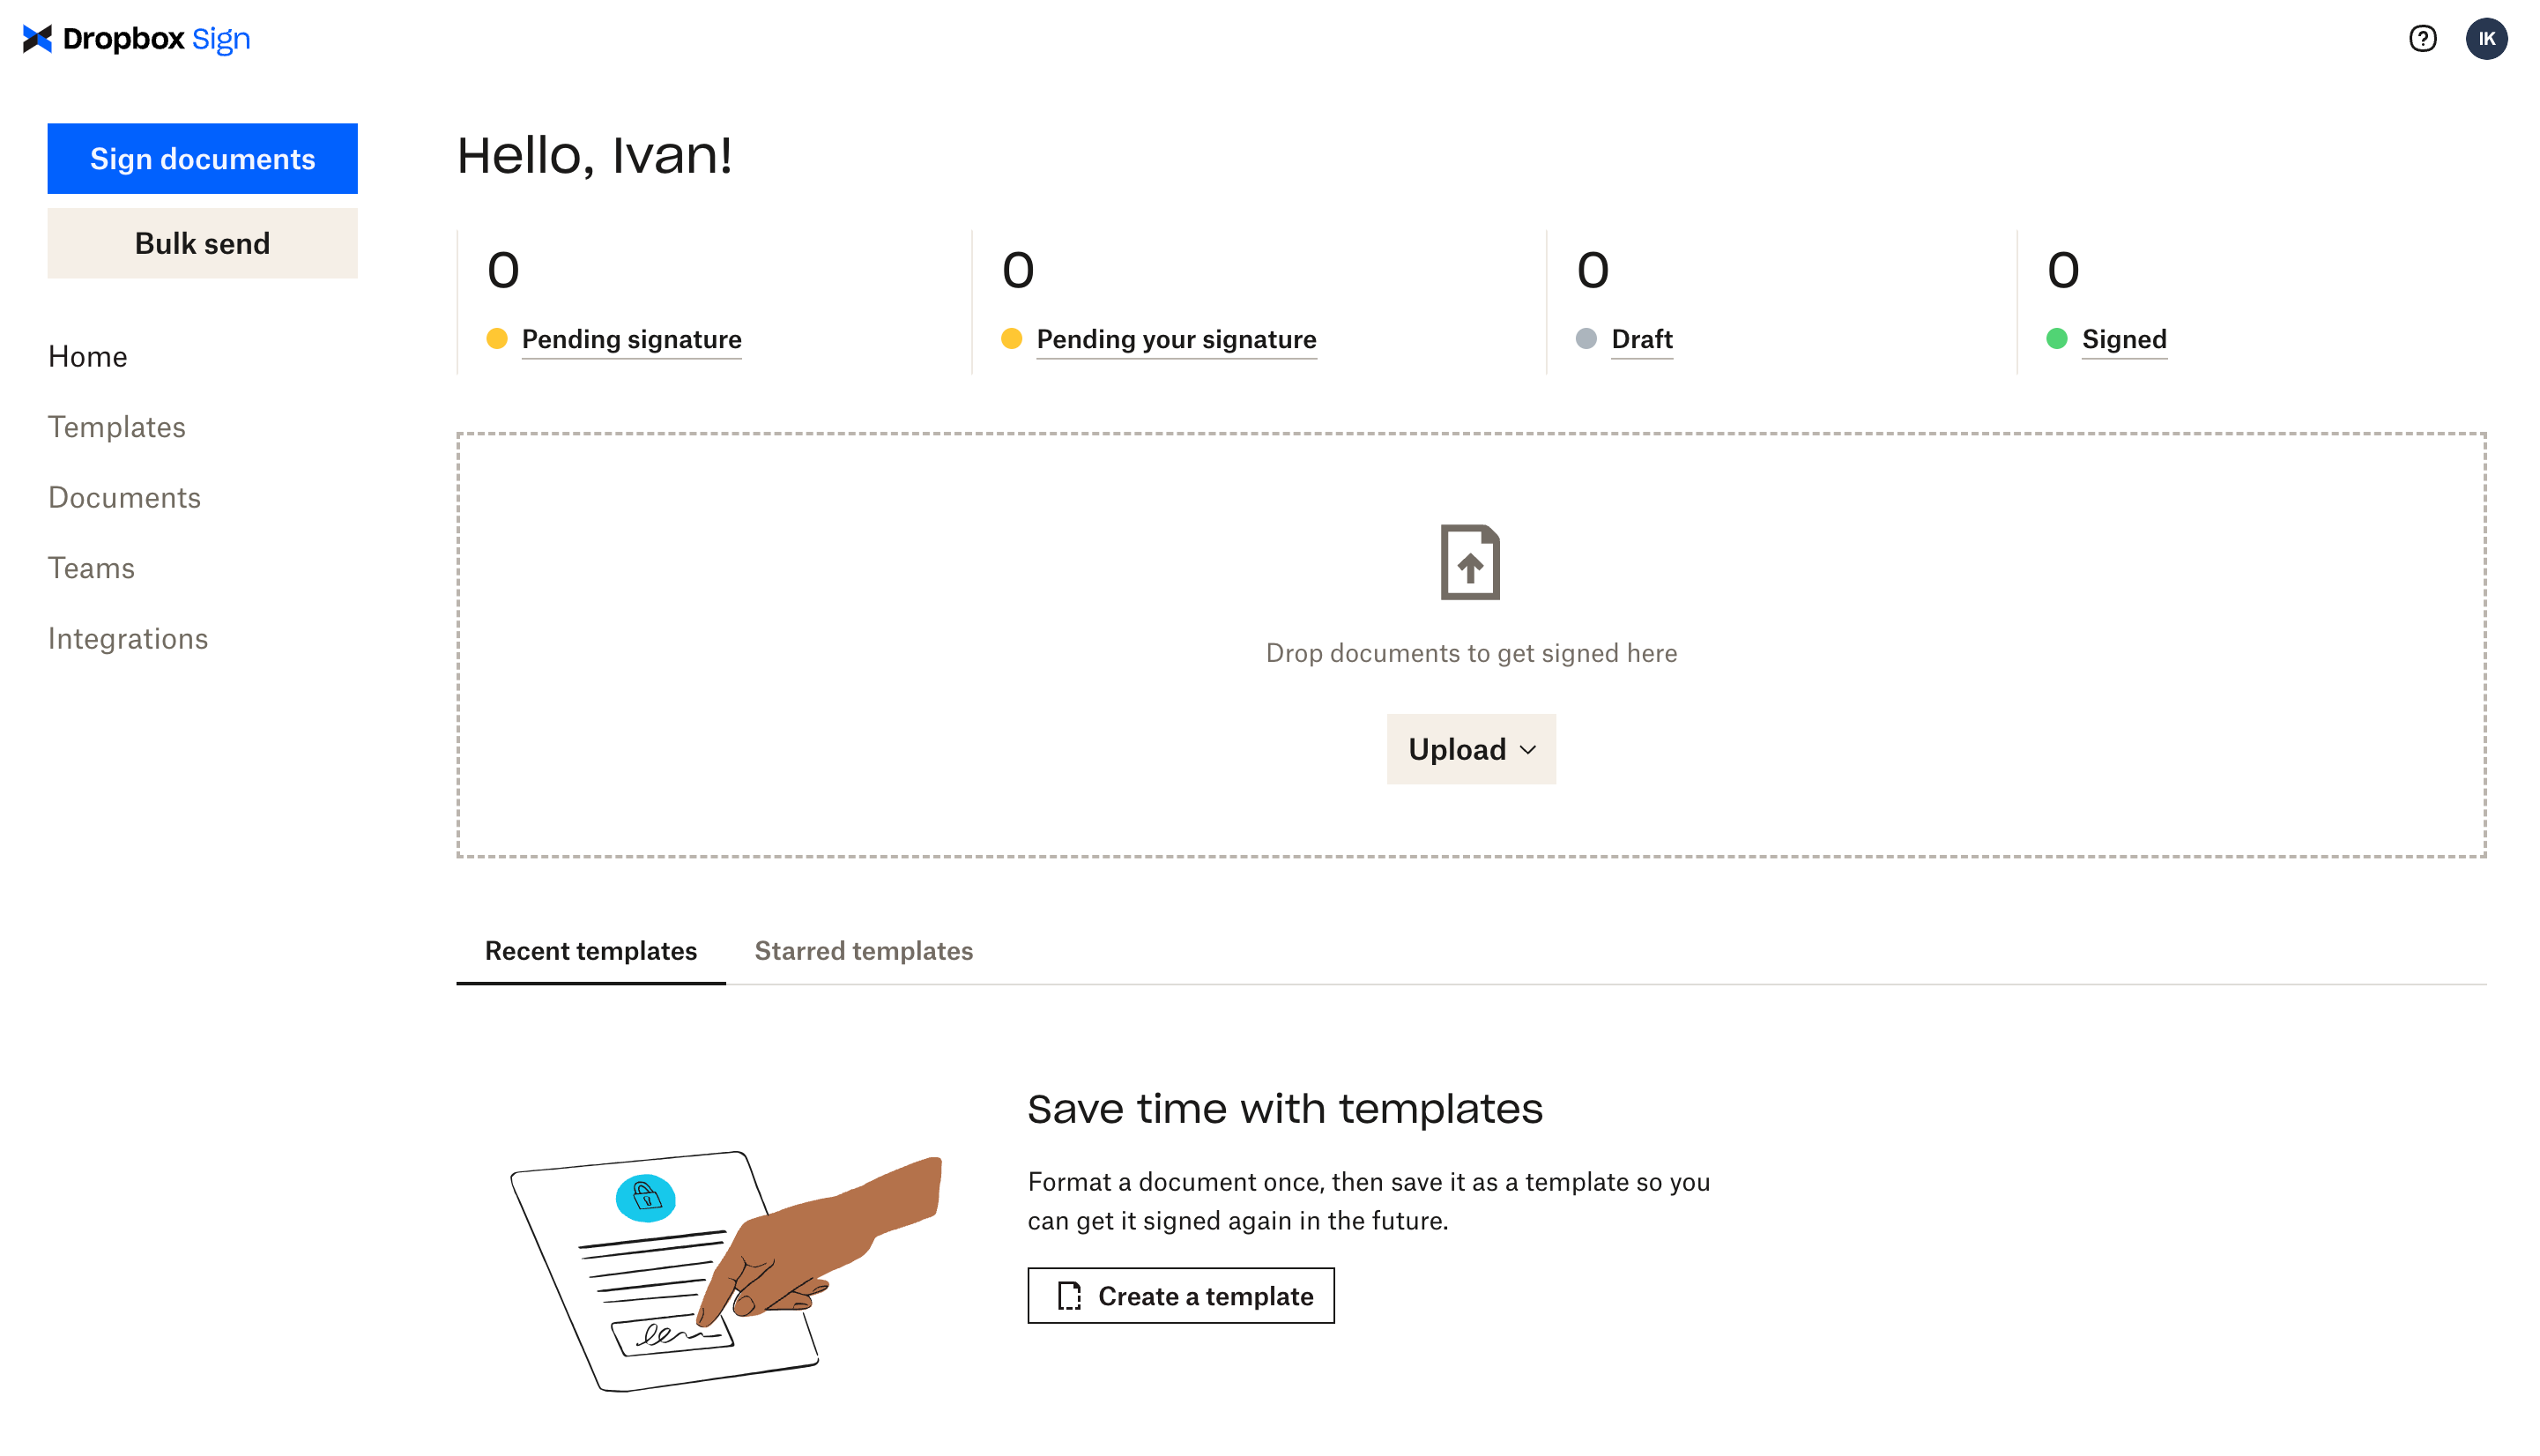
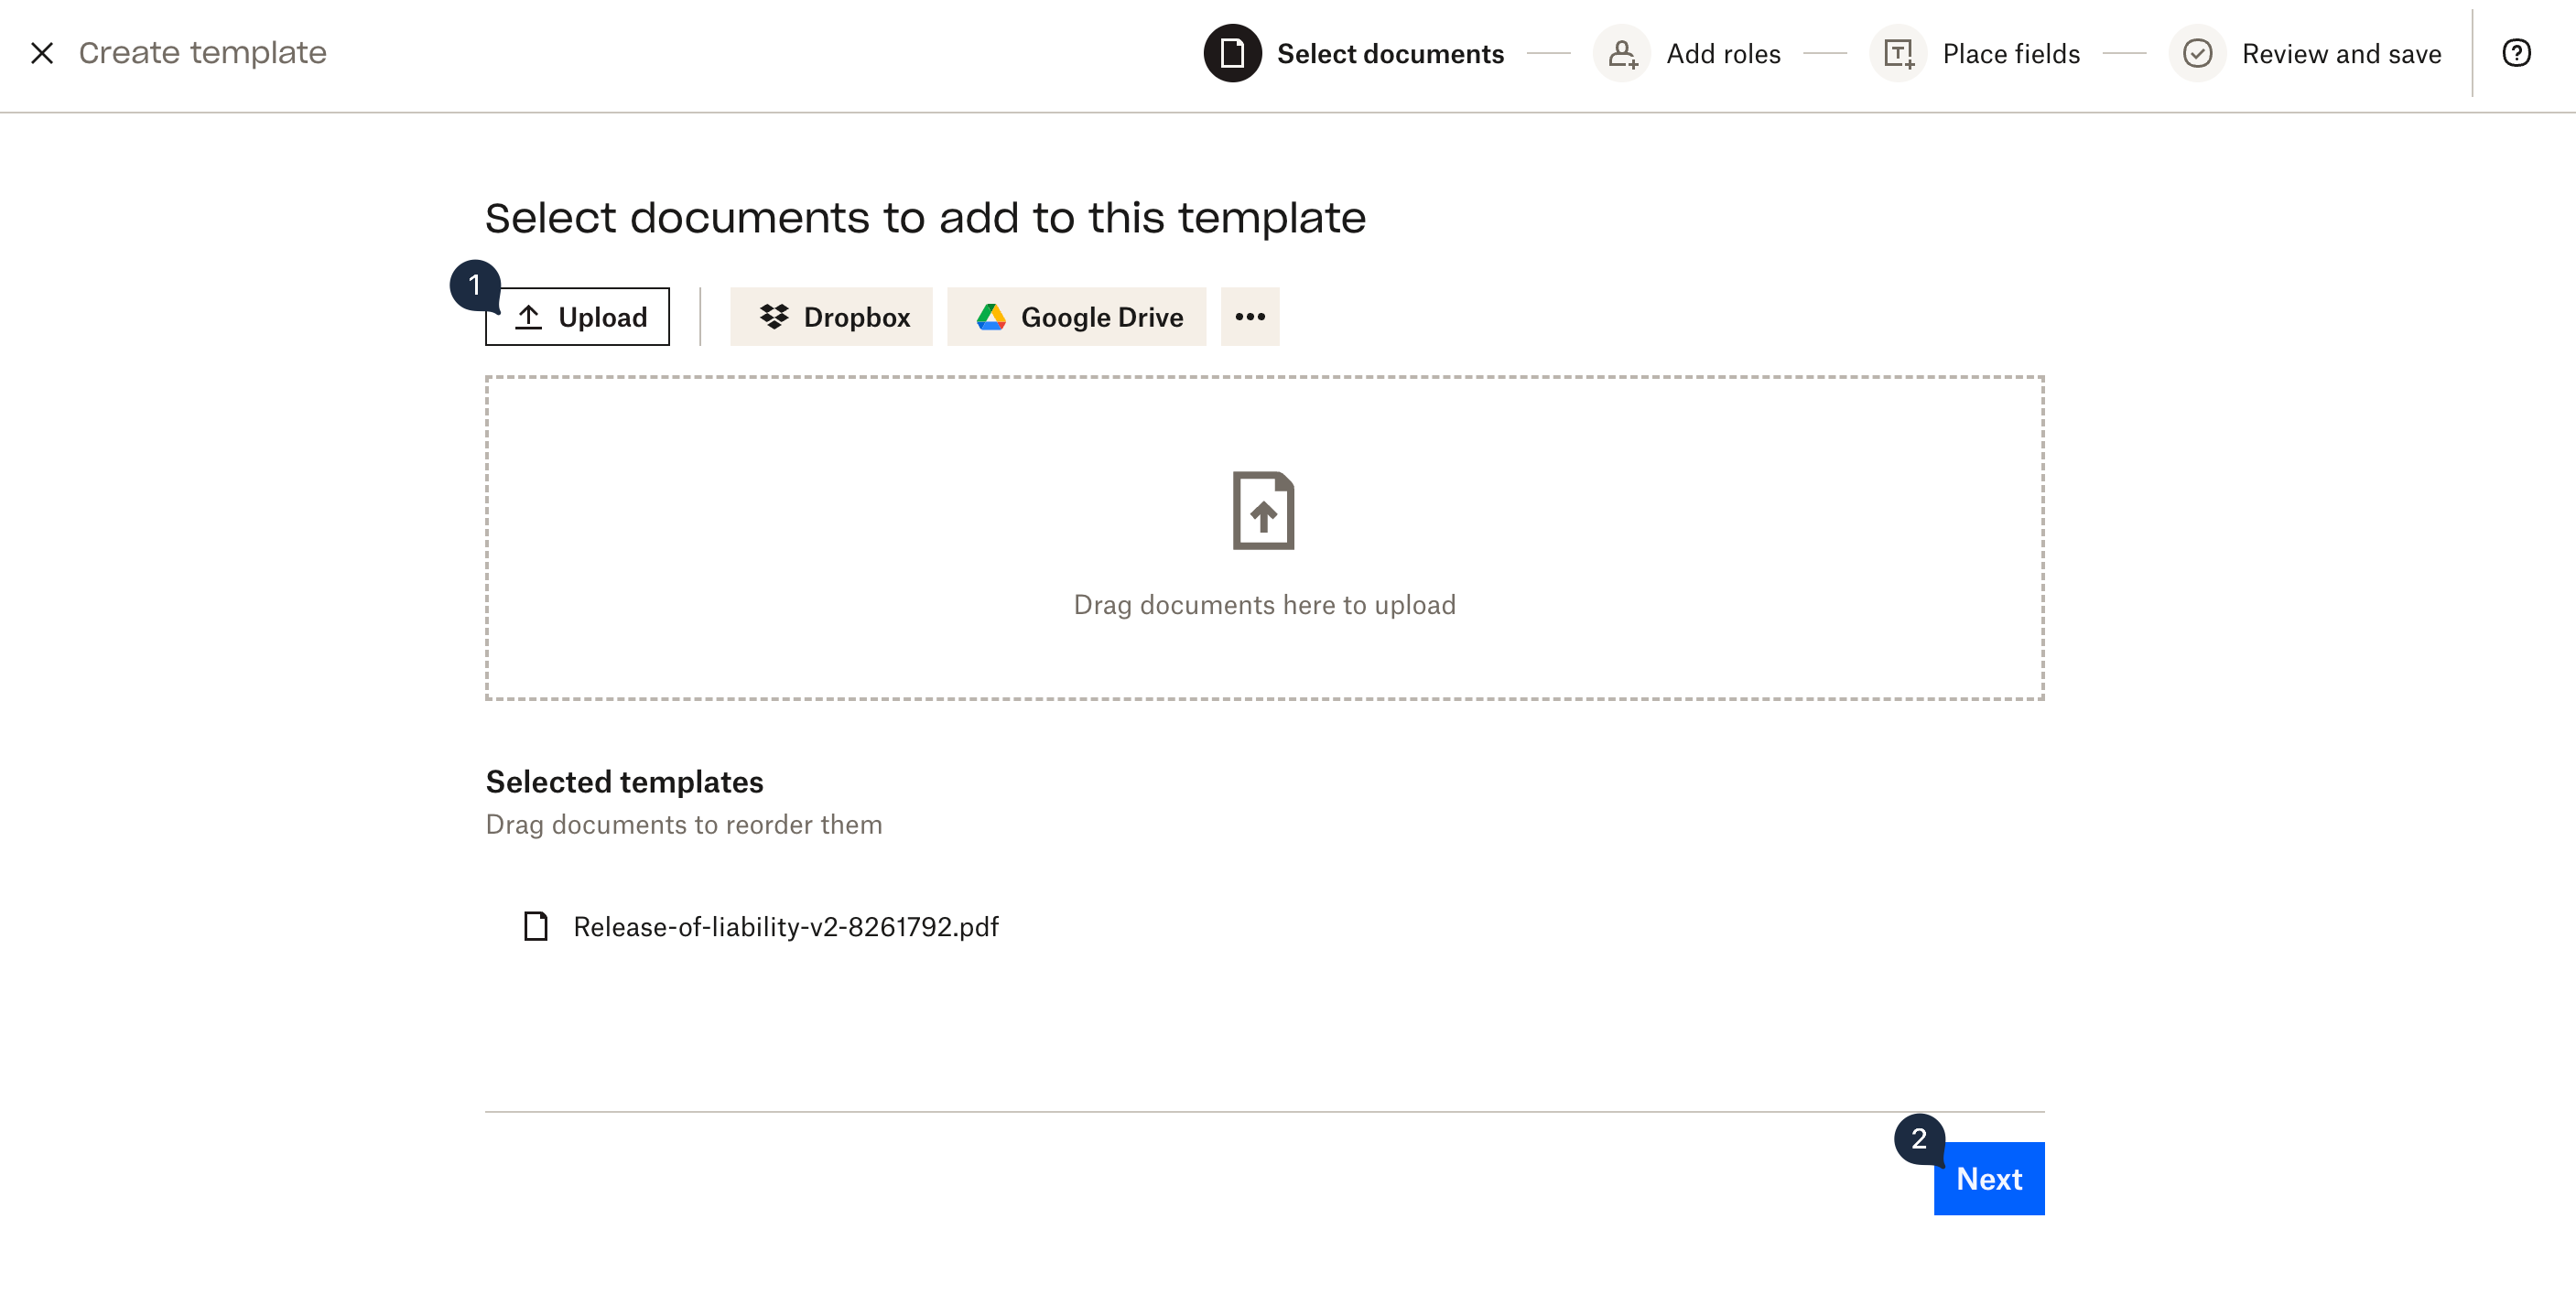
Click the Create a template button. On the page that appears, click Upload and select the file you downloaded from FormSwift. Once the file is uploaded, click Next to use the file:
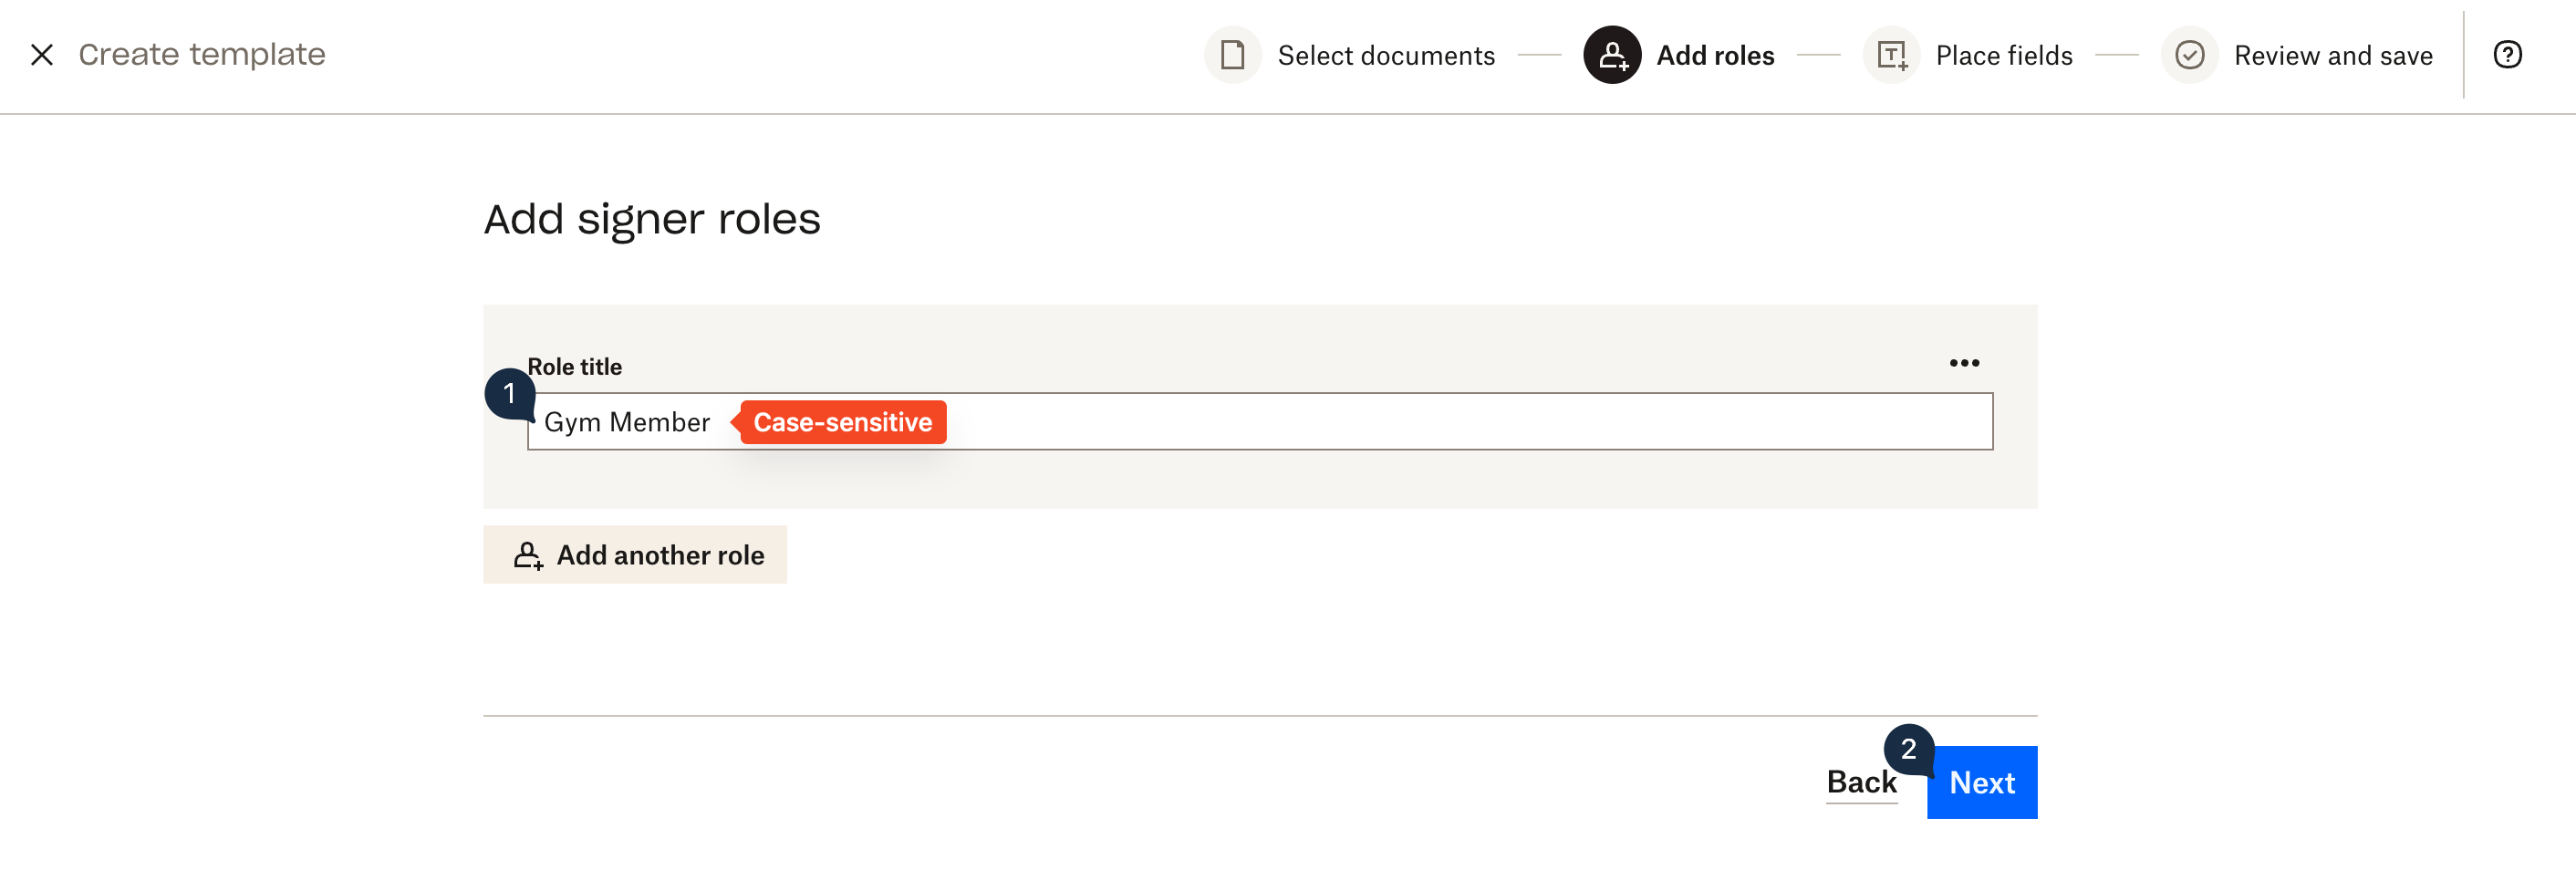
When prompted to specify signer roles for the document, enter "Gym Member" as the signer.
> Please note: The signer role is case-sensitive, so make sure you enter it correctly.
Click Next to continue:
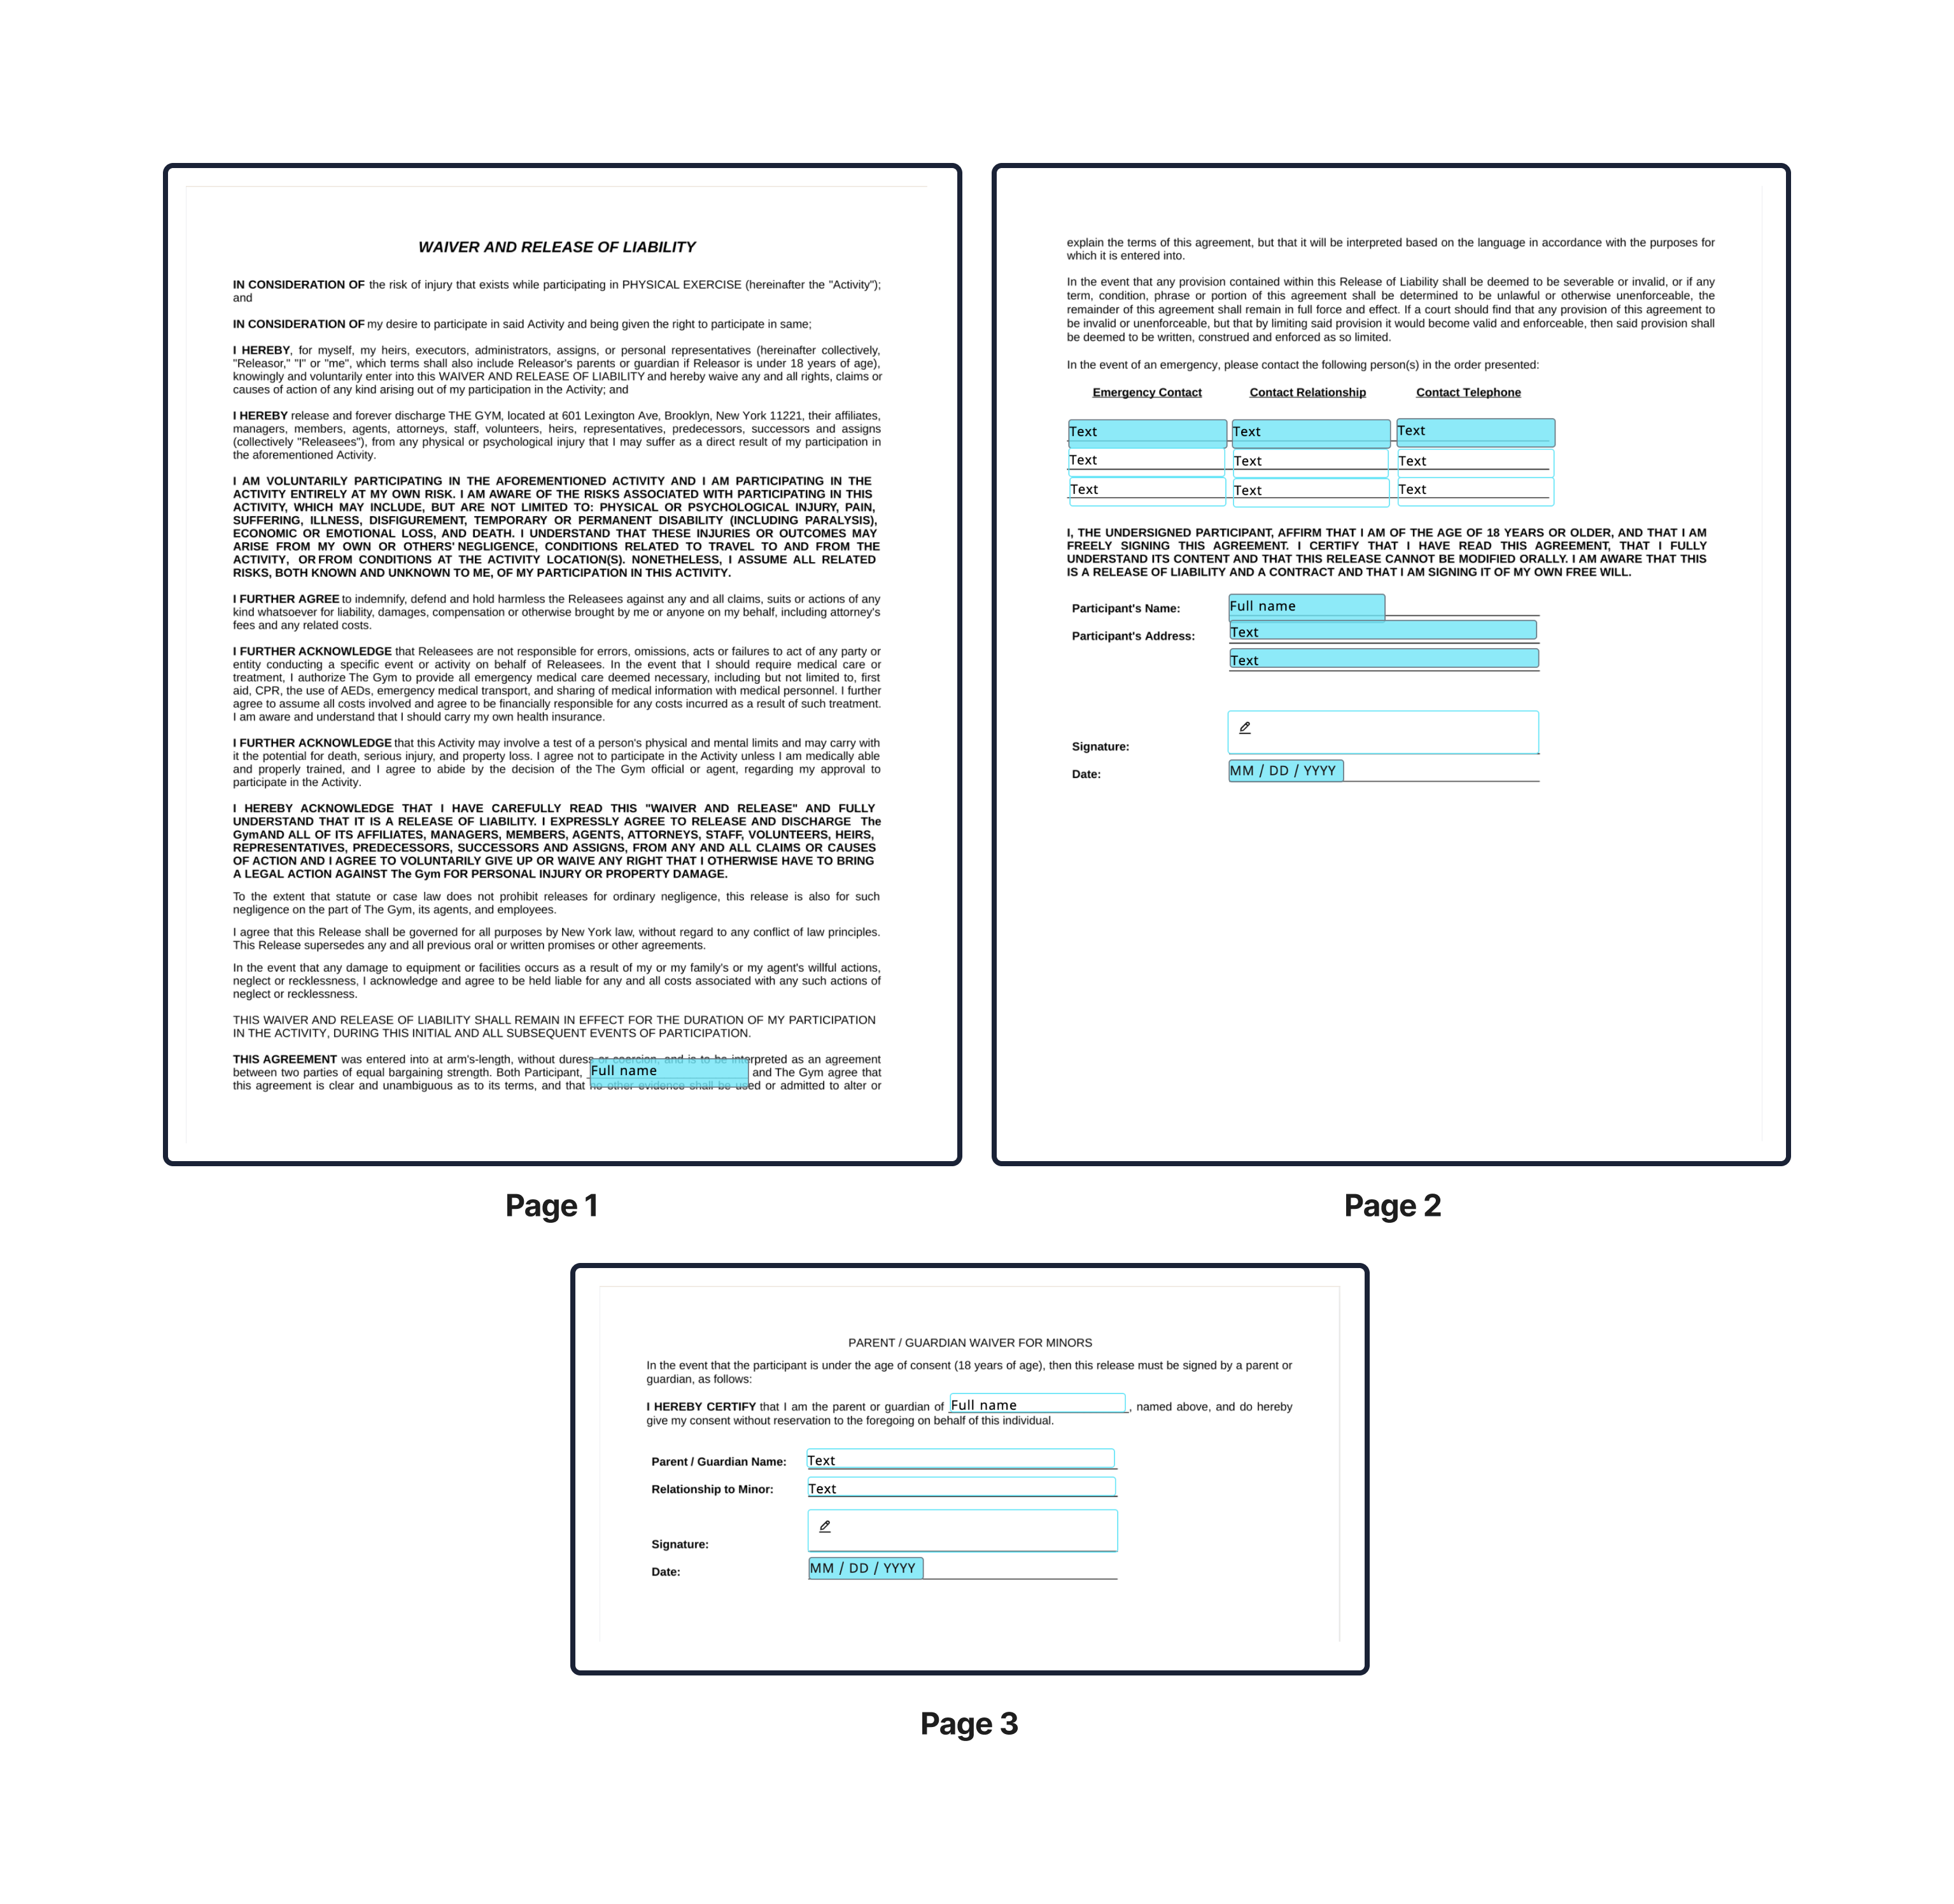
Now, you can use the designer that appears to add interactive fields to the PDF form. These fields can be signature fields, autofill fields, or standard fields. Drag a field from the left menu onto the PDF. Then you can position and resize the field to fit in the blank spaces on the form. Finally, you can configure field properties in the menu on the right. These properties include marking the field as required, formatting, and the field name:
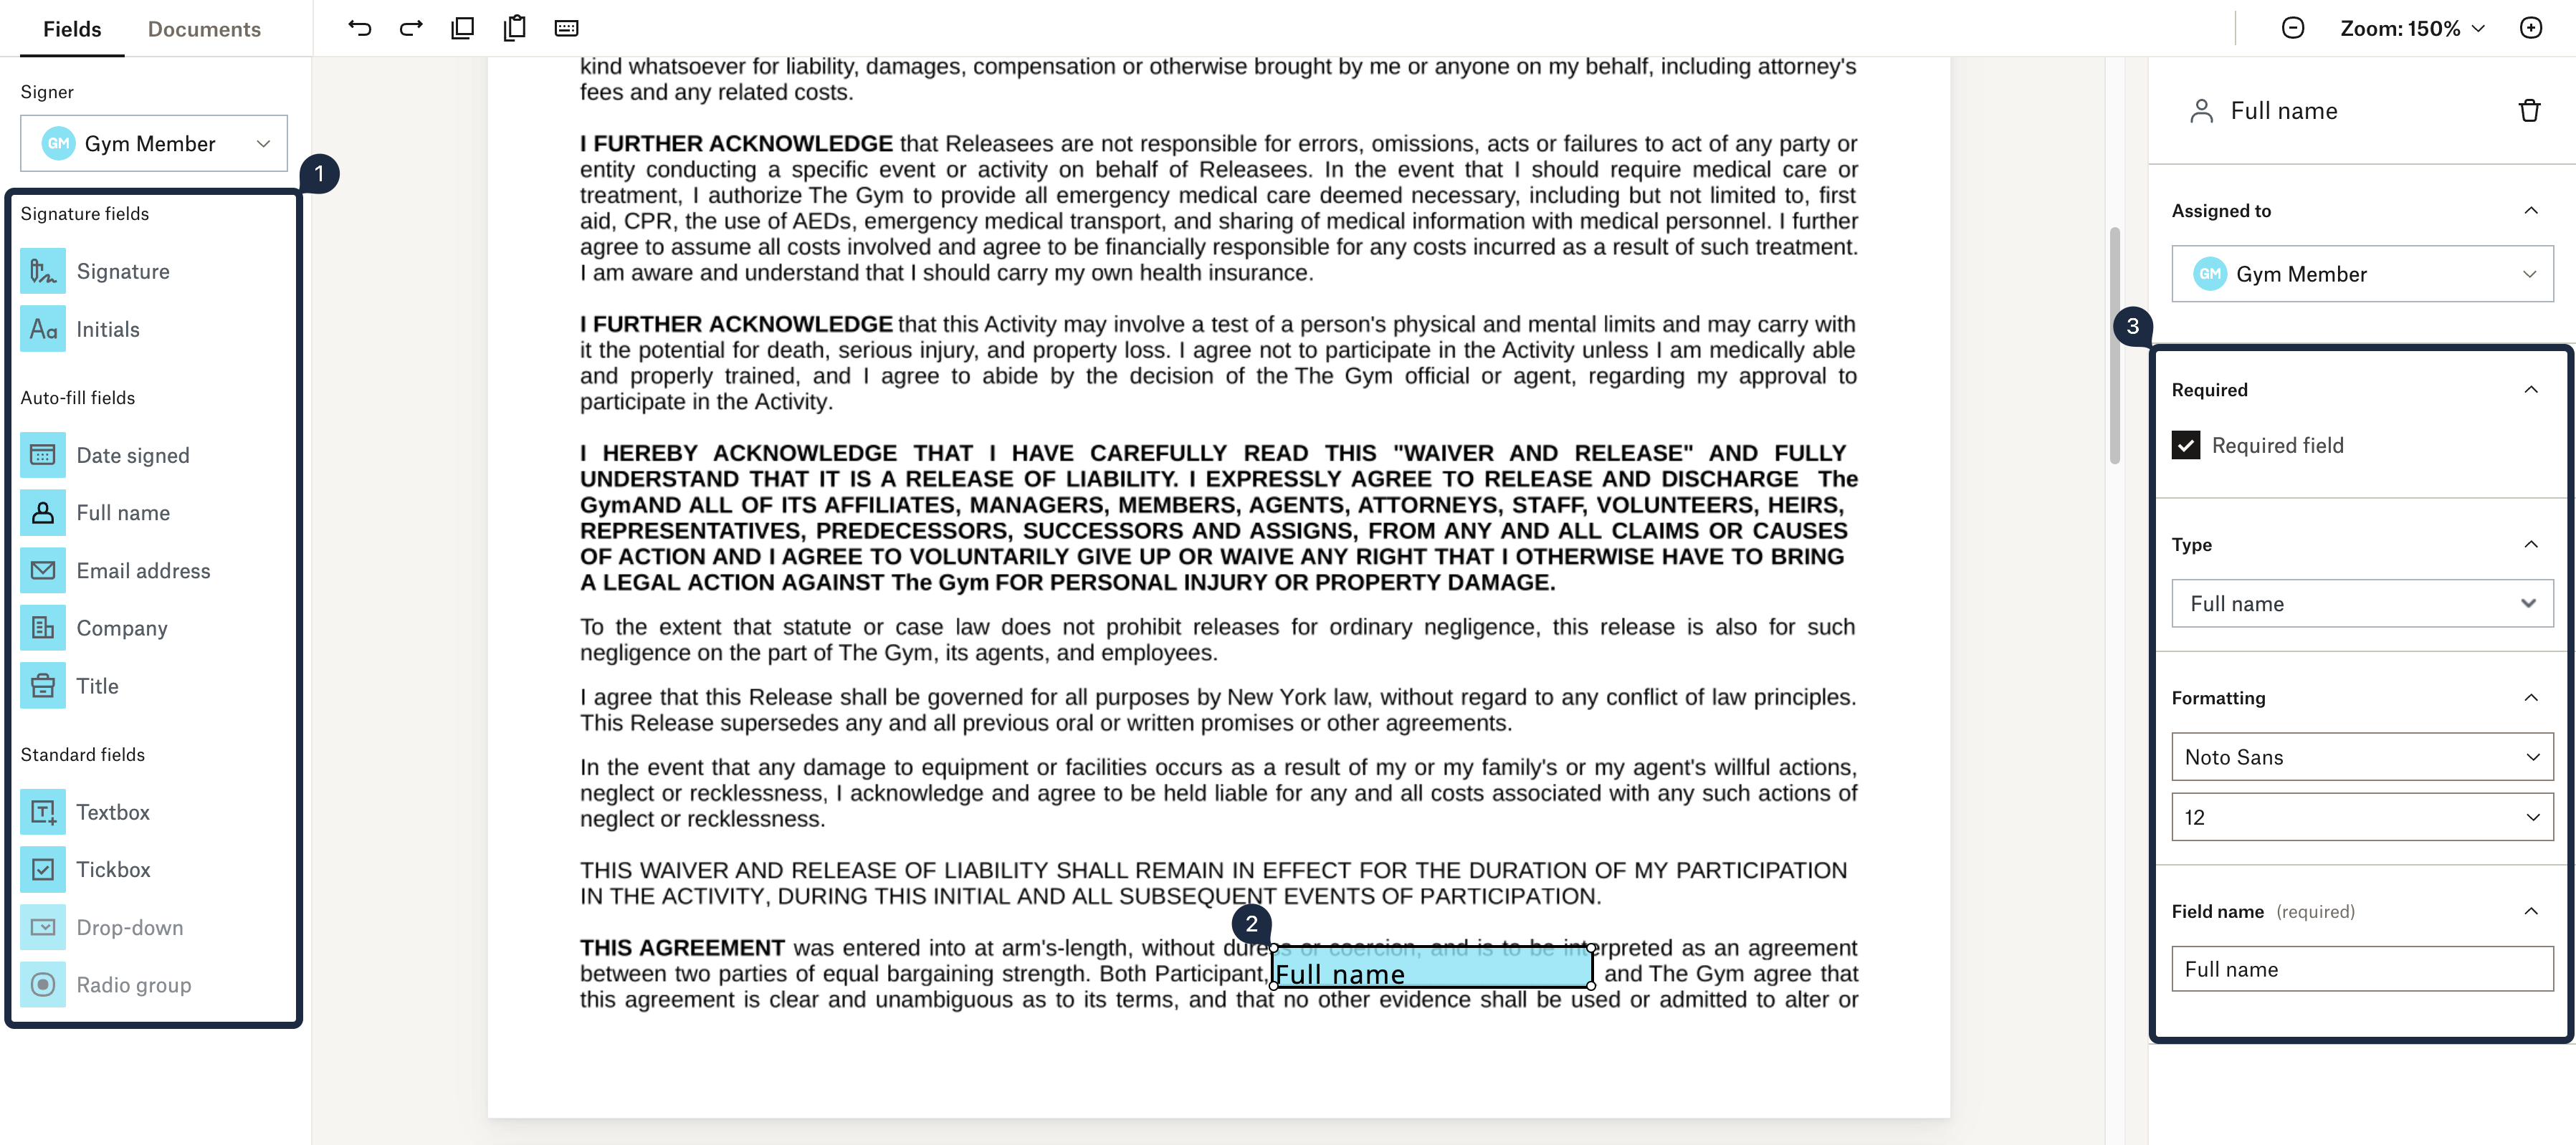
Add and arrange interactive fields in all the blank spaces on the form. Following is a screenshot showing how you can populate the field:
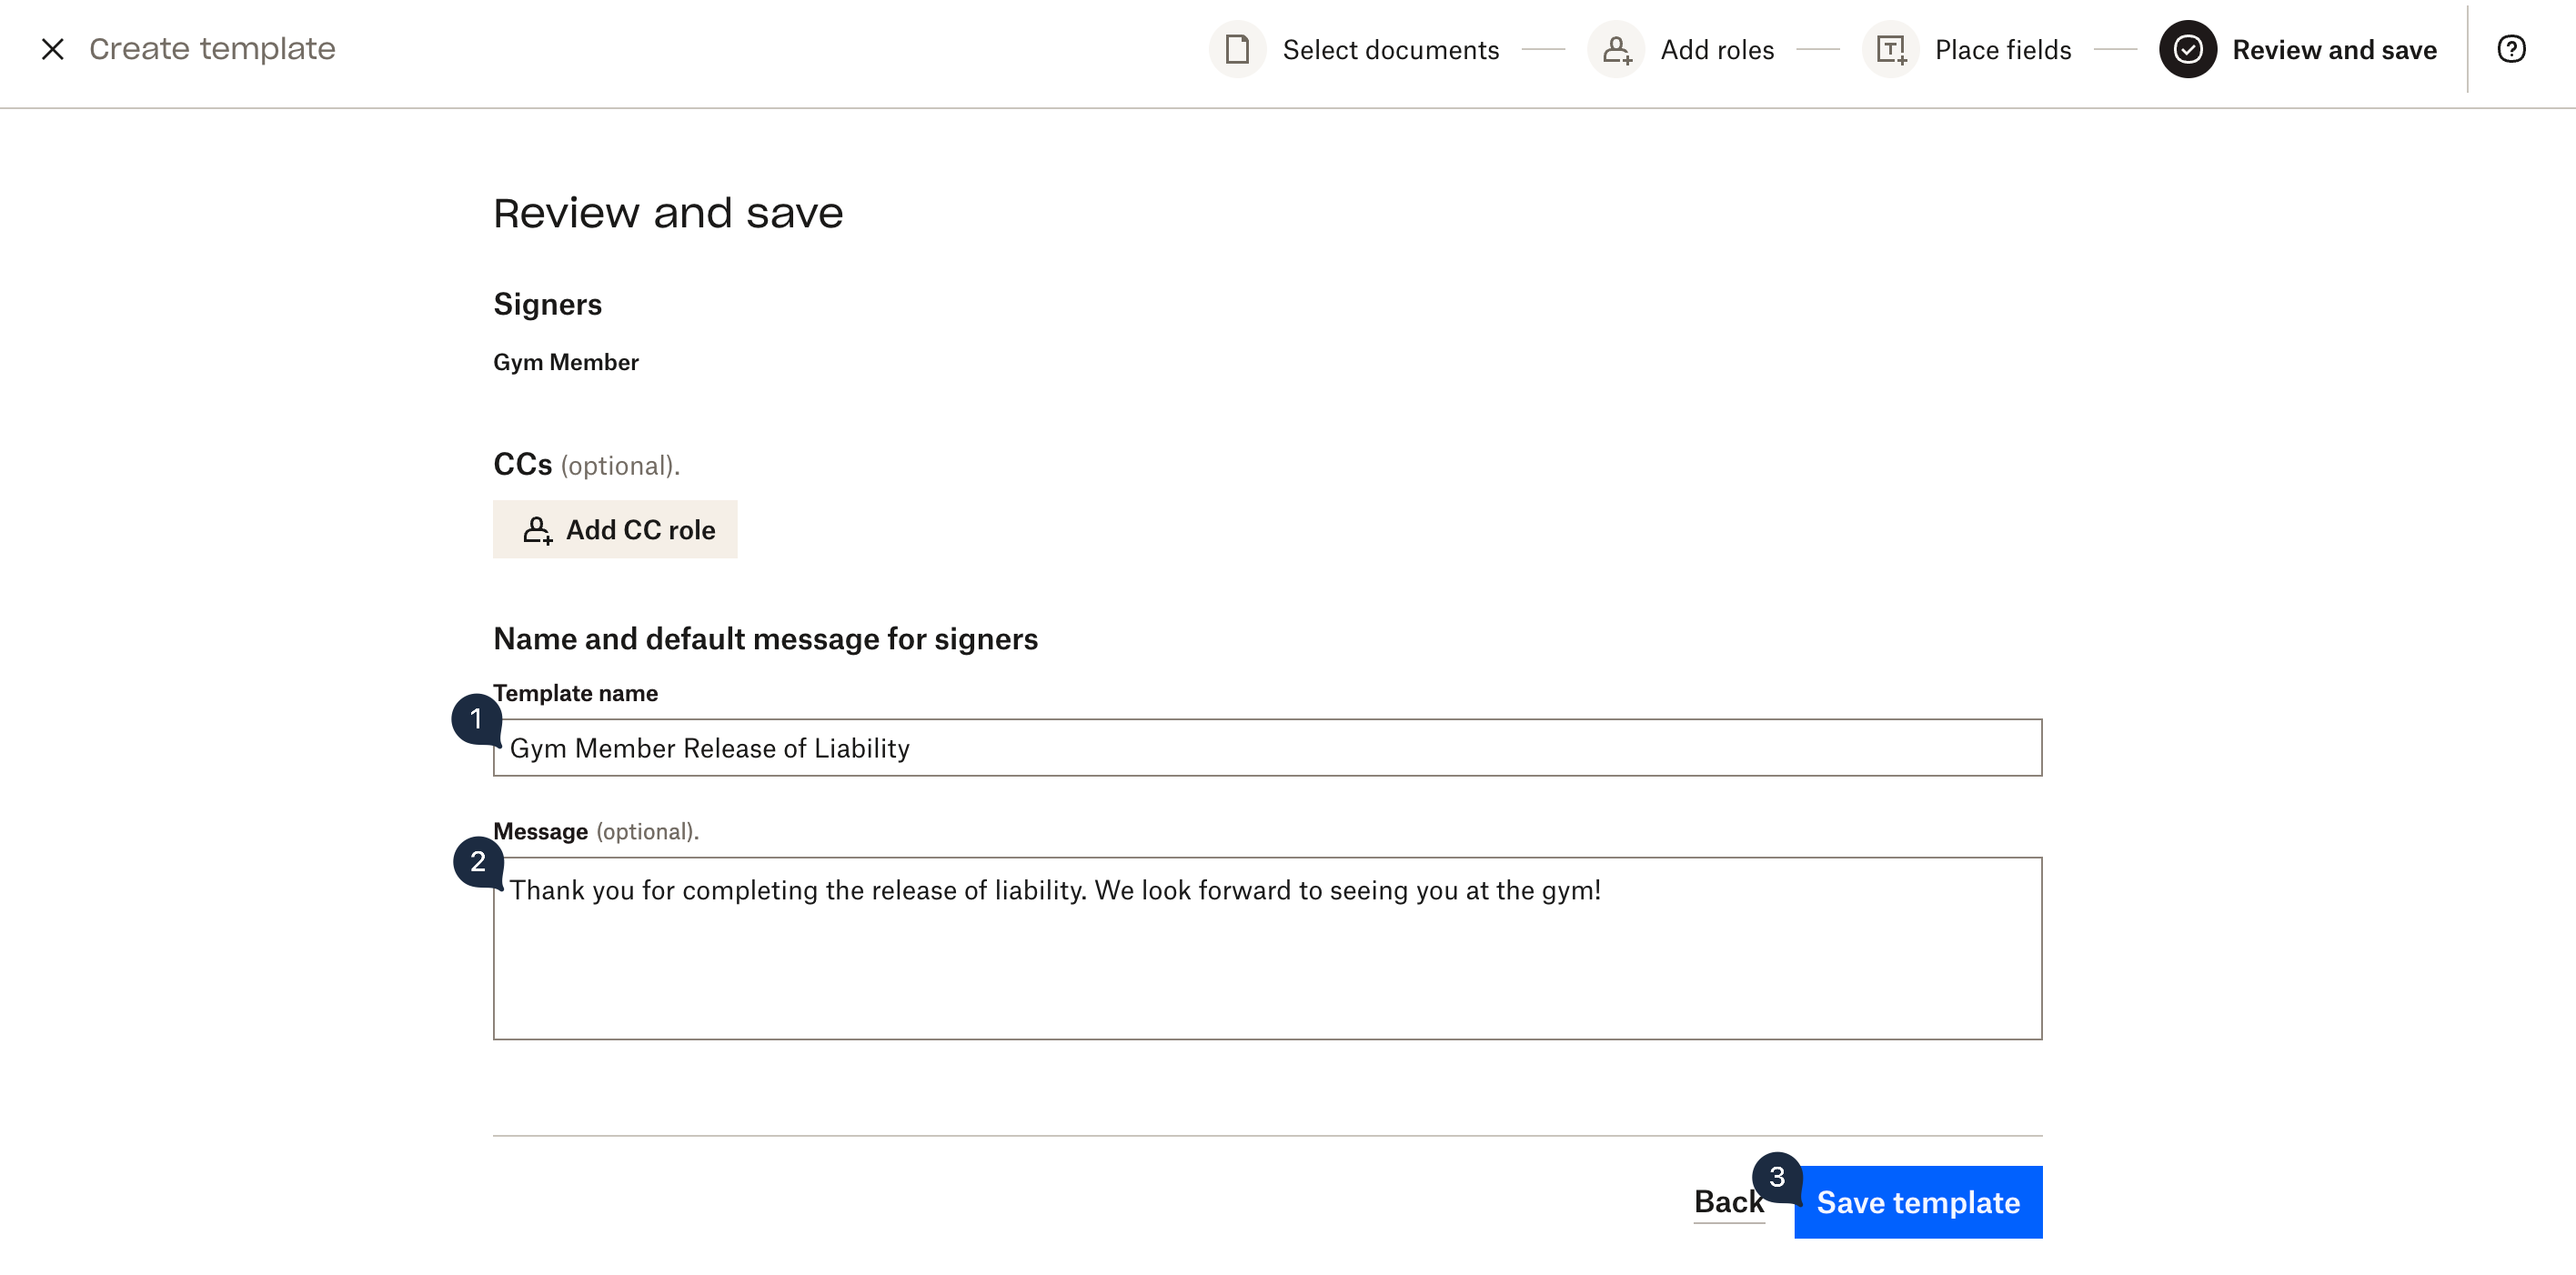
When you're finished, click Next. Then review your template signers, configure email addresses to be CCed when a form is signed, and specify the template name and message the signer will see after completing the form. Enter "Gym Release of Liability" as the template name and specify a message if you want to. Click Save template to finish creating your new template:
Now that your template is ready in Dropbox Sign, you can configure Dropbox Sign to send a Dropbox Sign Event via a webhook request to your web application every time someone signs the form.
Set up a webhook to retrieve the signature
Dropbox Sign uses Dropbox Sign Events to send push notifications to your web application using webhooks. This means you don't need to make unnecessary requests every few seconds to the Dropbox Sign API to check the status of a signature.
Before you can configure the webhook in Dropbox Sign, you need to develop an endpoint in your web application that the webhook request can be sent to. In your server.js file, add a /member endpoint like this:
// ...

app.get("/", (req, res) => {
  res.send({
    message: "Welcome to Gym Management System API",
  });
});

/**
 * Webhook endpoint that receives different events from the
 * Dropbox Sign Events service and processes them.
 */
app.post("/webhook", async (req, res) => {
  // Get the event type
  const data = JSON.parse(req.body["json"]);
  const eventType = data["event"]["event_type"];

  console.log(`Received ${eventType} event.`);

  // Your webhook must respond with a 200 status code
  // and a body containing the string 'Hello API event received'
  res.status(200).send("Hello API event received");
});

const port = process.env.PORT ?? 3000;

// ...
When the endpoint receives the webhook request, the request body is a multipart form data with a single field, called json, containing the webhook data in the JSON format. In order to use this data, you need to first get the json field and then parse its contents. Then you can get the event type using the event_type field. For now, you're just logging this, but in the next section, you'll add some processing logic to download signed forms. Finally, the endpoint returns a 200 status code with a body containing the text "Hello API event received". You must return this string in the body for the webhook to work.
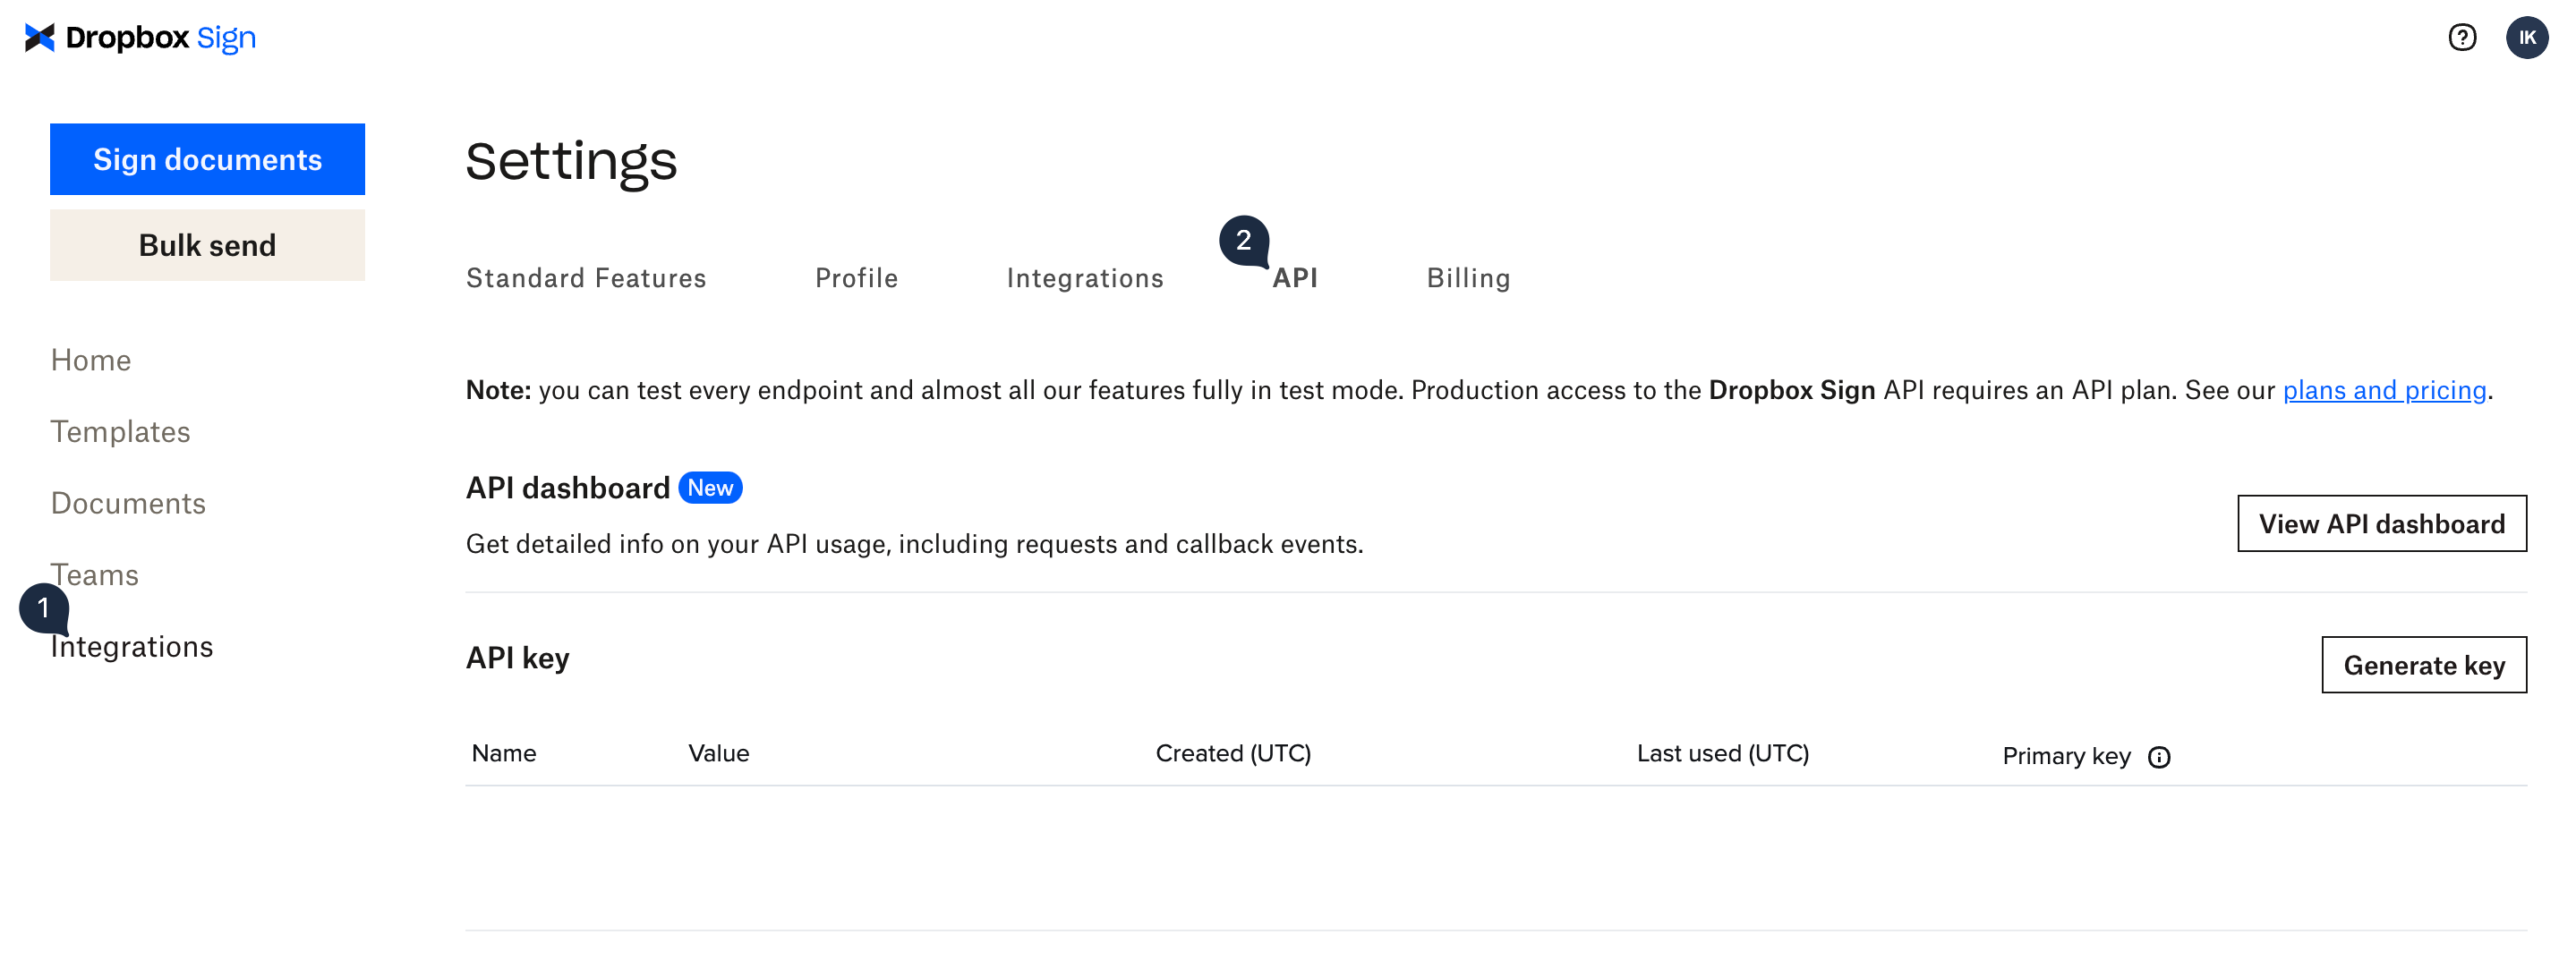
Now, you can configure Dropbox Sign to send webhook requests to this endpoint. In the Dropbox Sign dashboard, click on Integrations in the left menu and go to the API tab:
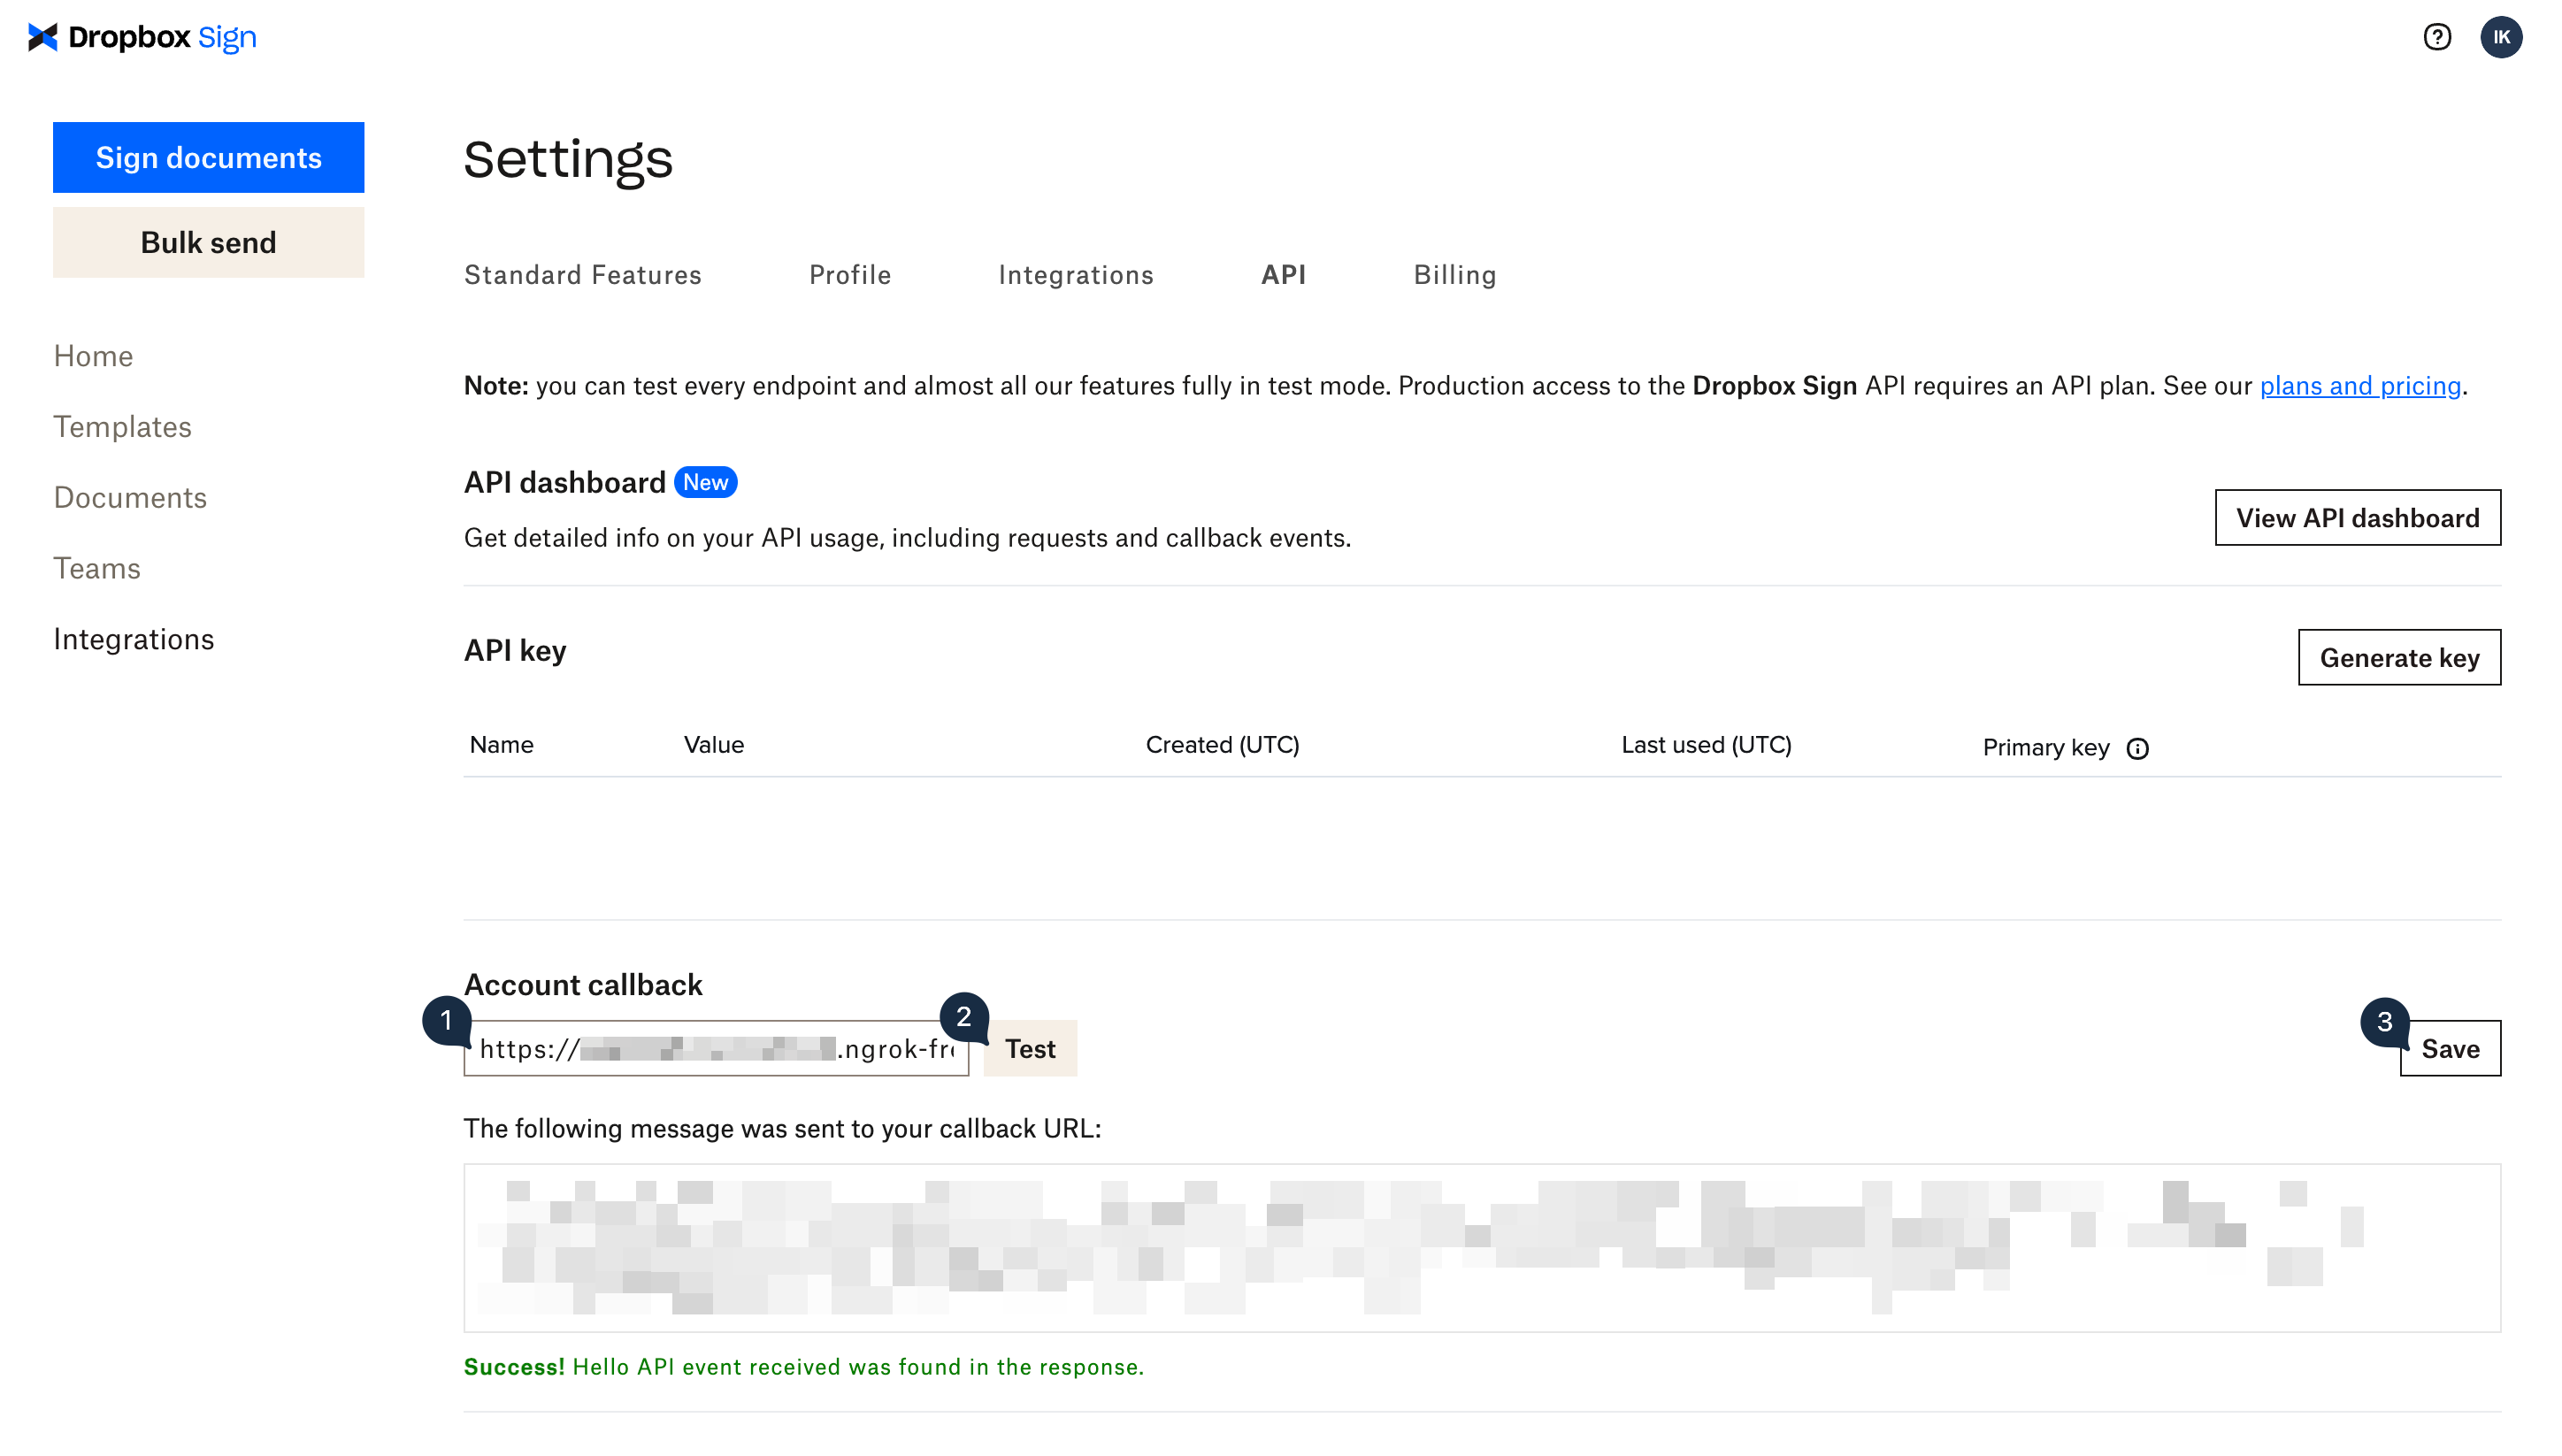
Then paste the ngrok URL for the /webhook endpoint you created in the previous step in the Account callback field. The URL should look something like this: https://[random].ngrok-free.app/webhook.
Once pasted, click Test to make sure the webhook request gets sent successfully. If a success message is shown, the webhook is configured correctly! Click Save:
Now that your webhook is set up, your web app will receive updates about signature requests in real time. In the next section, you'll develop an endpoint to send signature requests to the clients.
Create a signature request
When creating a new gym member in the system using the API, it makes sense to send the new member a release of liability for them to sign before their first visit. To do this, you'll create an endpoint in your web application that will save the new member's details and send the signature request using the Dropbox Sign API.
To use the Dropbox Sign API, you need to generate an API key for your web application. In the Dropbox Sign dashboard, go to the Integrations page and select the API tab. In the API key section, click Generate key and copy the new API key:
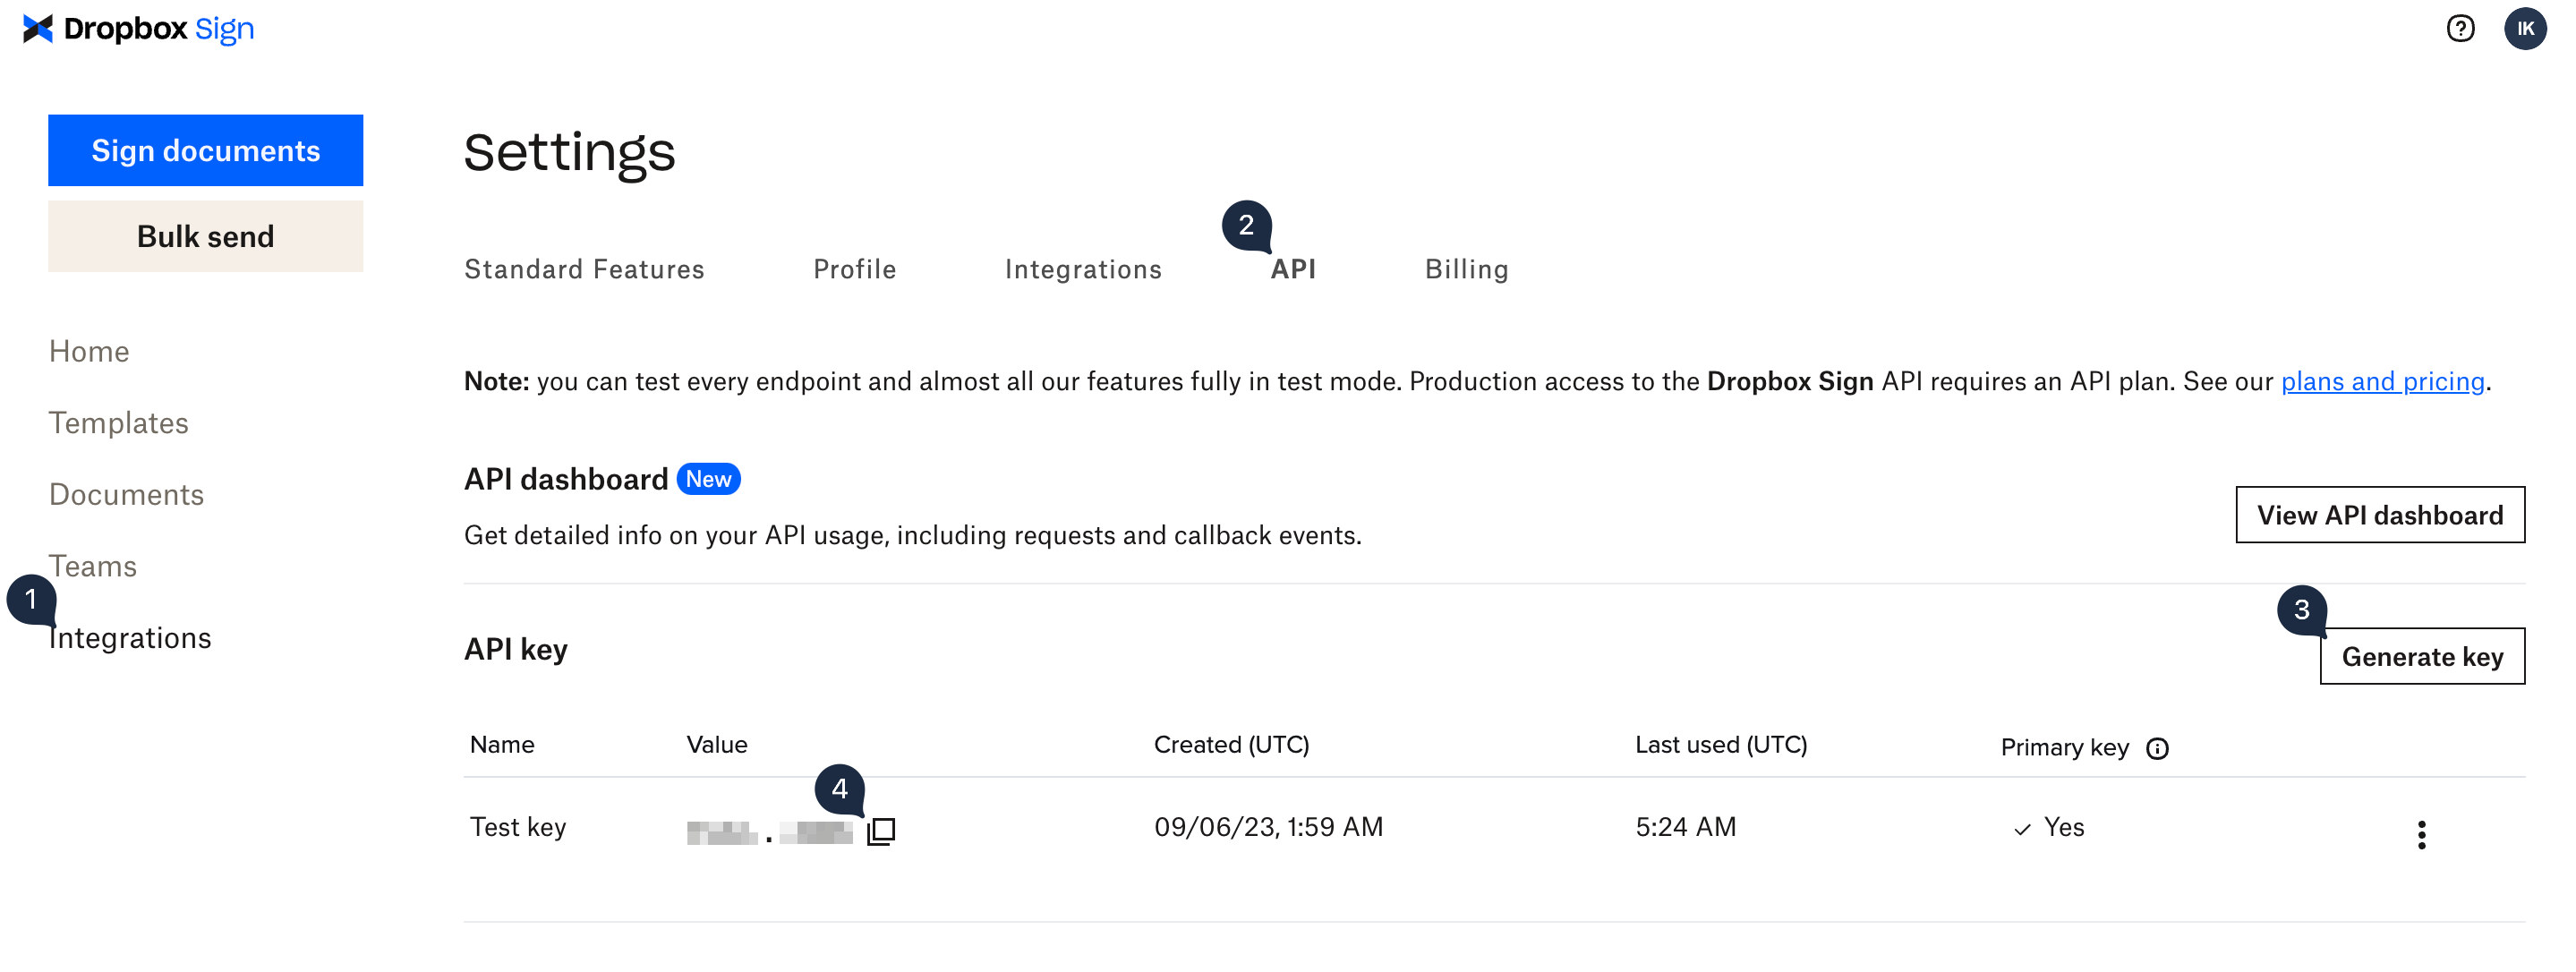
In the same folder as your server.js file, create a new file called .env and copy the following text:
DROPBOX_SIGN_API_KEY=<API_KEY>
DROPBOX_SIGN_TEMPLATE_ID=<TEMPLATE_ID>
Replace <API_KEY> with the API key you just generated and <TEMPLATE_ID> with the ID of your Dropbox Sign template, which you can find in your Dropbox Sign dashboard by selecting the template:
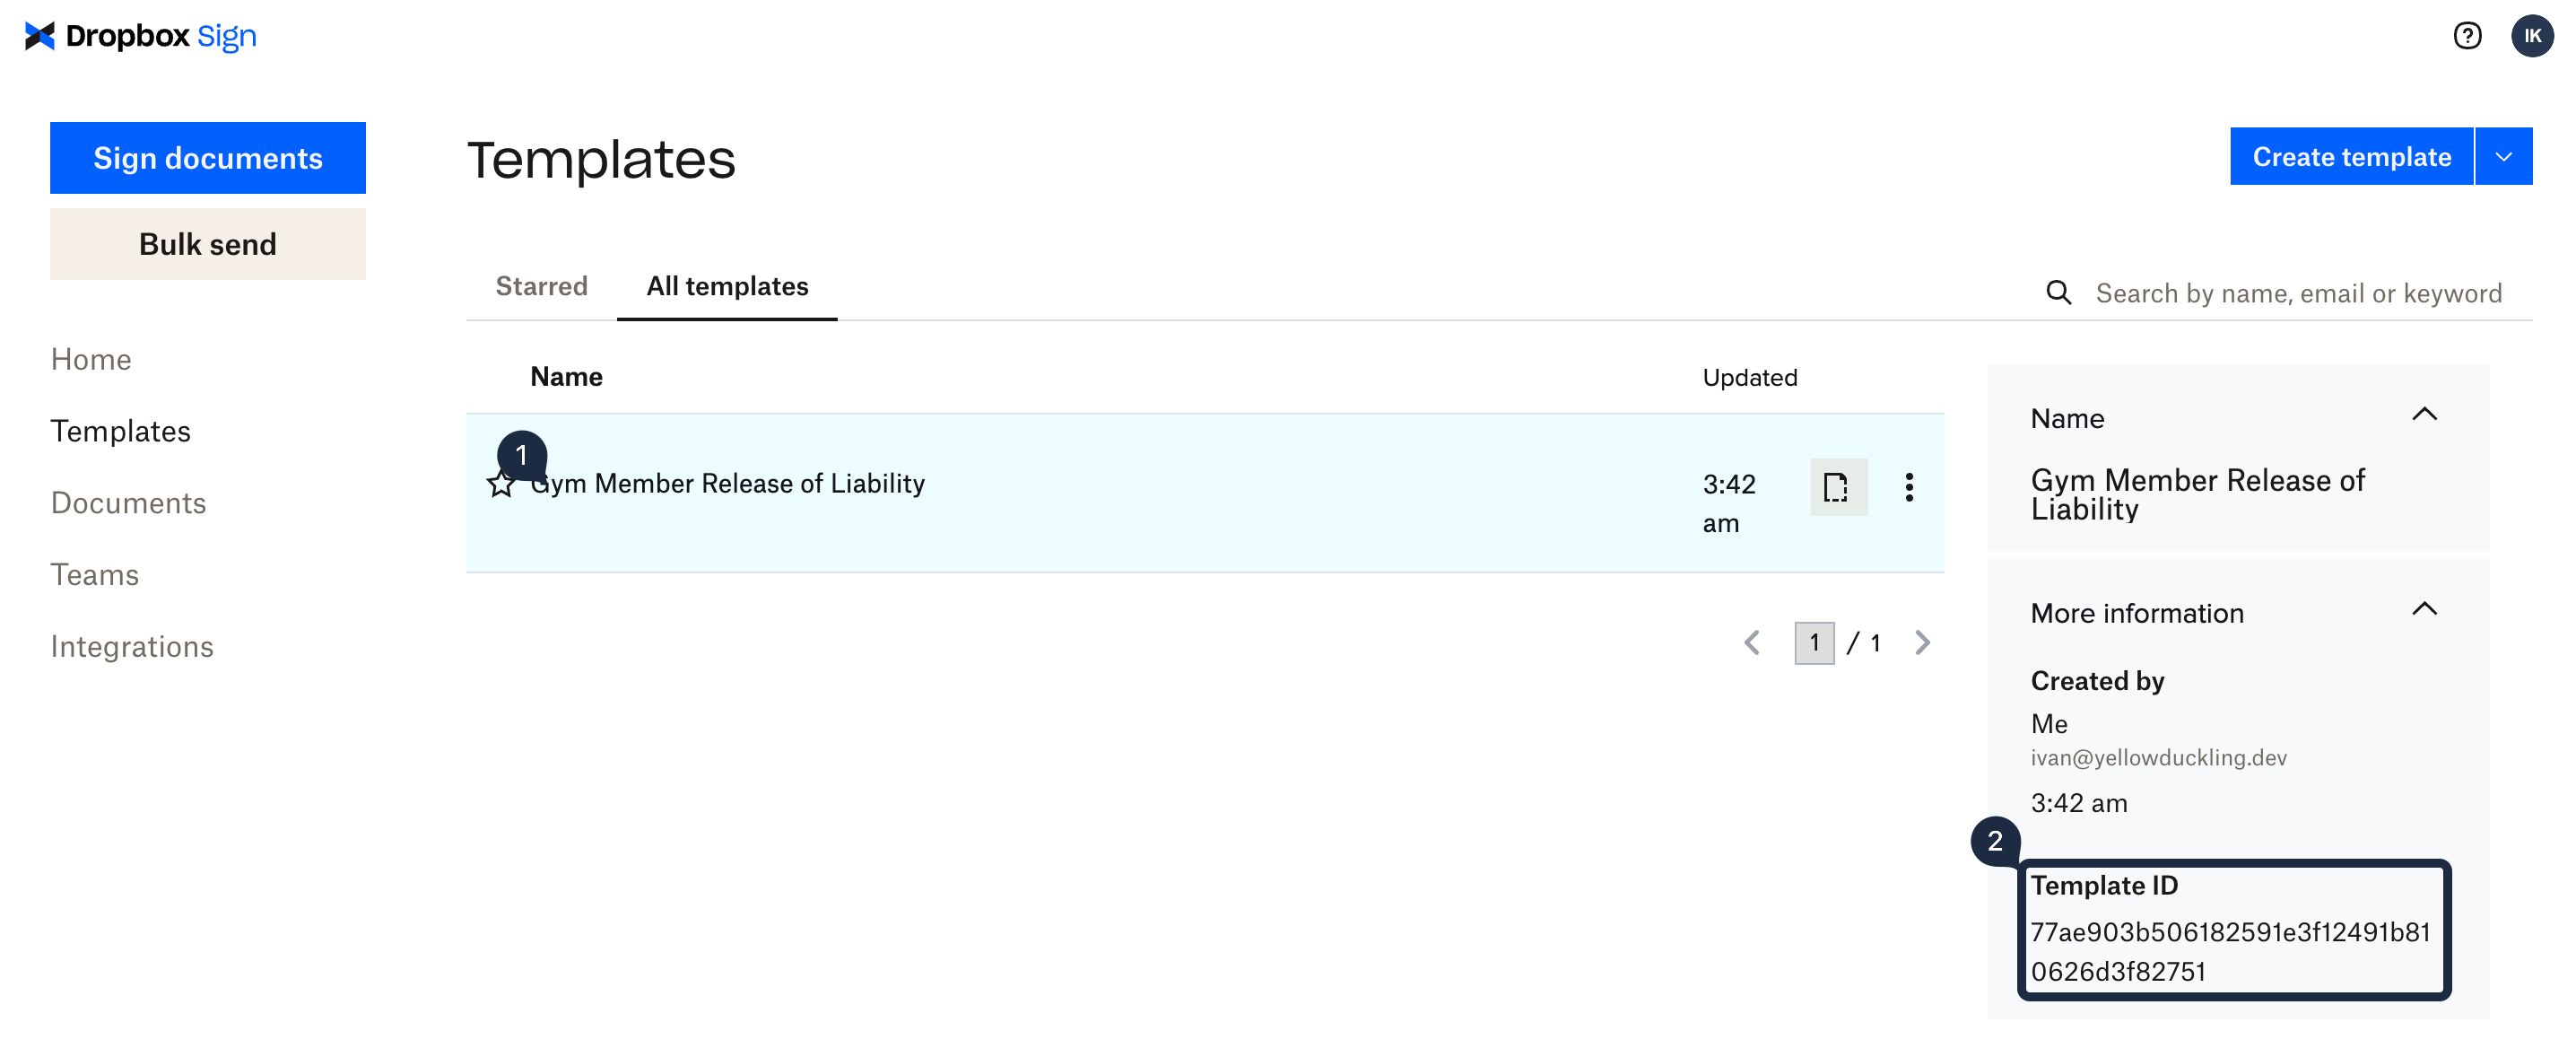
Your Dropbox Sign API key will now be available in your web application in the DROPBOX_SIGN_API_KEY environment variable.
Now, paste the following updated code snippet into your server.js file:
const express = require('express');
const multer = require('multer');
const { SignatureRequestApi } = require('@dropbox/sign');

// Load your environment variables from your .env
// file
require('dotenv').config();

const app = express();
// Use the JSON parser to parse incoming JSON data
app.use(express.json());
// Use multer to parse incoming multipart form data
// requests (used for Dropbox Sign Events)
app.use(multer().none());

// Create a new instance of the SignatureRequestApi
const dropbox = new SignatureRequestApi();
// Specify your API key as the username on the API
dropbox.username = process.env.DROPBOX_SIGN_API_KEY;

app.get('/', (req, res) => {
  res.send({
    message: 'Welcome to Gym Management System API',
  });
});

/**
 * Endpoint for creating a new gym member in the system.
 * After creating the member, a signing request will be
 * sent to the new member.
 */
app.post('/member', async (req, res) => {
  // Save the member to the database

  // Send the document to sign
  await dropbox.signatureRequestSendWithTemplate({
    // Specify the ID of the template in Dropbox Sign
    templateIds: [process.env.DROPBOX_SIGN_TEMPLATE_ID],
    // Subject and message that are used for the email
    subject: 'The Gym - Release of Liability',
    message:
      "We're so excited you decided to join The Gym. " +
      'Please make sure to sign this Release of Liability before your ' +
      'first visit. Looking forward to seeing you!',
    // Specify the signer details using details from the
    // request.
    signers: [
      {
        // Remember signer role is case-sensitive so enter it
        // exactly as you entered it when creating the template.
        role: 'Gym Member',
        name: req.body.name,
        emailAddress: req.body.email,
      },
    ],
    // Configure the signing experience
    signingOptions: {
      draw: true,
      type: true,
      upload: true,
      phone: false,
      defaultType: 'draw',
    },
    // Specify that you're using test mode so you can develop
    // the app for free. Remove or set to false in production
    test_mode: true,
  });

  res.status(200).send('Member created.');
});

/**
 * Webhook endpoint that receives different events from the
 * Dropbox Sign Events service and processes them.
 */
app.post('/webhook', async (req, res) => {
  // Get the event type
  const data = JSON.parse(req.body['json']);
  const eventType = data['event']['event_type'];

  console.log(`Received ${eventType} event.`);

  // Your webhook must respond with a 200 status code
  // and a body containing the string 'Hello API event received'
  res.status(200).send('Hello API event received');
});

const port = process.env.PORT ?? 3000;
app.listen(port, () => console.log(`Example app is listening on port ${port}.`));
The new POST /member endpoint receives the new member's details as a JSON object. After saving the member to the database (excluded from this demonstration for brevity), the endpoint sends a new signature request using the Dropbox Sign API.
Now you're ready to send your first Dropbox Sign signature request and monitor it.
Monitor the request via the webhook
In this section, you'll create a new gym member using your API and monitor the signature request events that get sent to your /webhook endpoint.
Open your HTTP client to send a POST request to the /member endpoint of your API. The appropriate curl command is shown subsequently, which you can execute in your terminal window if you've installed curl:
curl -X POST 'https://[random].ngrok-free.app/member' \
  --data '{"name": "Joe Soap", "email": "joe@example.com"}' \
  --header  "Content-Type: application/json"
Replace the name and email with your name and email address so that you receive the signature request email. Open the email and click on the link to sign the document:
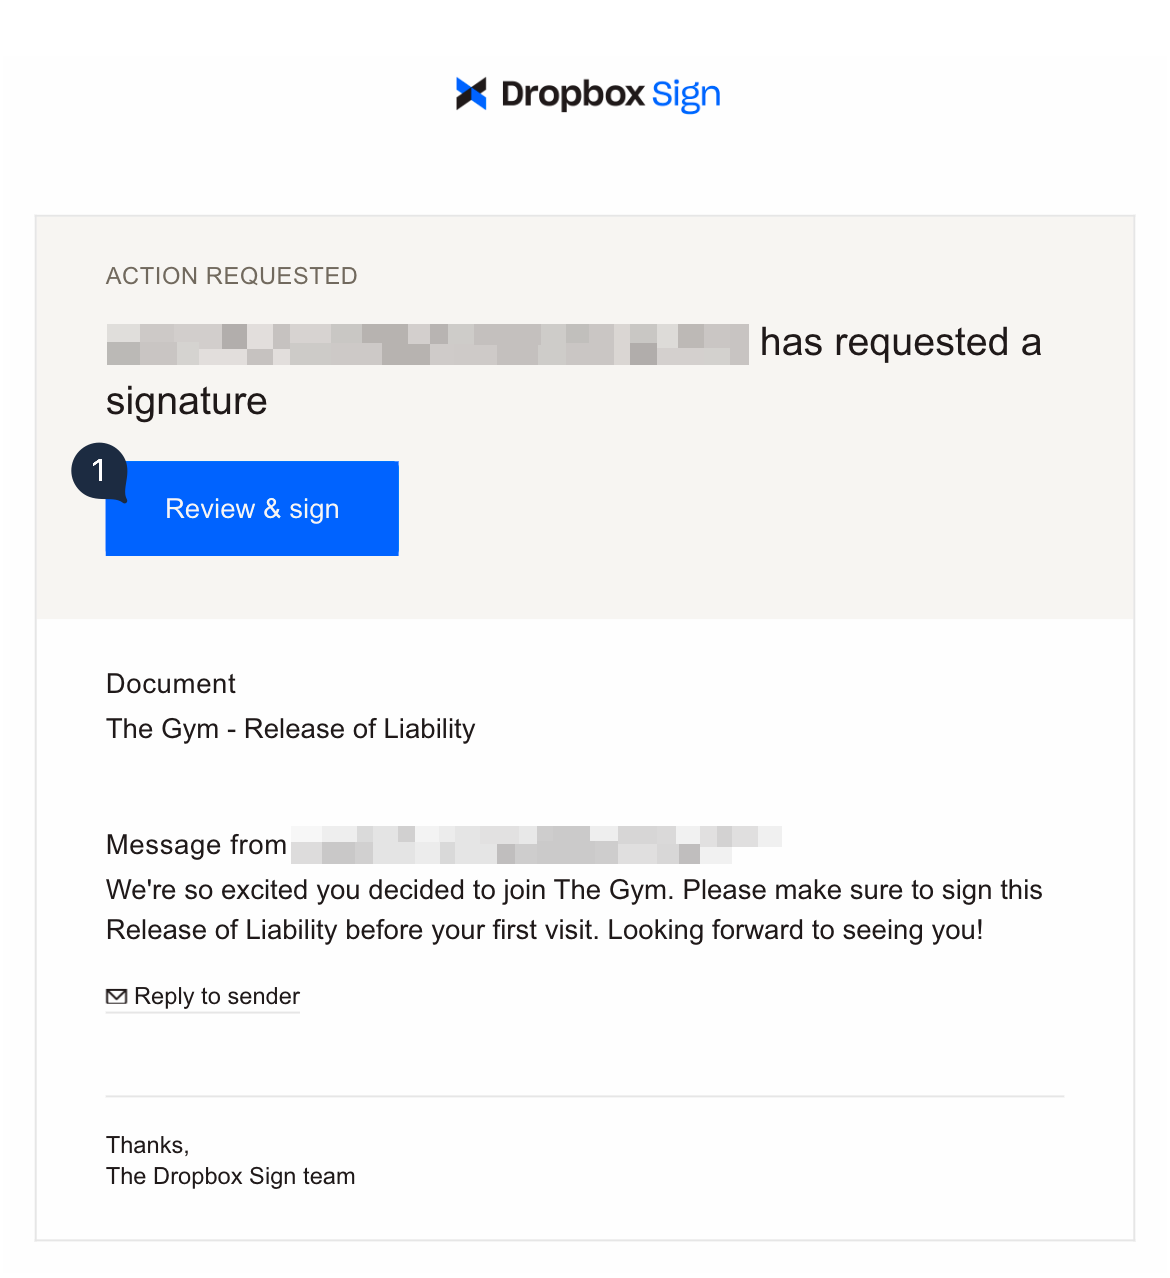
Once you've completed all the required fields, click on Continue in the top-right corner of the page:

Now go to your terminal window where your web application is running. You should see a list of events that Dropbox Sign sent to your webhook endpoint as the user opens and completes the signature request. It should look something like this:
Received signature_request_sent
Received signature_request_viewed
Received signature_request_signed event.
Received signature_request_all_signed event.
Received signature_request_downloadable event.
In the last section, you'll download the signed PDF.
Retrieve the document once signed
It's useful to store the signed documents in your own system instead of having to access each signed document on Dropbox Sign's dashboard. To do this, you'll update your webhook endpoint to download the signed PDF document using the Dropbox Sign API when the signature_request_all_signed event is received.
Replace your /webhook endpoint in your server.js file with the following snippet:
// Import the fs module
const fs = require('fs');

// ...

/**
 * Webhook endpoint that receives different events from the
 * Dropbox Sign Events service and processes them.
 */
app.post('/webhook', async (req, res) => {
  // Get the event type
  const data = JSON.parse(req.body['json']);
  const eventType = data['event']['event_type'];

  console.log(`Received ${eventType} event.`);

  // Handle the different events
  if (eventType === 'signature_request_all_signed') {
    // Get the request ID for the signing request
    const requestId = data['signature_request']['signature_request_id'];

    // Download the signing request as a single PDF file
    // to the 'signed_docs' folder
    const fileRes = await dropbox.signatureRequestFiles(requestId, 'pdf');
    fs.createWriteStream(`./signed_docs/${requestId}.pdf`).write(fileRes.body);
  }

  // Your webhook must respond with a 200 status code
  // and a body containing the string 'Hello API event received'
  res.status(200).send('Hello API event received');
});
In this code, you add an if block that only gets executed if the signature_request_all_signed event is sent. Inside the if block, you use the signatureRequestFiles method on the Dropbox Sign API to get the raw PDF file. You then save the raw PDF to a file in the signed_docs directory in your project folder.
Before running the server again, make sure you create a folder called signed_docs in the same folder as your server.js file.
Run the application again using this command:
node server.js
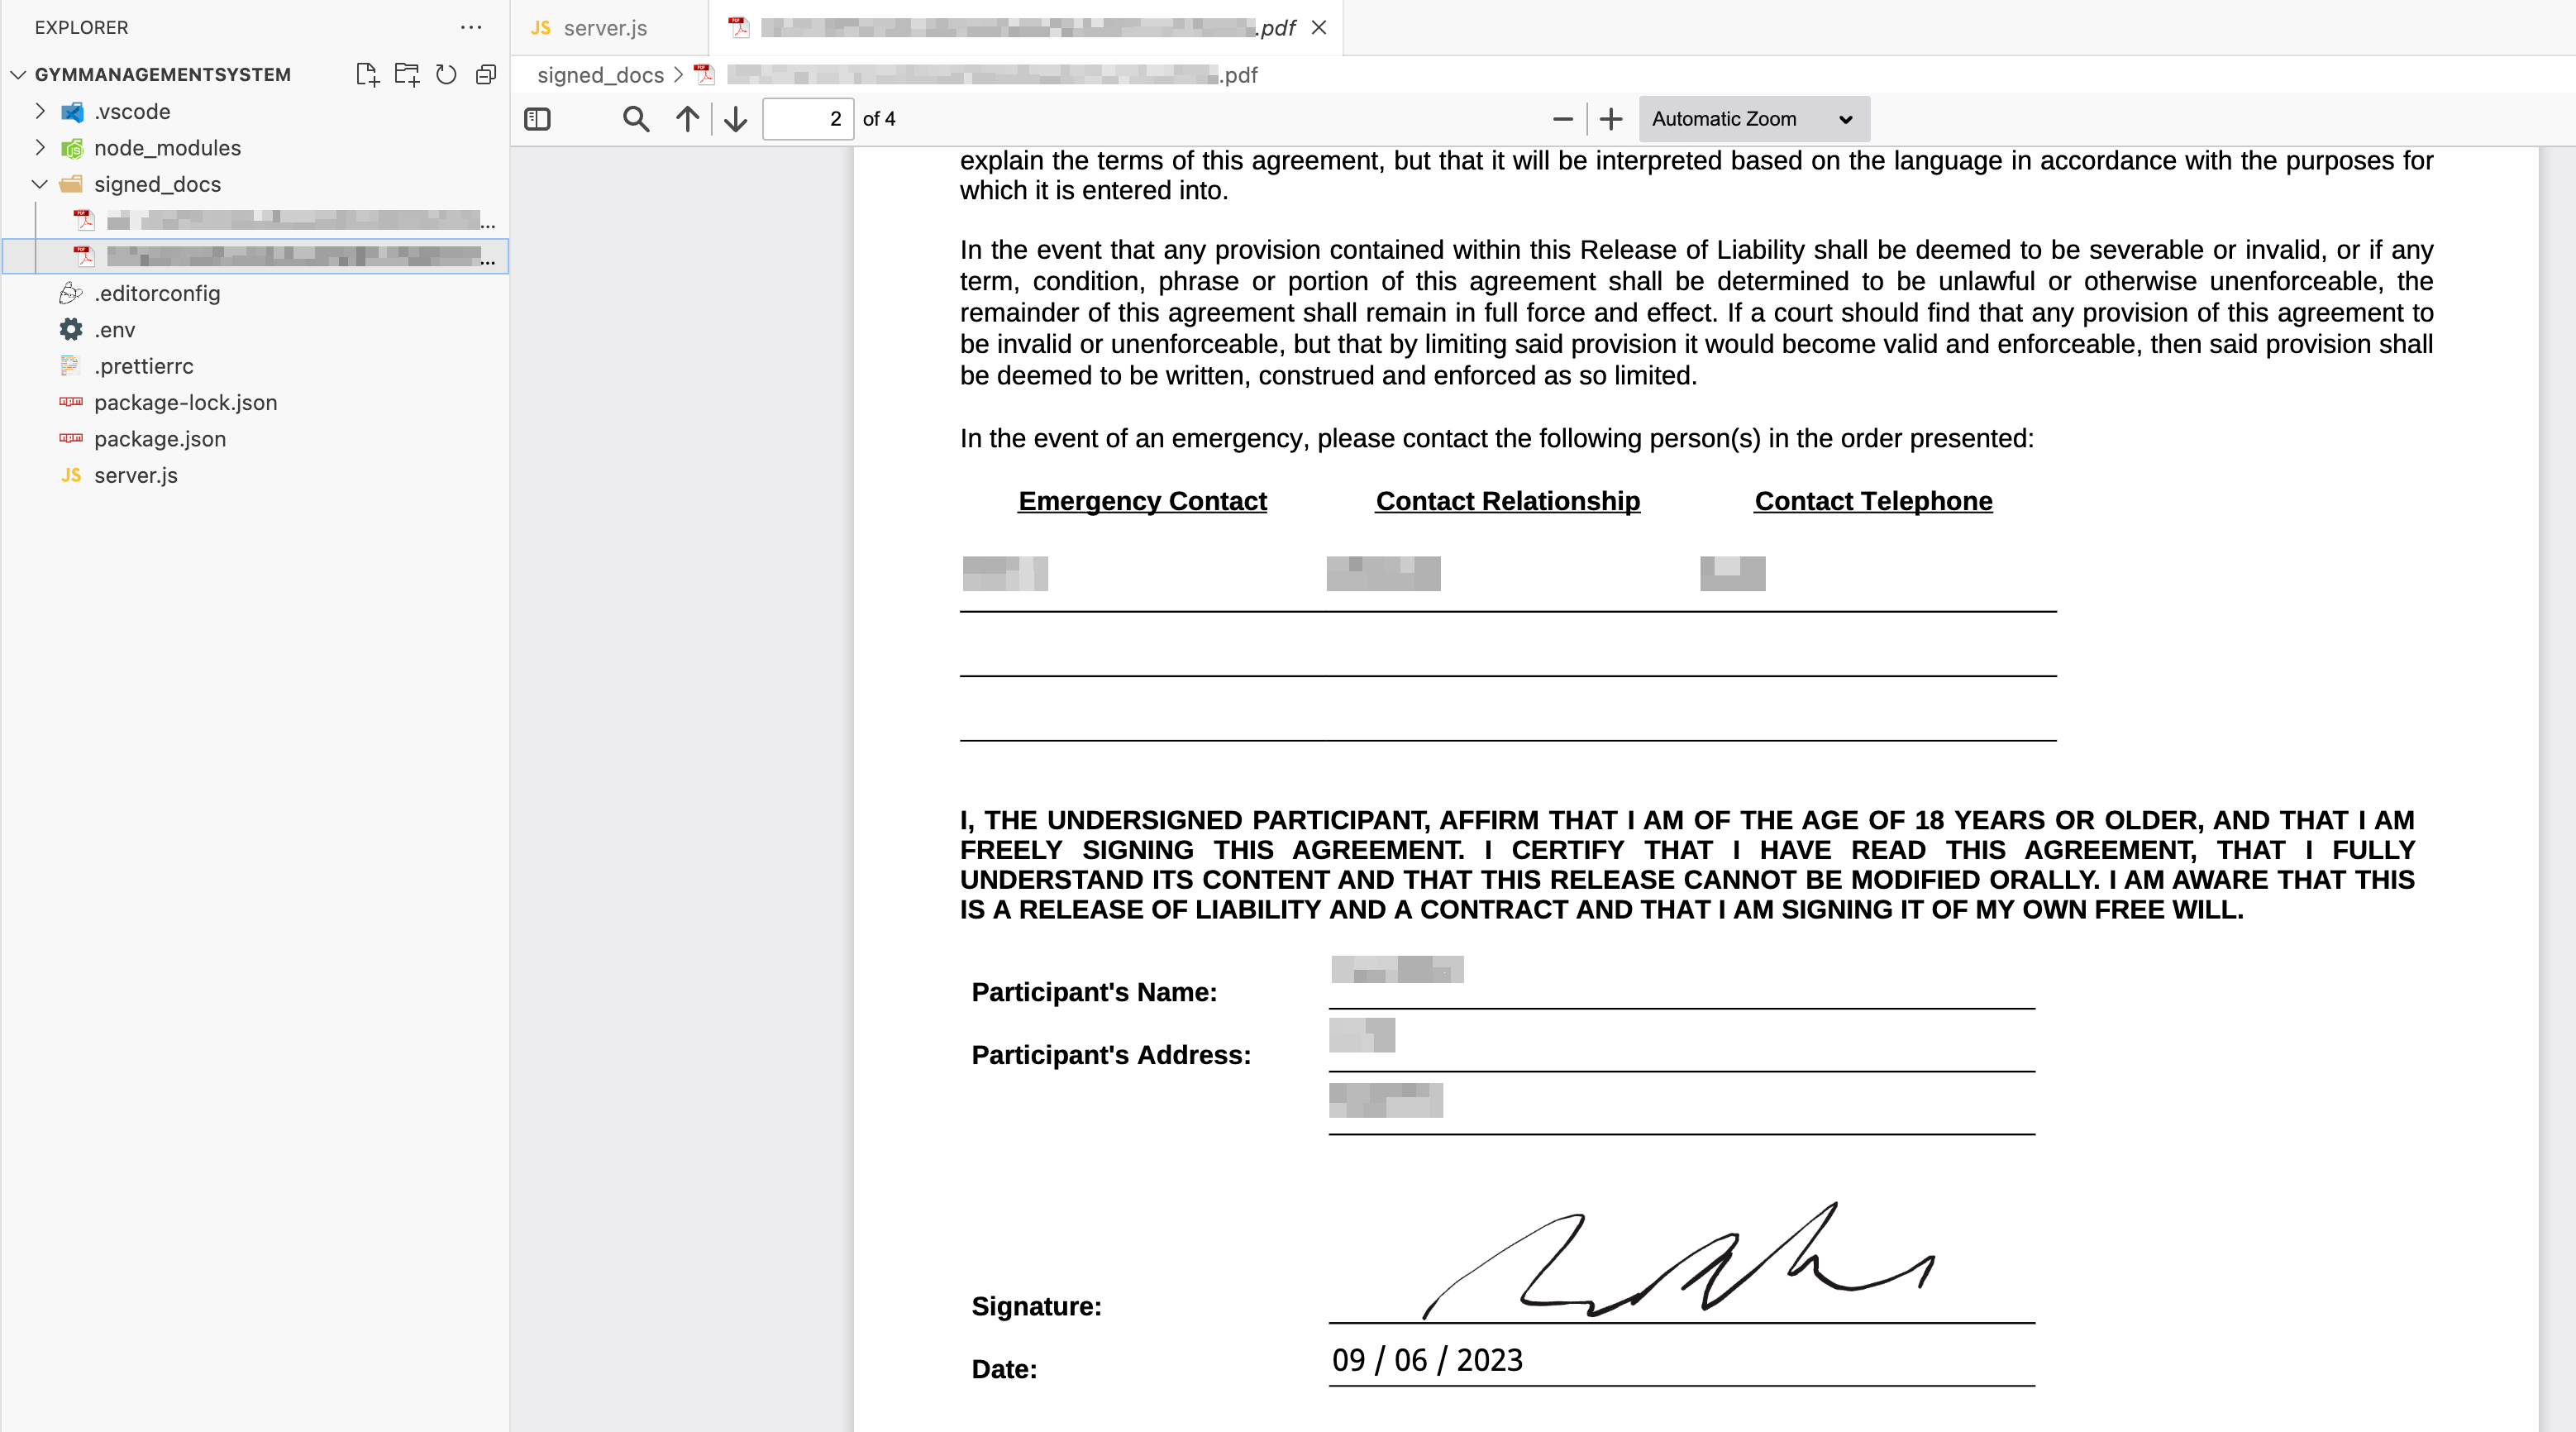
Create a new gym member using your API and complete the signature request. Once you've completed the signature, you should see a new PDF file in your signed_docs folder. Open it, and you'll see the signed PDF:
Conclusion
In this article, you saw how easy it is to create a template for a PDF document using Dropbox Sign. You then wrote a Node.js web app that sent signature requests for that template whenever a new gym member signed up. Using webhooks, you received updates on the signature request as the member received the request, opened it, and signed it. Finally, you downloaded the signed PDF using the Dropbox Sign API.
Digitally collecting signatures provides higher security and makes it easier to automate collecting and storing signed documents. Dropbox Sign provides an intuitive interface and API for you to implement digitally signed documents in your own application.
Blijf op de hoogte
Thank you!
Thank you for subscribing!


