In the world of digital communications, there is probably no other file format that is as ubiquitous as a PDF file. You've probably received hundreds if not thousands of PDF files in your inbox for all sorts of use cases, both business and personal.
The utilization of PDF files has been increasingly expanding, specifically when it comes to adopting electronic signatures (aka eSignatures). An eSignature is an electronic way of signing a document to make it legally binding between multiple parties. Integrating eSignature functionality directly into your PDF reduces friction for end users and streamlines your document workflow.
In this tutorial, you'll learn all about Dropbox Sign and how you can use their official PHP SDK to create and send signable PDFs via the Dropbox Sign API.
Dropbox Sign use cases
The Dropbox Sign API can be used to simplify, enhance, and automate any existing processes you might already have in your organization that require a signature.
For instance, financial institutions can generate signable loan agreements or consulting agreements straight from a web form or an online client inquiry. Human resources departments can send eSignature-enabled contracts to prospective hires straight from a database without needing to fill in any paperwork. Or a possible conflict-of-interest document can be sent straight to an employee's inbox for signing.
These time-consuming processes, which typically involve numerous steps, can be streamlined by integrating eSignatures, making virtually any document that normally requires an in-person signature convertible to one using eSignatures, unless governed by specific laws that mandate physical signatures.
Implementing an eSignature workflow using PHP and the Dropbox Sign API
In this article, you'll learn how to create a backend PHP application to interface with the Dropbox Sign API so that you can automate the procedure of sending documents that require a signature.
In this scenario, you're dealing with a nondisclosure agreement (NDA). An NDA is a binding agreement between your organization and another party that states that the signing party will keep secret any information they might be able to gather while working on your premises or working with your codebase. Contractors or developers who need access to your existing code, infrastructure, or other intellectual property are usually required to sign one.
Normally, this process would be tedious, with documents being emailed around, printed, signed, scanned, and so forth.
In the following hypothetical use case, you're a developer for "The Company". You've been tasked with automating the process of onboarding external developers, specifically the part of the process where the external developers need to sign an NDA before they can begin working on existing projects.
You've decided to automate the process using a PHP application and the Dropbox Sign PHP SDK.
Prerequisites
Before you begin writing your application, you need the following:
- A Dropbox Sign account
- You will need to subscribe to one of the paid plans to enable uploading signable templates via the web interface.
- Your Dropbox Sign API key.
- A template PDF file that can be signed. Or you can use the template file supplied in this GitHub repository.
- PHP 7.4 or newer.
Create your template file
The easiest way to prepare a document for signing is by using the Dropbox Sign template system.
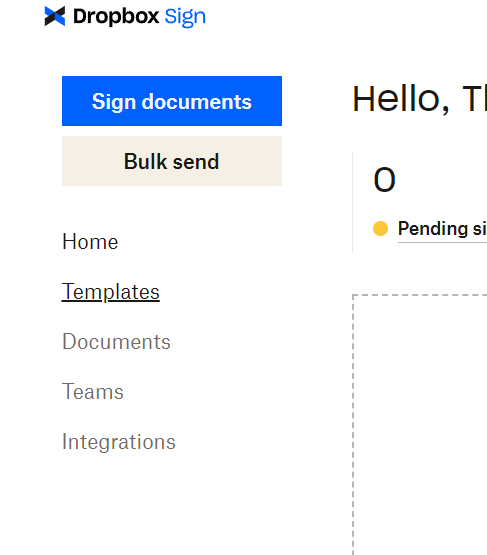
Once you've signed in to your Dropbox Sign console, you have to click on Templates, which will show you a list of all your uploaded templates:
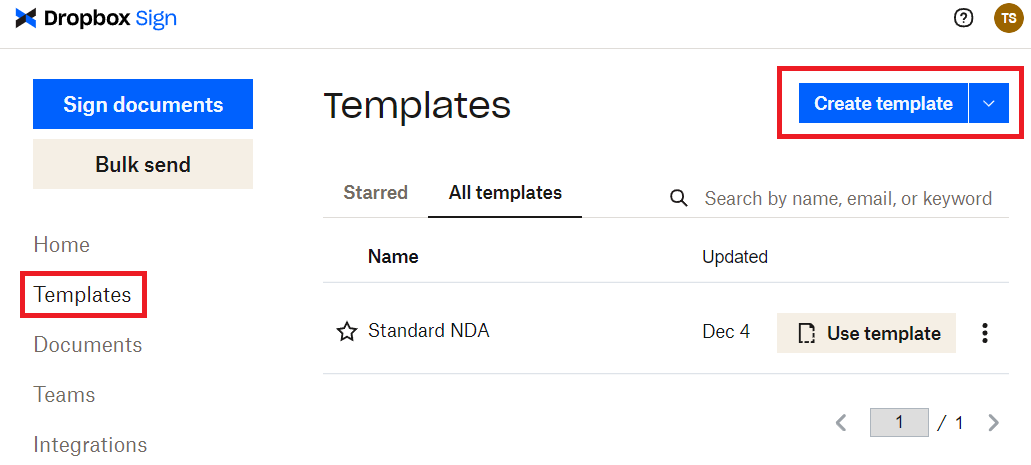
From the Templates page, click the Create template button at the top right-hand corner to get started:
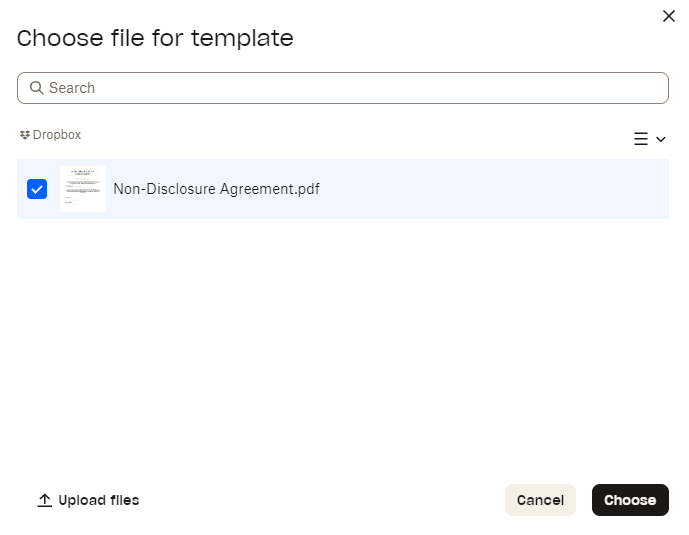
While you can use any PDF, this tutorial uses the Non-Disclosure Agreement.pdf file that is available in this GitHub repository. Upload that file (or your own file) to the template and then select Choose:
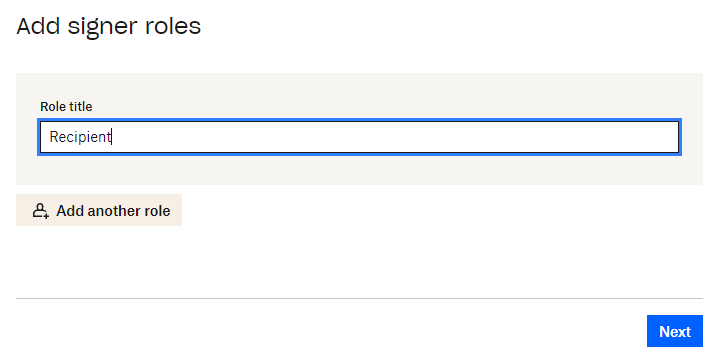
Next, you need to create a signer role. Enter "Recipient" and click Next:
When your editor loads, you'll be able to add fields to the PDF file. Start with the Auto-fill fields and add a Date signed field on top of the Date Signed line on your form:
.png)
You may have to scroll to the bottom of the uploaded form to get to the section where you want to place your fields.
Next, add the Signature field:
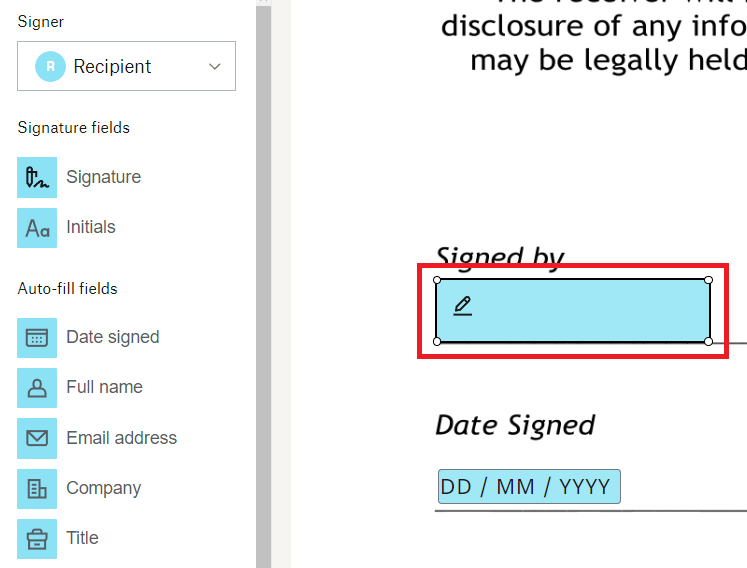
Once you've placed the Signature field, you need to set some options. Select the field on the form, and then set the options on the right-hand side of the designer screen:
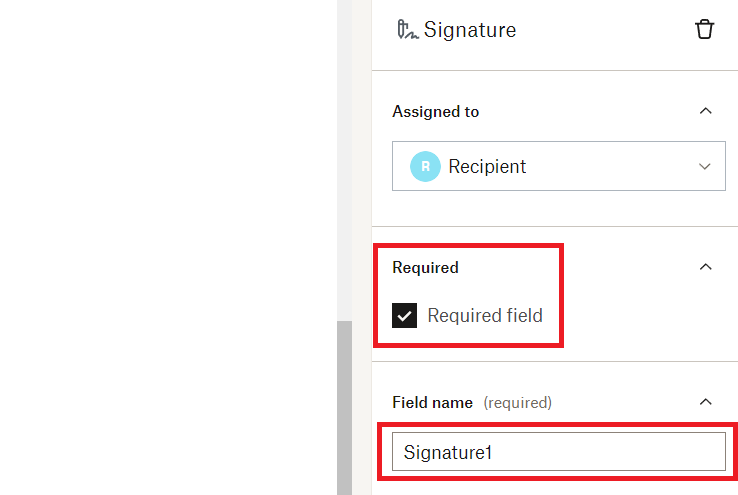
Once you're done placing your fields, click Next on the bottom-right corner of the designer.
At this point, you are asked to review your template before you save it and give it a name:
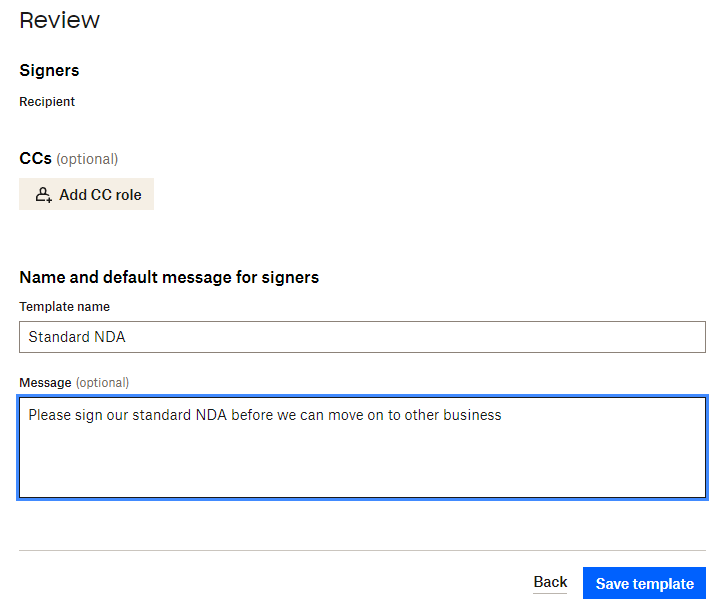
Once completed, click on Save template, and it's ready to be used for signature requests.
Install Composer
Composer is a dependency manager for PHP projects. It manages any libraries that your project depends on, and it installs and/or updates the packages your project needs on your behalf.
The installation instructions are a bit more involved than just running an APT command, so make sure to follow the instructions carefully.
Download the Composer package as specified on the Download page.
Once you've followed those instructions, there should be a composer.phar file in the directory where you ran the commands. It's recommended to make this executable available globally so you can move it to a directory that's in your $PATH variable:
While you don't need to install Composer, it's highly recommended as it makes the process of installing the Dropbox Sign SDK much easier. The rest of this tutorial assumes that Composer is installed. If you are using a different PHP dependency manager, adjust your commands accordingly.
Once you've downloaded Composer, everything is ready for your PHP application.
Write your PHP application
The next part of this tutorial teaches you how to get started writing an application that can interface with the Dropbox API, retrieve the template ID for your uploaded NDA template, and then initiate the signature request process. Ultimately, the application checks on the progress of a signature request and downloads the signed PDF once the signature process has been completed.
Install your dependencies
The first thing you need to do is create a composer.json file that contains the following lines:
This composer.json file tells your dependency manager (Composer) which external packages you would like to download and include in your PHP application. If you're expanding on your application and it needs other packages, you use the same composer.json file to add the other packages to your application.
Now, you can run composer install to install the packages listed in composer.json.
Depending on your system setup, it might work immediately, or composer might tell you that other prerequisites are required. On the test system, it needs the PHP curl and mbstring extensions to be installed first. Resolve any errors you might have on your side:
Then run composer install again:
Your application directory should now have a vendor directory inside it that contains the SDK packages that you need to start writing your application.
Retrieve your template ID
Create the first of your PHP scripts and call it getTemplates.php:
Make sure you replace <API_KEY_HERE> and <EMAIL_ADDRESS_YOU_SIGNED_UP_WITH> with the correct values.
Run the following command from the command line:
Your response should include the template you created with its template_id:
In this example output, you can see the template ID that starts with acd0. Copy that value somewhere. You need it to send the document for signing.
Send your first signature request
Create another PHP file called sendRequestWithTemplate.php:
Again, replace the values for the placeholders <API_KEY_HERE>, <RECIPIENT_EMAIL_ADDRESS>, and <RECIPIENT_NAME>. In a production setup, you would probably be interfacing with a database of some kind to pull in those values instead of editing and running the PHP script manually.
Also, notice the option ->setTestMode(true). This indicates that the file you're sending now is not legally binding. Remember to change that value to false once you have an application ready to use in production.
Now, run the file:
If it's successful, the output should look something like this:
Notice that you have test_mode with a value of 1. This is a parameter that tells the API you are testing the signature request system. Any request generated with this parameter is considered to be not legally binding. Remember to update or remove the parameter once you’re ready to move your code to production.
The response you received contains a lot of information. It basically tells you that the system has fired off a signature request and that the request is on its way to the person you specified. However, you don't need most of the information. The most important information is the signature_request_id. You need that to check on the status of the signature.
Verify the progress of the signature
Create another file called getRequestProgress.php:
Running this command shows you the progress of the signature request. You're really interested in only the [status_code], so you can make your life easier using grep (a standard Linux utility) to look for the lines with only that value:
If you want to see the full output, omit the | grep "status_code" part of the command. Otherwise, the output looks like this:
As you can see, you're still waiting for the signer to sign the NDA. They should have received the signature request with a link in their email that takes them through to a website where they can sign the document. Once they've completed the signature process, the status of the signature request ID will look like this:
Download and save the signed document
In order to retrieve the signed document, you need to create a file called getSignedDocument.php:
Don't forget to replace the values for <API_KEY_HERE> and <SIGNATURE_REQUEST_ID> with your values and run the file:
There won't be any output, but once the script has run, you can check for PDF files in the application directory:
Open the signed_response.pdf file using any PDF viewer:
.png)
And the signed file is now in your possession.
Something to note: While you can query the endpoint for a specific signature ID’s status, this method does not scale well with many signature requests, and you might end up getting rate-limited. Dropbox recommends that you set up your application with a callback URL, and you will receive notifications of events that have occurred, like a signature request being completed. You can then act on these events, rather than polling the endpoint constantly.
See this link for more information regarding event callbacks.
Conclusion
In this tutorial, you learned how to create a basic PHP application that can interface with the Dropbox Sign API using their official PHP SDK.
You've learned how to interface with several of the API endpoints, including the following:
- Getting template IDs
- Sending signature requests using templates
- Downloading signed documents
This tutorial is only a demonstration of what you can achieve using a PHP-integrated system that can be plugged into any existing workflow.
You can download all the files used in this tutorial at the following GitHub repository.
保持更新
Thank you!
Thank you for subscribing!


